Custom Integration LLM Parameters
User Documentation for Add/Edit Parameter Dialog
Overview
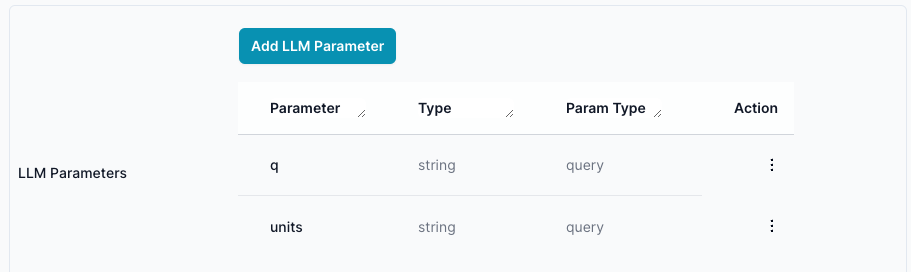
The LLM can pass the Integration parameters. You need to define the parameters that will be passed to the Integration. Note there is one parameter set by default that does not need to be defined, that is llm_query
The Add/Edit Parameter dialog is used to configure parameters for the parameters of a custom Integration. This dialog allows you to specify details such as the parameter name, type, parameter type, description, enum values, default value, and whether the parameter is required.

Screen Elements
-
Header Section:
- Title: "Update Parameter" (or "Add parameter" when adding a new parameter)
-
Fields:
- Parameter Name:
- Description: The name of the parameter.
- Input: Text field.
- Type:
- Description: The data type of the parameter (e.g., String, Interger, Number, Boolean, Array).
- Input: Dropdown menu.
- Parameter Name:
Parameter Type
Indicates how and where the parameter is included in the API request. Choose from:
Query
-
Description: The parameter is added to the end of the URL as part of the query string.
-
Example:
GET https://api.example.com/resource?apikey=1234 -
Usage:
- If you set a parameter’s type to Query, the system will automatically append it to the URL as a key-value pair (e.g.,
&search=your_value). - Do not use curly braces (
{}) for query parameters in the URL template; simply define the base URL, and the parameter will be appended. - Query parameters are visible in the URL after the
?, and multiple parameters are separated by&.
- If you set a parameter’s type to Query, the system will automatically append it to the URL as a key-value pair (e.g.,
Path
-
Description: The parameter is included as part of the URL path, usually in place of a placeholder.
-
Example:
GET https://api.example.com/users/{username} -
Usage:
- The value replaces the placeholder (e.g.,
{username}) in the URL. - Use curly braces in the URL to indicate where the value should be substituted.
- The value replaces the placeholder (e.g.,
Body
-
Description: The parameter is sent in the request body, commonly used for
POSTorPUTrequests. -
Example:
{
  "username": "example",
  "password": "secret"
} -
Usage:
- The parameter does not appear in the URL, but is included as part of the request payload (usually in JSON or form-data format).
- Description:
- Description: A brief description of the parameter and its usage.
- Input: Text area.
- Enum (comma separated, optional):
- Description: A comma-separated list of acceptable values for the parameter.
- Input: Text field.
- Default Value (optional):
- Description: The default value for the parameter if none is provided. If you have Enum, it must be in the Enum list. If you want to pass an empty string then enter
"". Leaving it blank and setting required to False, is the same as enteringnullad the default value - Input: Text field.
- Description: The default value for the parameter if none is provided. If you have Enum, it must be in the Enum list. If you want to pass an empty string then enter
- Required:
- Description: Specifies whether the parameter is mandatory. Set to True, if there is no default value the LLM will reprompt the user if it can not figure out the value based on the question or context being asked.
- Input: Dropdown menu (True/False).
Important:
- If Required is set to
Falseand no default value is provided, the value will benull. - If a default value is provided, it will always be used when no value is specified—regardless of whether Required is
TrueorFalse. - If Required is
Trueand no default value is provided, the LLM will prompt the user for a value if it cannot determine one from the context.
- Action Buttons:
- Save:
- Function: Saves the parameter configuration.
- Cancel:
- Function: Discards changes and closes the dialog.
- Save:
How to Use
-
Adding a New Parameter:
- Click on "Add Parameter" from the Edit Integration screen.
- Fill in the details in the dialog:
- Enter the Parameter Name.
- Select the Type from the dropdown.
- Choose the Parameter Type from the dropdown.
- Provide a Description for the parameter.
- If applicable, enter acceptable values in the Enum field, separated by commas.
- Set a Default Value if needed.
- Indicate whether the parameter is Required by selecting True or False.
- Click "Save" to add the parameter.
-
Editing an Existing Parameter:
- Click on the three vertical dots in the Action column next to the parameter and select "Edit".
- Update the necessary details in the dialog:
- Modify the Parameter Name if required.
- Change the Type if necessary.
- Update the Parameter Type if applicable.
- Edit the Description to better explain the parameter’s purpose.
- Adjust the Enum values if needed.
- Change the Default Value if applicable.
- Update the Required field to True or False as necessary.
- Click "Save" to apply the changes.
-
Discarding Changes:
- If you do not wish to save the changes, click "Cancel" to close the dialog without saving.
Notes
- Ensure all required fields are filled out correctly before saving.
- Use the Description field to clearly explain the purpose and usage of the parameter.
- Enum values should be provided only if the parameter can take specific, predefined values.
This documentation should help you effectively use the Add/Edit Parameter dialog to configure parameters for your custom Integrations. If you have any further questions or need assistance, please refer to the help section or contact support.