Manage Integrations
Managing your Custom Integration
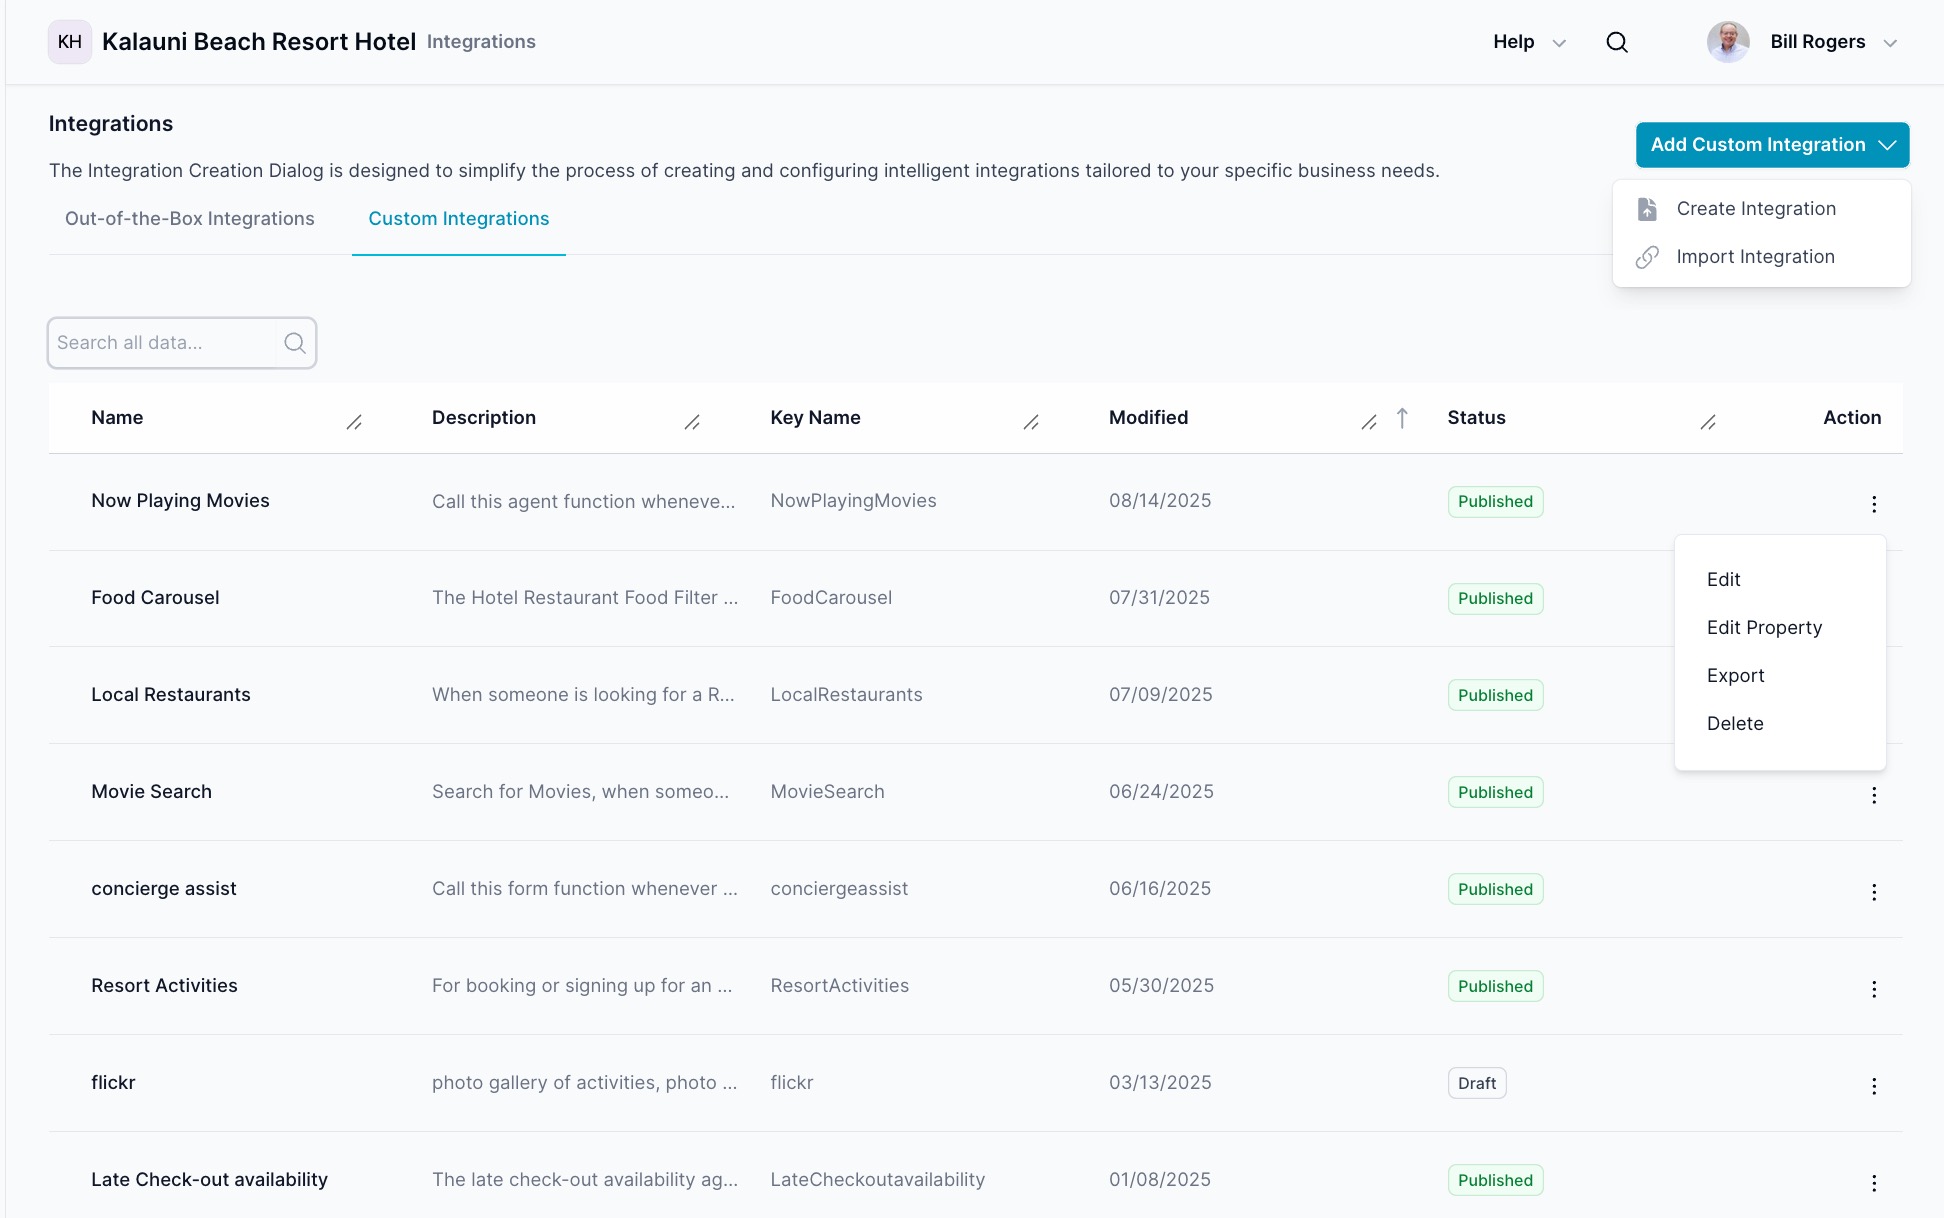
From this dialog you can view all the custom Integrations, create, edit, export, and delete custom Integrations.
Screen Elements
-
Header Section:
- Title: "Integrations"
- Description: Provides a brief overview of the screen's purpose.
- Tabs: "Out-of-the-Box Integrations" and "Custom Integrations" to switch between integration types.
-
Search Bar:
- Function: Search/filter Integrations by name or description.
- Usage: Start typing to filter. Press Enter or click the magnifying-glass icon to run the search.
-
Integrations List:
- Columns:
- Name: Displays the name of the Integration.
- Description: Provides a brief description of what the Integration does.
- Key Name: The identifier the LLM sees; reference this in the System Prompt.
- Modified: Shows the last modified date of the Integration.
- Status: Draft or Published. Draft items are hidden from agents (the reasoning engine will not call them).
- Action: Options to Edit, Edit Property, Export, or Delete the Integration.
- Sorting: You can sort the Integrations list by clicking on the column headers.
- Columns:
-
Create Button:
- Location: Top-right corner of the screen.
- Label: "Add Custom Integration".
- Function: Opens the menu to create or import a custom Integration.
-
Action Menu:
- Location: Found in the 'Action' column next to each Integration.
- Options:
- Edit: Allows you to edit the Integration's details.
- Edit Property: Modify Name, Description, Data Source, Handle Response, and optionally enable a custom Python function.
- Export: Export the Integration's configuration so you can share it with other agents.
- Delete: Deletes the Integration.
- Edit: Allows you to edit the Integration's details.
How to Use
-
Creating a New Integration:
-
Click the
Add Custom Integrationbutton at the top right of the screen.- Select either
Create IntegrationorImport Integration.

- Select either
-
-
Edit Properties of an Integration:
- Find the Integration you wish to edit in the Integrations list.
- Click the three vertical dots in the 'Action' column next to the Integration.
- Select
Edit Propertyfrom the dropdown menu. - Use this to modify the Name, Description, Data Source, Handle Response, and optionally enable a custom Python function.
-
Editing an Integration:
- Find the Integration you wish to edit in the Integrations list.
- Click the three vertical dots in the 'Action' column next to the Integration.
- Select
Editfrom the dropdown menu.

-
Exporting an Integration:
- Locate the Integration you wish to export.
- Click the three vertical dots in the 'Action' column next to the Integration.
- Select "Export" from the dropdown menu.
- Follow the prompts to export the Integration's configuration.
-
Deleting an Integration:
- Find the Integration you want to delete.
- Click the three vertical dots in the 'Action' column next to the Integration.
- Select "Delete" from the dropdown menu.
- Confirm the deletion in the popup dialog.
Notes
- Ensure that you review the Integration's details before deleting, as this action cannot be undone.
- Use the search functionality to quickly locate Integrations, especially when dealing with a large number of Integrations.