Quick Start with ai12z
This walks you through the process step by step—from creating an account to deploying a fully functional AI assistant. By following these steps, you’ll be able to integrate your agent into your digital ecosystem, train it with your unique content, and ensure it delivers accurate and valuable insights to your users.
With the flexibility to connect external systems, customize responses, and utilize advanced tools like the ReAct model, your agent will be a dynamic and powerful solution designed to grow alongside your business. Let’s get started!
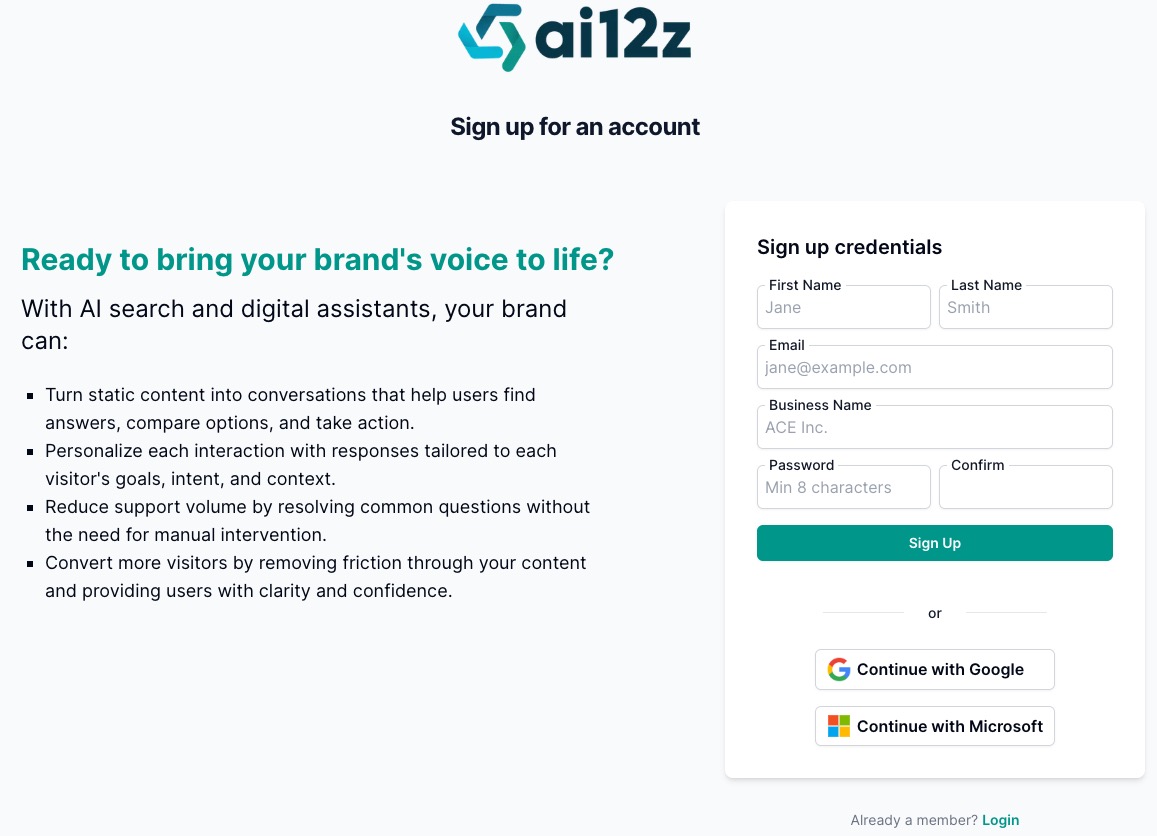
1. Sign Up and Create Your Account
-
Why This Matters: Creating an account is your entry point into the ai12z platform. It provides you access to all the tools and settings needed to build your agent.
-
Detailed Steps:
-
Visit the ai12z website.
-
Click the Try ai12z button to create a free account (no credit card required).
-
Fill out the required details:
- First Name and Last Name: Your full name or your organization's representative.
- Email Address: Ensure it's valid and accessible for verification.
- Business Name: Your organization name.
- Password: Create a secure password (minimum 8 characters).
- Confirm: Re-enter your password to confirm.
-
Verify your email by clicking the link sent to your inbox.
-
Log in using your new credentials.
-
-
Outcome: You gain access to the platform and can begin setting up your agent.
Complete guide: Creating an Account
2. Create an Agent
-
Why This Matters: An agent serves as the container for all configurations, data, and settings specific to your AI assistant.
-
Detailed Steps:
-
Log in to your account and access the Agents section from the left-hand navigation menu.
-
Click Add New Agent and select Create Agent. Provide the following information:
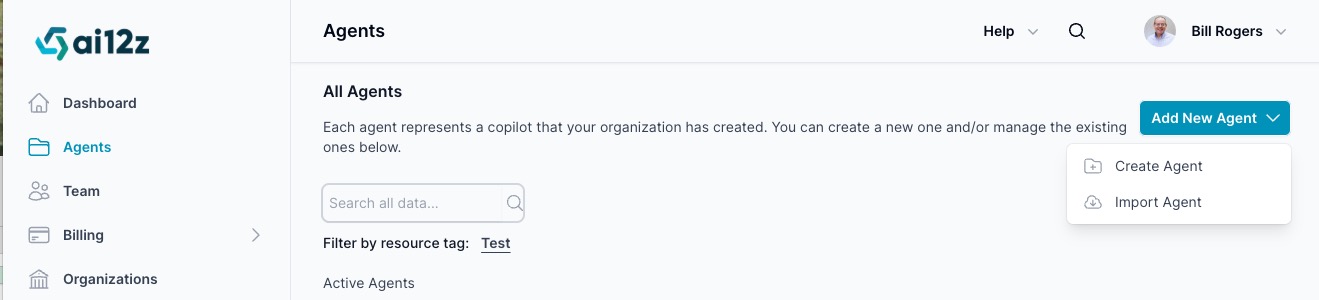
Information for creating an Agent
 warning
Important: Ensure Organization and URL of Organization are accurate. The AI uses these values throughout the automated setup, branding, and configuration steps.
- Name: Something descriptive like "Customer Support Assistant."
- Organization: This is case sensitive, it will be default header title of the Bot.
- URL of Organization: The organization's public website.
- Purpose: A brief summary of the Agent’s purpose. (Default is copilot for the public website)
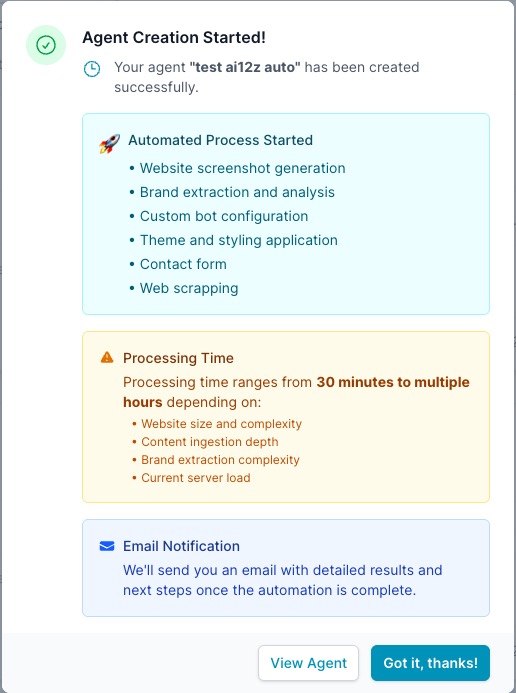
- Automate full agent creation: This automates extracting the brand from the website, creating the welcome message, adding a contact form, and configuring the entire bot. It is recommended that you check this box. The system will ingest the website and automatically create the system prompts, giving you a fully functional agent.
- Language: Select this if you plan to ingest non-English content; it uses a different embedding model.
- Save and proceed to the next step.
-
-
Outcome: If you selected Automate full agent creation, you will have a fully functional agent once the ingestion process completes.
Complete guide for Agent Creation
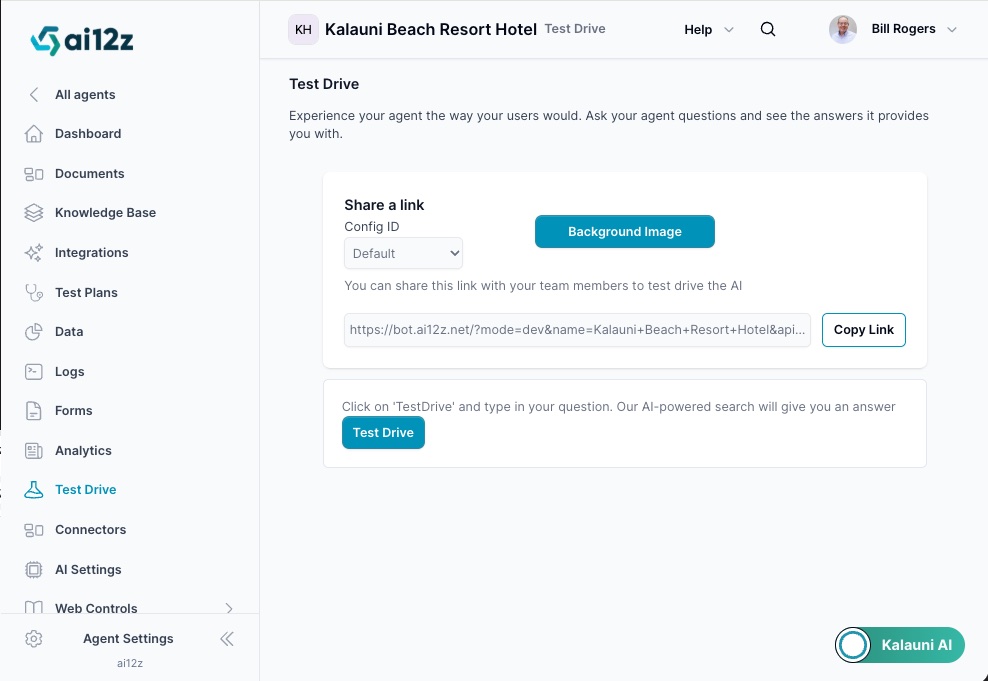
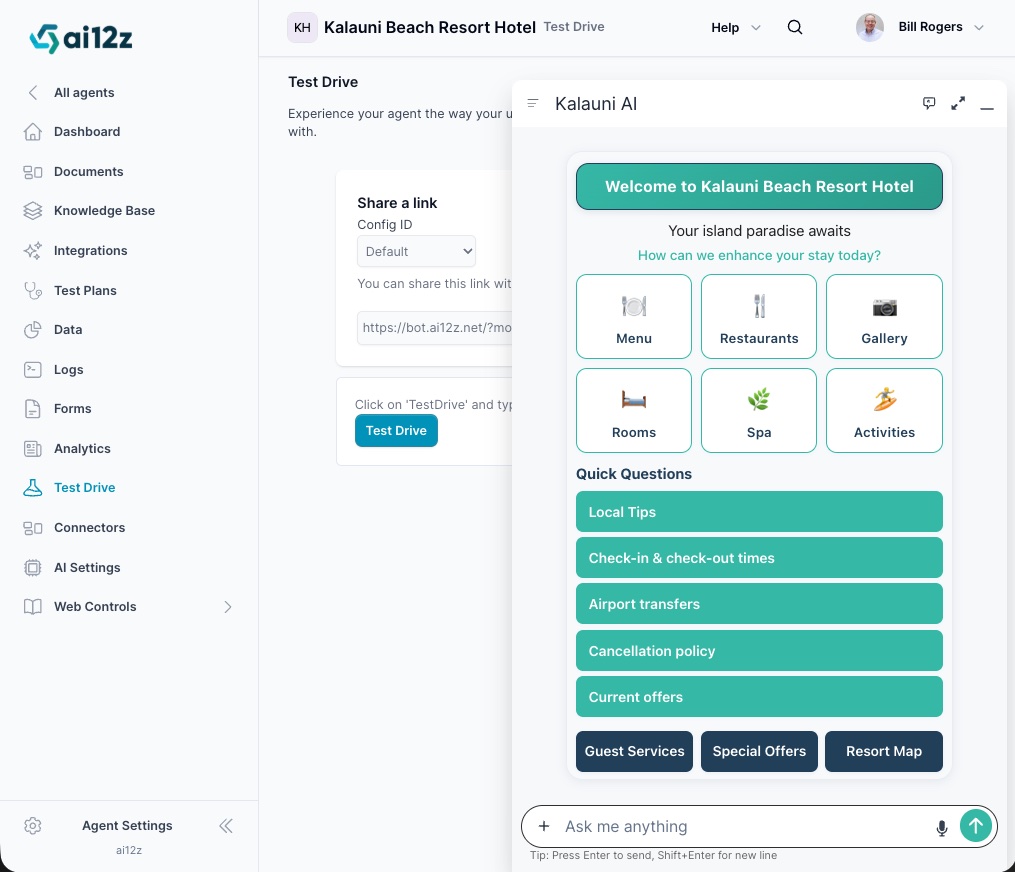
3. Test Drive Your Agent
-
Why This Matters: The Test Drive feature allows you to experience your agent exactly as your users will, enabling you to validate responses and fine-tune performance before deployment.
-
Detailed Steps:
-
Access Test Drive
- Once you receive the email notification confirming your website has been ingested, navigate to the Test Drive section from the left-hand navigation menu.
-
Launch Your Agent
- Click the Bot at bottom right to open your agent.
- The agent will open with its default configuration, ready for testing.
-
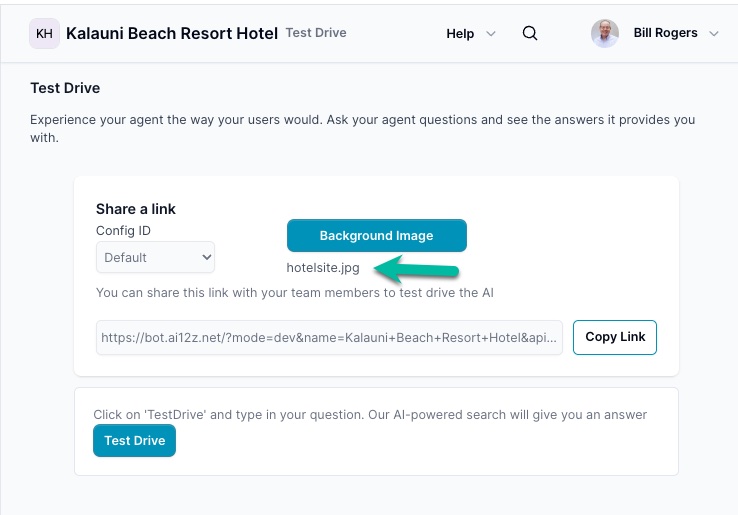
Share Your Agent (Optional)
- To share your agent with team members for collaborative testing, use the Copy Link feature.
- For a more professional presentation, add a background image before sharing.
Before Background Image:

-
Add a Background Image (Recommended)
- Click the Background Image button in the Test Drive interface.
- Upload a JPEG file of your website's homepage (recommended size: 1200 x 1200 pixels).
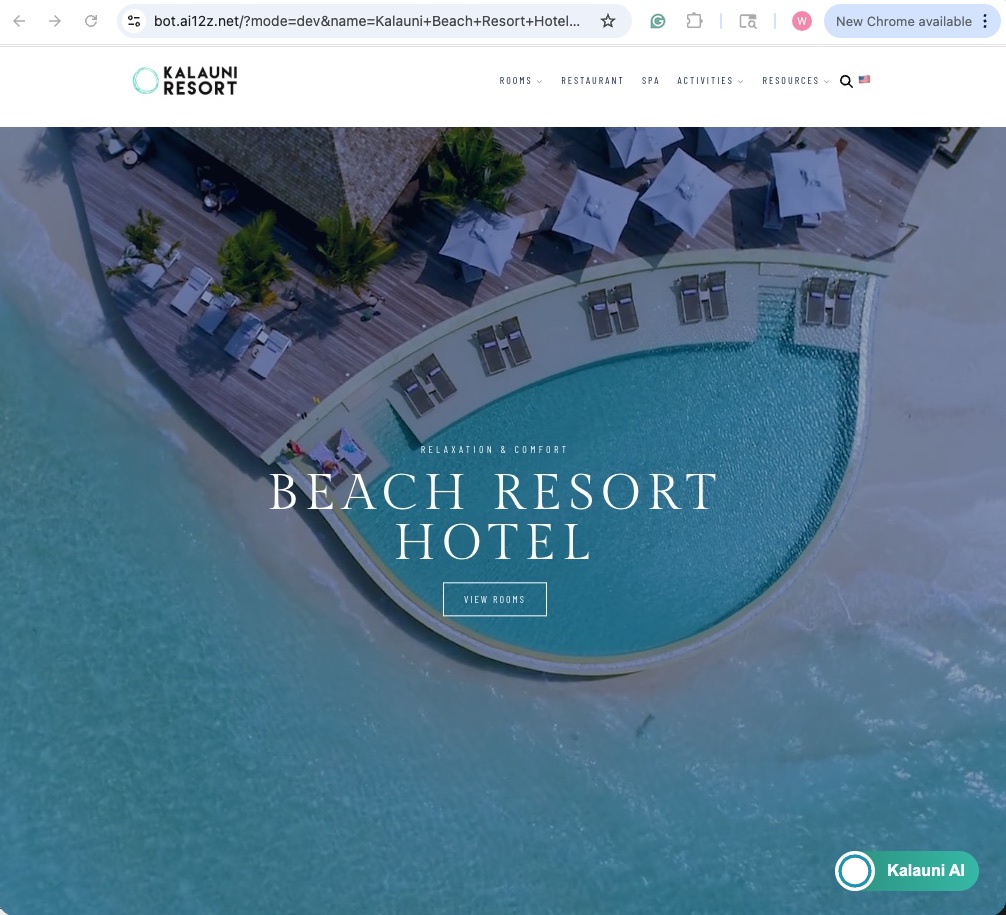
After Background Image:
-
Copy and Share the Link
- Click Copy Link to generate a shareable URL.
- Share this link with stakeholders to demonstrate your agent's capabilities in a realistic environment.
-
-
Outcome: You have successfully tested your agent and can now share it with team members for feedback before deploying it to production.
Complete guide: Test Drive Documentation