Creating an Agent
Overview
Agents in the ai12z platform represent AI digital assistant tailored for different use cases. For example, your organization might deploy an AI assistant on a public-facing website, or create one for internal HR or IT support functions.
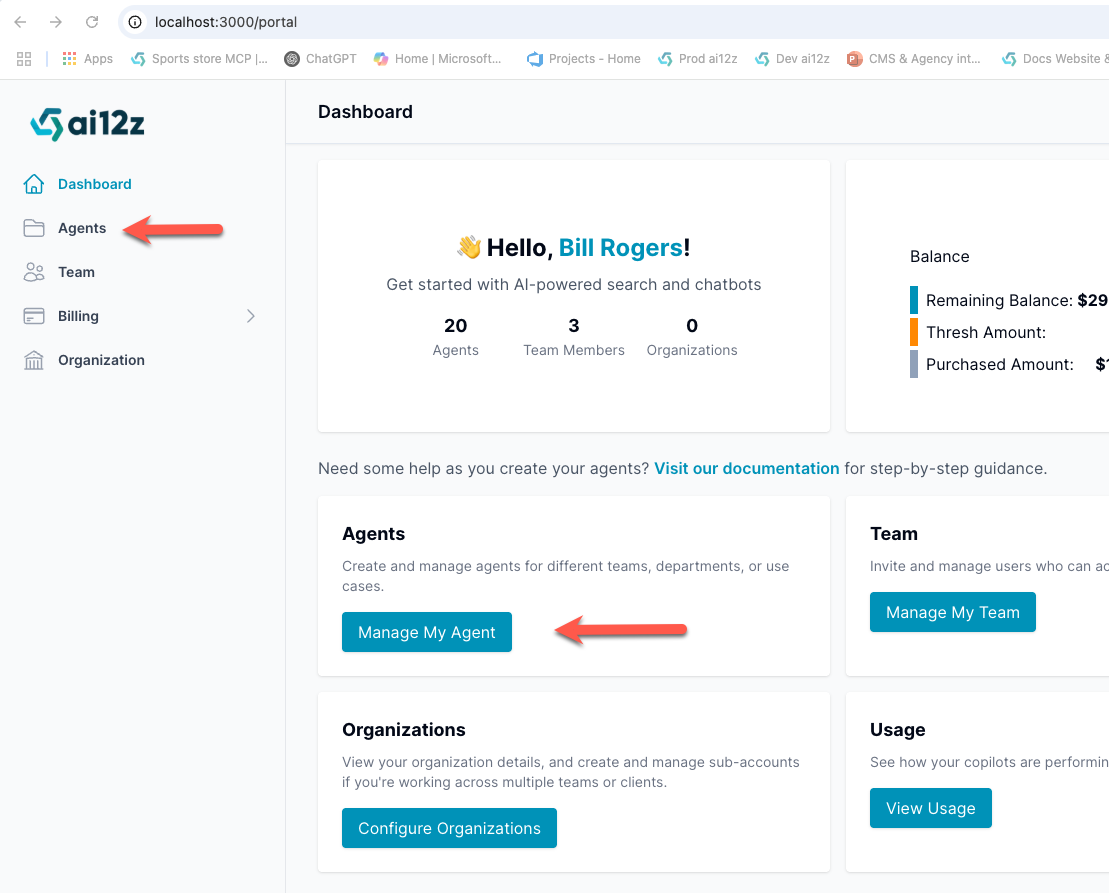
Navigating to Agents
To access your Agents, click on "Agents" in the left-hand navigation menu.
Steps to Create a New Agent
-
Why This Matters: An agent serves as the container for all configurations, data, and settings specific to your AI assistant.
-
Detailed Steps:
-
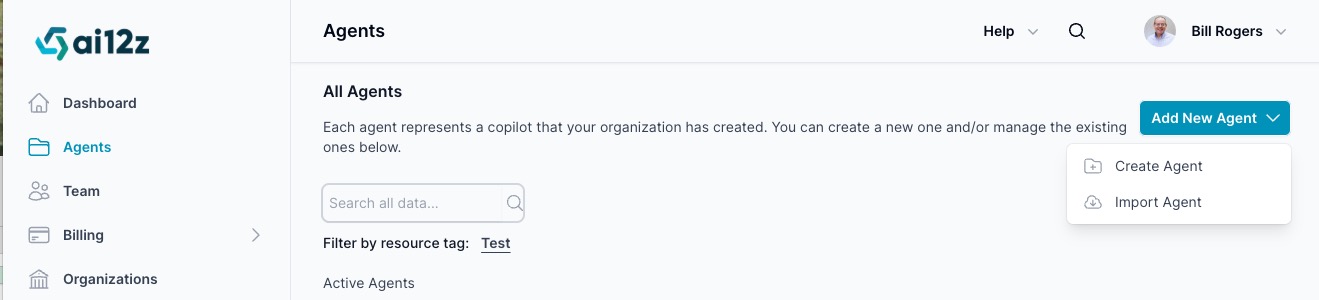
Log in to your account and access the Agents section from the left-hand navigation menu.
-
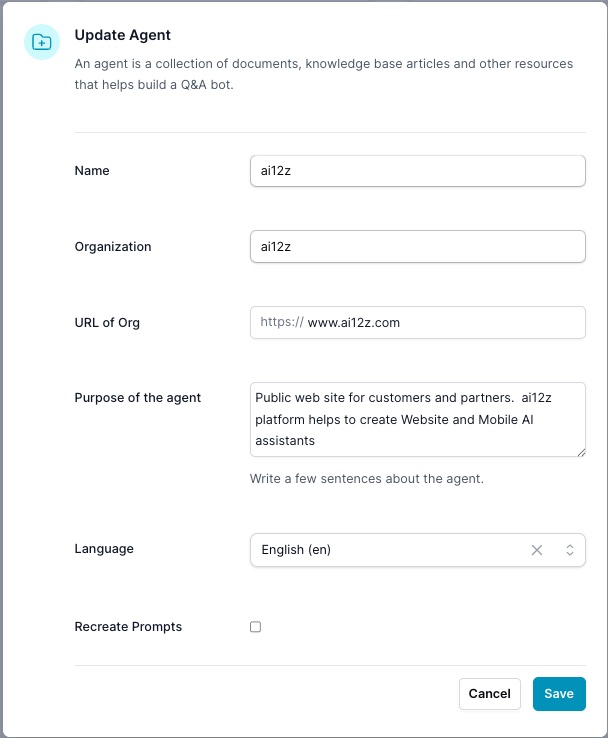
Click Add New Agent and select Create Agent. Provide the following information:
Information for creating an Agent
 warning
Important: Ensure Organization and URL of Organization are accurate. The AI uses these values throughout the automated setup, branding, and configuration steps.
- Name: Something descriptive like "Customer Support Assistant."
- Organization: This is case sensitive, it will be default header title of the Bot.
- URL of Organization: The organization's public website.
- Purpose: A brief summary of the Agent’s purpose. (Default is copilot for the public website)
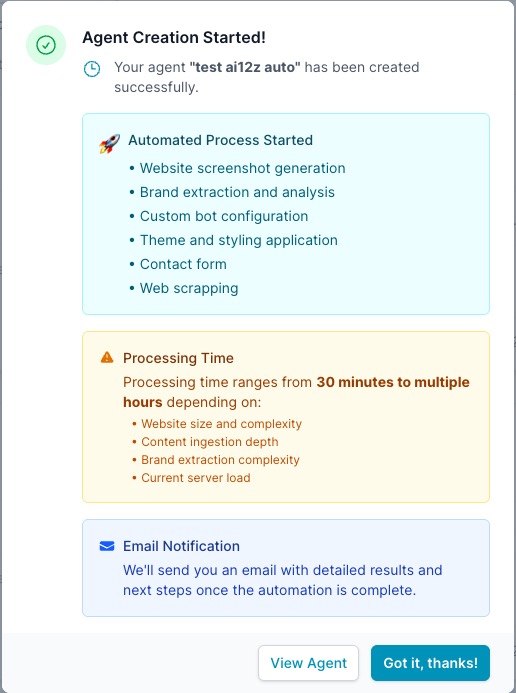
- Automate full agent creation: This automates extracting the brand from the website, creating the welcome message, adding a contact form, and configuring the entire bot. It is recommended that you check this box. The system will ingest the website and automatically create the system prompts, giving you a fully functional agent.
- Language: Select this if you plan to ingest non-English content; it uses a different embedding model.
- Save and proceed to the next step.
-
-
Outcome: If you selected Automate full agent creation, you will have a fully functional agent once the ingestion process completes.
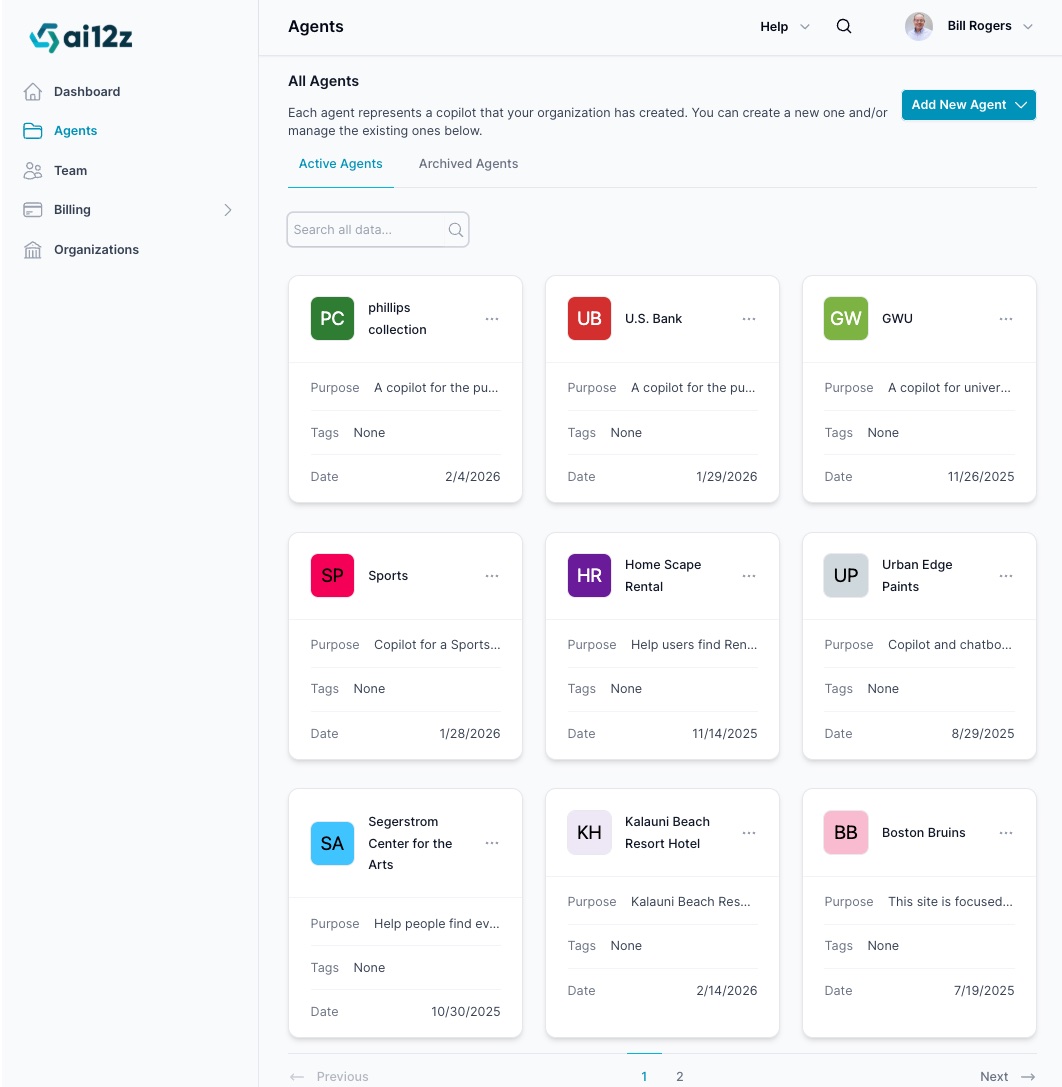
Once saved, your new Agent will appear on the All Agents page alongside your other existing Agents.
Agent status
- Active Agents - Agents that are active. Agents in this state can be marked to archive
- Archived Agents - Agents that are marked for deletion. Agents in this state can be deleted immediatly or restored to active. After 30 days the agent is deleted if left in this state.
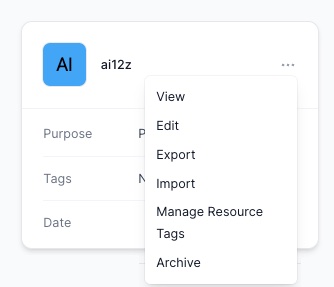
Agent Cards
Each Agent appears as a card with the following information:
- Initials or Logo: A colored square showing the Agent's initials (or a custom logo, if uploaded).
- Agent Name: Displayed prominently on the card.
- Description: A short summary of the Agent's purpose (e.g., “Web and call center PDFs”).
- Date: The creation or last updated date.
- Actions Menu: The
...action menu that allows you to:- View the Agent
- Edit Agent properties, change the name of the bot, reset the prompts
- Export the Agent is exported to a zip file. Great way to back up your agent and to create copy of your agent
- Import you can import an Agent from a ZIP file
- Manage Resource Tags Ability to organize your Argent cards by assigning them tags
- Archive Archive agent, it will be removed in 30 days, you can go to archive and delete an agent to do it faster.
Editing Agent Properties
To modify an Agent:
- Click Edit from the card menu or inside the Agent.
- Update any of the fields: Name, Organization, Organization URL, or Purpose.
- If you want to regenerate the system prompts, check the Recreate Prompts box. This will:
- Recreates the system prompt used by Answer AI
- Recreates the system prompt for ReAct
- Note it is better to use the vibe coding in AI settings so you are not reseting your prompt to the default prompts. Note your changes will be in History.
When editing, always use the real organization name and correct URL of the client that the Agent is for (especially if you're an interactive agency). The AI uses this data to generate branded and purpose-driven system prompts.
This guide ensures a smooth start in creating and managing your Agents in ai12z. Continue to the next section to learn how to configure Agent settings and connect tools, forms, and integrations.