Agent Settings
Overview
The Agent Settings screen allows administrators to configure and manage all key properties of an Agent, including API keys, embedding models, connectors, tags, and organization information.
API Keys
API keys enable access to the Agent via web components (search/bot controls) or via developer integrations (REST API or WebSocket). The API Keys section displays a comprehensive table with key management details.
API Keys Table
The API Keys interface shows:
- Name: Descriptive identifier for the API key
- Key: Masked API key value with copy functionality
- Status: Current key status (Active/Inactive)
- Created By: User who created the key
- Date: Creation timestamp
- Action: Management options (Edit/Archive)
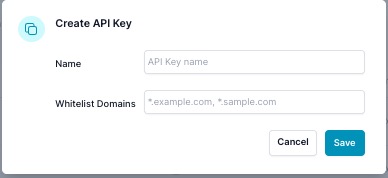
Creating an API Key
- Click Create API Key to open the creation modal.
- Name: Enter a descriptive name (e.g.,
Website Bot,Mobile App,Analytics Dashboard) you use this to filter the data, inDataandAnalytics - Whitelist Domains: Add comma-separated domains where this key will be used (e.g.,
*.example.com, *.sample.com) - Click Save to generate the new API key
The new key will appear in the API Keys table with "Active" status and current timestamp.
Managing API Keys
To manage existing API keys:
- View Key Details: Each key shows its masked value with a copy icon for easy access
- Edit Key: Click the action menu (⋮) next to any key and select Edit to:
- API Type
- Control is the default for web controls
- Management API, interacting with the portal via API
- Update the key name
- Modify whitelist domains, what domain can the control be used on
- Change API type settings
- API Type
- Archive Key: Use the action menu to Archive keys that are no longer needed
- Archived keys become inactive but remain visible for reference
- Can be reactivated if needed
💡 Security Tip: Use specific, meaningful names and proper domain whitelisting to maintain security and easily track key usage across your applications.
Embeddings
Choose the appropriate text embedding model based on your language and cost needs:
- ADA V2 (
text-embedding-ada-002) – The original embedding model. Consider upgrading for better performance and cost-efficiency. - Text Embedding 3 Small (Recommended) – Offers improved accuracy at lower cost. Best for English-only Agents.
- Text Embedding 3 Large – Recommended for multilingual Agents; higher cost, but better support for non-English content.

Agent Information
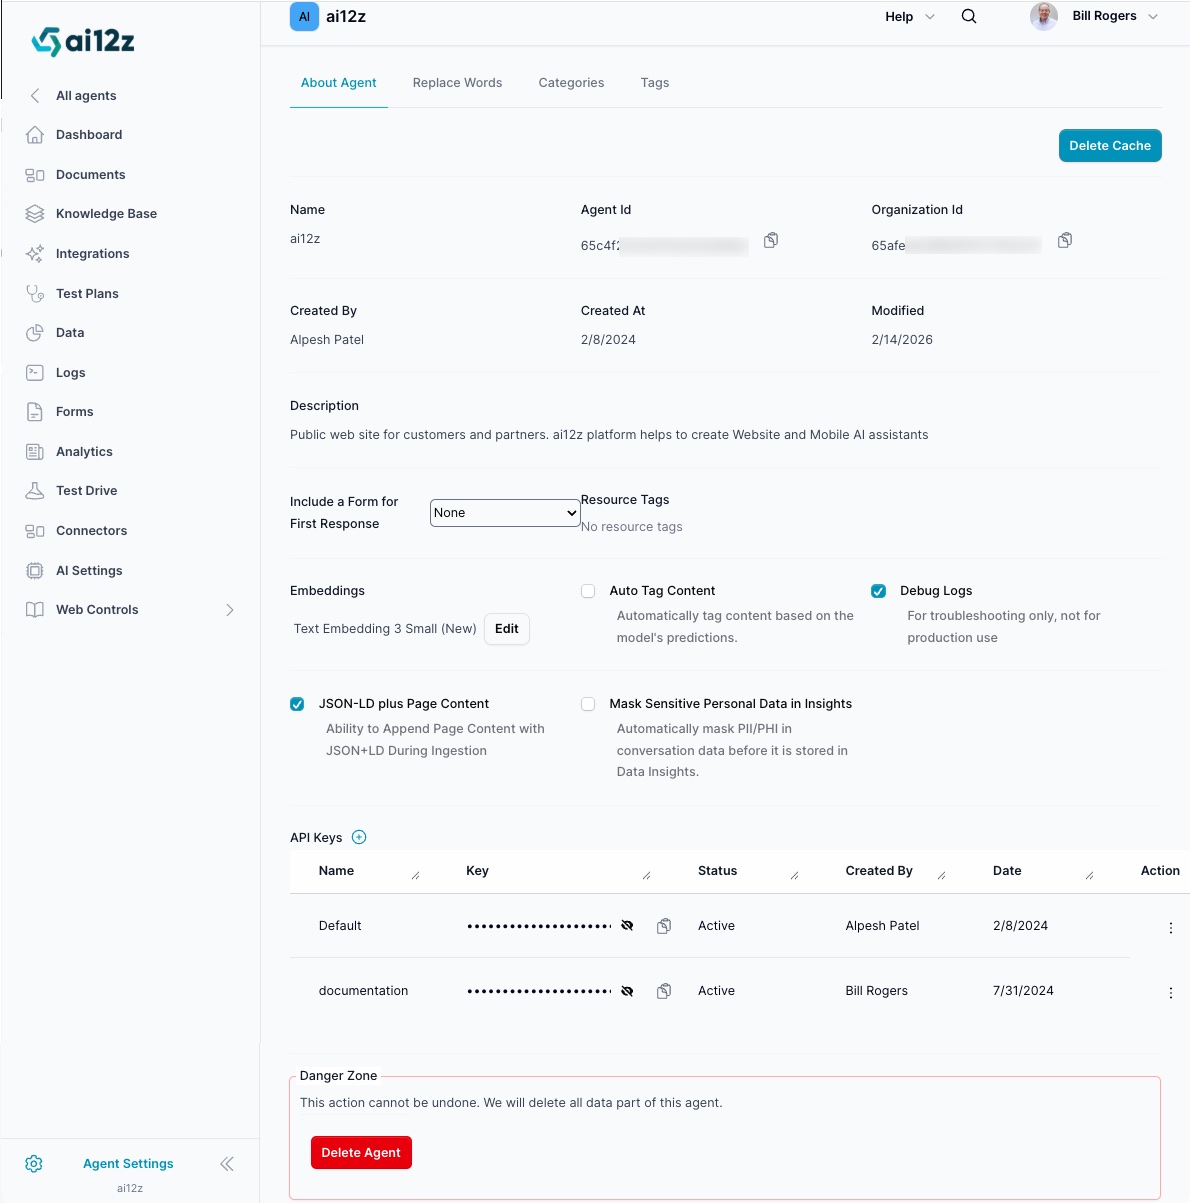
The Agent Settings page displays comprehensive agent details and configuration options:
Basic Information
- Name: Current agent identifier (e.g., "Kalauni Beach Resort Hotel")
- Agent ID: Unique system identifier with copy functionality
- Organization ID: Associated organization identifier
- Created By: Agent creator information
- Created At: Timestamp of agent creation
- Modified: Last modification date.
Agent Description
A detailed description of the agent's purpose and functionality. This description helps define the agent's role and can be edited to improve response quality and context understanding.
Configuration Options
The settings page includes several key configuration sections:
- Include a Form for First Response: Dropdown to select forms for lead generation. What this does is if you ask a question and the RAG answers, then after the anser a Form is presented only 1 time. So if user continues to ask questions, this form is not shown again
- Embeddings: Text embedding model selection and configuration
- Auto Tag Content: Automated content tagging and categorization
- Debug Logs: Enable detailed logging for troubleshooting (not recommended for production)
- JSON-LD Add Page Content: Enhanced content ingestion options, JSON-LD be default is checked, it is rich information for the LLM, if unchecked and JSON-LD is found then only JSON-LD is ingested. Best practice is to keep it checked.
- Mask Sensitive Personal Data in Insights: Automatically mask PII/PHI in conversation data before it is stored in Data Insights. Note you need to be in a business plan or above to use this AI
- API Keys: Comprehensive key management table
Debug Logs
The Debug Logs feature provides detailed logging capabilities for troubleshooting and development purposes.
When to Enable Debug Logs
- Development and Testing: Enable during agent development to track processing behavior. When reviewing the Data tab the
Analyzebutton will only be enabled if Debug Logs is enabled since it needs the Meta data of a question to analyze why it answered the way it did. - Troubleshooting: Use when diagnosing integration issues or unexpected responses
- Performance Analysis: Monitor system performance and identify bottlenecks
Important Considerations
⚠️ Not recommended for production use: Debug logs can impact performance and should be disabled in live environments.
Use Cases:
- Tracking integration calls and responses
- Monitoring content processing workflows
- Analyzing user query handling
- Debugging custom connector behavior
Accessing Debug Information
When enabled, debug logs provide detailed information about:
- Integration execution details, see
Logs - Query processing steps, see
Logs - Response generation workflows, see
Logs - Data analisis on why did the Agent answer the way it did, see
DataclickAnalyzebutton and type in your concern
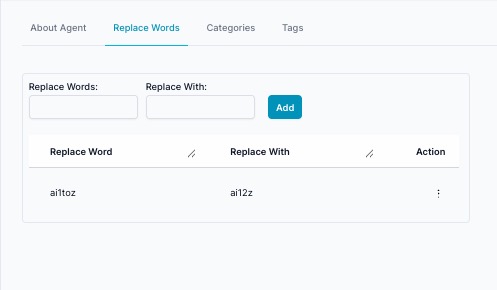
Replace Words
The Replace Words feature lets you substitute certain terms in real-time across AI responses. This is useful for standardizing terminology or personalizing output.
- Not case-sensitive
- Example: Replace
ai1tozwithai12z
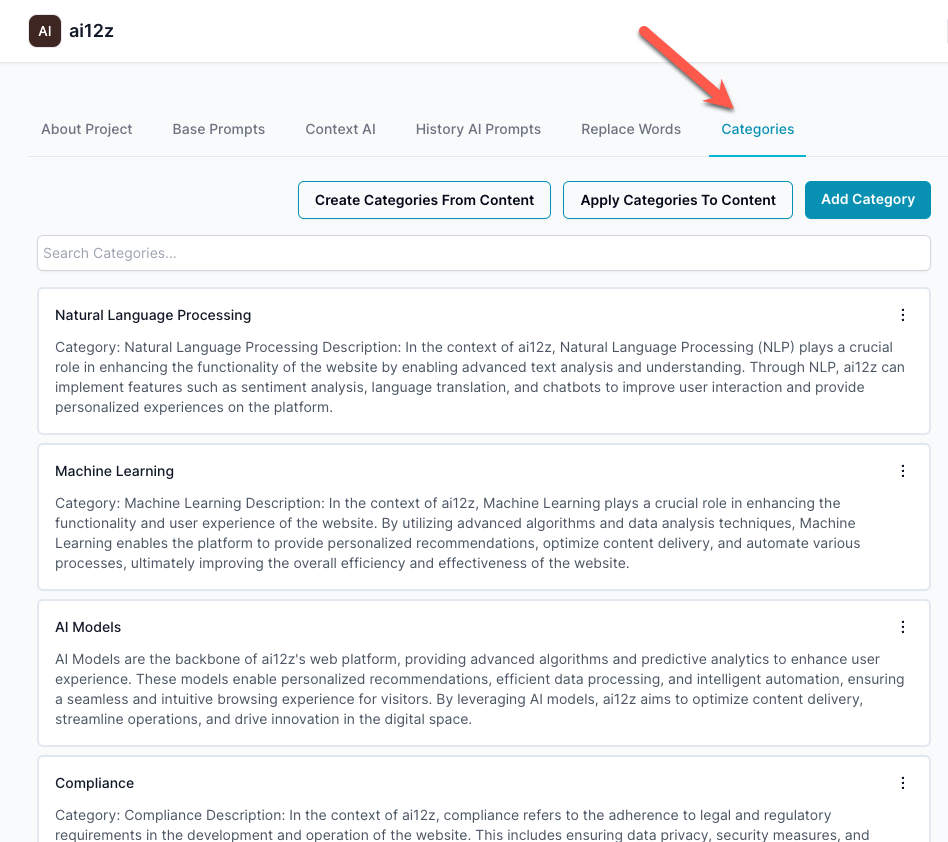
Categories
Category Management is a critical feature of the ai12z platform that enhances the organization of content by creating and applying categories based on a detailed analysis of the website's content and the company's profile. This guide aims to provide you with a comprehensive understanding of how to utilize this feature effectively.
This is used in the search control, so as you type, you are returned items, thoes items can be organized by categories, if enabled in the search control.
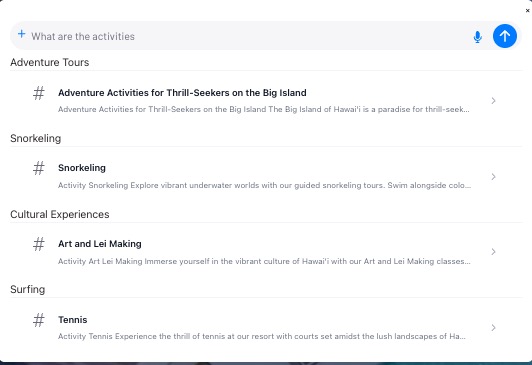
The system can automatically generate categories based on the content it ingests from websites and PDFs. A histogram is created from the URLs, and utilizing the information about the organization and the histogram data, the system proposes relevant categories.
- Navigate to 'Create Categories From Content' button.
- The system will analyze the content and present a list of suggested categories.
- Review and edit these suggestions to ensure they align with your content strategy.
- Wait about 10 minutes and the Categories with their descriptions will be created. If you click the button again it will know the categories that are already created and add additional categories.
Manual Category Creation
If you wish to create a category manually:
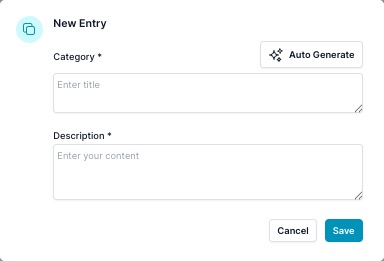
- Click Manage Categories ▾ → Add Category.
- Fill in the category name and provide a concise description. Or click Auto Generate to let the system draft the description.
Manual Creation
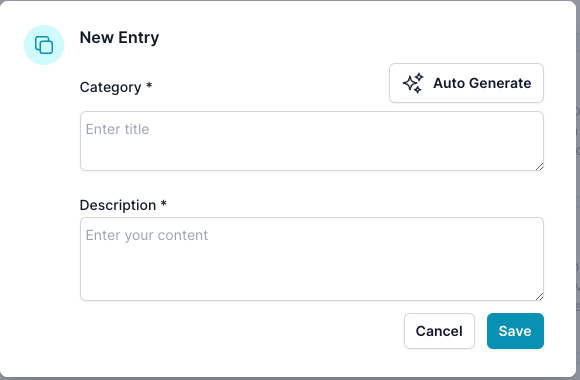
- Save the category to add it to your list.
Applying Categories to Content
Once categories are created, they can be applied to your content:
- Select Manage Categories ▾ → Apply Categories To Content.
- The system will match your content with the created categories based on the content embeddings.
- Review the applied categories to ensure accurate classification.
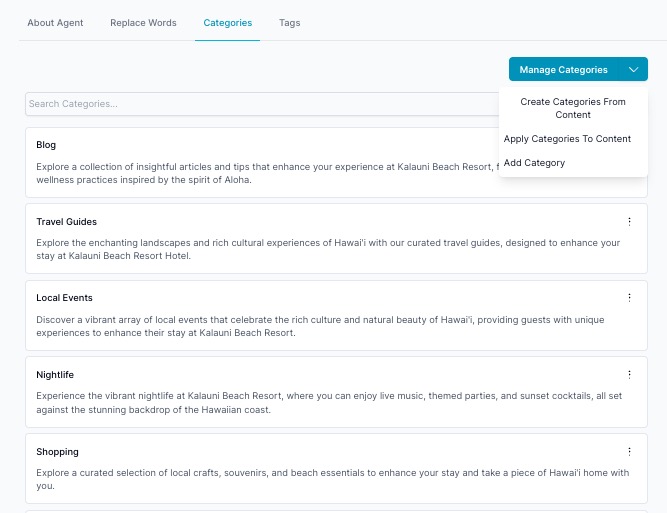
Managing Categories
Each category comes with options to edit or delete:
- Click the ellipsis (
...) next to the category you wish to manage. - Select 'Edit' to change the category name or description.
- Choose 'Delete' to remove the category entirely.
Best Practices for Category Management
- Consistency: Maintain consistency in category names and descriptions to avoid confusion.
- Relevance: Ensure categories are relevant to your content and organization's goals.
- Simplicity: Avoid over-complicating categories - the simpler, the better for users to navigate.
- Ensure descriptions are succinct and accurately reflect the category's purpose.
- Regularly review and refine categories to align with evolving content strategies.
Auto Apply categories to Content
Categories are applied automatically to new content added to the system
Category from your CMS
Category can be applied by your CMS, by includeing the category as property and that category will be used. Note only one category can be applied.
JSON-LD Support
ai12z automatically detects and ingests JSON-LD from web pages. This format offers highly structured data ideal for semantic search and knowledge extraction.
You can also choose to append JSON-LD content during ingestion by enabling this setting.
Auto Tag Content
When enabled, this feature will:
- Automatically applies tags to ingested content
- Generates content titles and descriptions
- Calls GPT-4o-mini for each file (incurs a small cost)
⚠️ This can affect billing depending on content volume.
Purpose, with tags content can be filtered by tags, both to include or exclude vector documents. For example when looking at a product for ecommerece and you want the answers only from that product you can apply for example the skew to all information related to that product. With the ai12z contorls, you can use javascript to apply the tags for filtering, see the web controls for more information on how to do this.
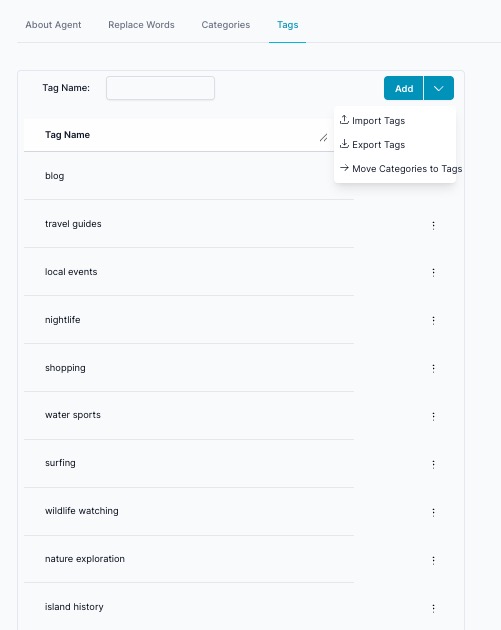
Tags
Use tags to include or exclude content in search and to segment data.
From the Tags tab you can: When auto tagging the AI uses this list to auto tag. Note Tags can be applied during ingestion, when scrapping if your web site has a meta tag, with the name tags, we will apply those tags to the tags meta of vector content.
- Add a tag by entering a name and clicking Add
- Open the menu ▾ to Import Tags (CSV), Export Tags (CSV), or Move Categories to Tags
- Edit or delete individual tags via the row actions
Tags for include or exclude
Tags can be used to include or exclude certain content during vector search. Useful for segmenting data in use cases like eCommerce.
Include a Form on First Response
Overview
The Include a Form on First Response setting allows you to seamlessly integrate lead generation forms into your AI agent’s conversations. When enabled, the agent will automatically display a selected form immediately after answering the user’s question, helping you collect valuable information without disrupting the conversation flow.
How It Works
-
Select an Available Form
- From the dropdown menu, choose one of the forms you have previously created and enabled for form collection.
- Only forms marked as enabled in your Forms settings will appear in this list.
-
Triggering the Form
- When a user asks a question, the AI agent provides its answer as usual.
- Immediately after the answer, the selected form will be displayed within the chat interface.
- This is particularly useful for lead capture, sign-ups, surveys, or other follow-up actions.
-
Use Case Example
- A guest asks about best time of year to visit the hotel.
- The AI answers the question with the appropriate answer.
- Right after the answer, a form such as sign up for our News Letter.
Key Benefits
- Streamlined Lead Generation: Collect user details without interrupting the conversation.
- Customizable Forms: Choose forms tailored to specific workflows or campaigns.
- Higher Engagement: Engage users at the exact moment their interest is highest.
Note: You can use javascript, to disable triggering the form. Use case it is a returning visitor, you know from a cookie, the user has already seend the form in a previous session. Add the attribute via JavaScript skipInitialForm set to true. See how to guide.
Danger Zone: Delete Agent
The Danger Zone section provides access to permanent agent deletion.
⚠️ Critical Warning: This action cannot be undone. All data associated with this agent will be permanently deleted.
What gets deleted:
- All agent configuration and settings
- Uploaded documents and content
- Knowledge base entries
- Analytics and interaction history
- API keys and integrations
- Forms and custom configurations
Before deletion, consider:
- Exporting important data or configurations
- Notifying team members using this agent
- Removing the agent from any live deployments
To delete the agent, click Delete Agent and follow the confirmation prompts.
The Agent, actually is not deleted for 30 days, Click the Show Deleted Agents to see agents that have been deleted, and you can restore the agent. But after 30 days, it is gone.