Testing Custom Integrations
Overview
The Test Parameter feature allows you to validate your custom integration configuration before deployment. Use this tool to verify that parameters, requests, and response handling work correctly. You can input test values and immediately see the API response.
Testing Workflow
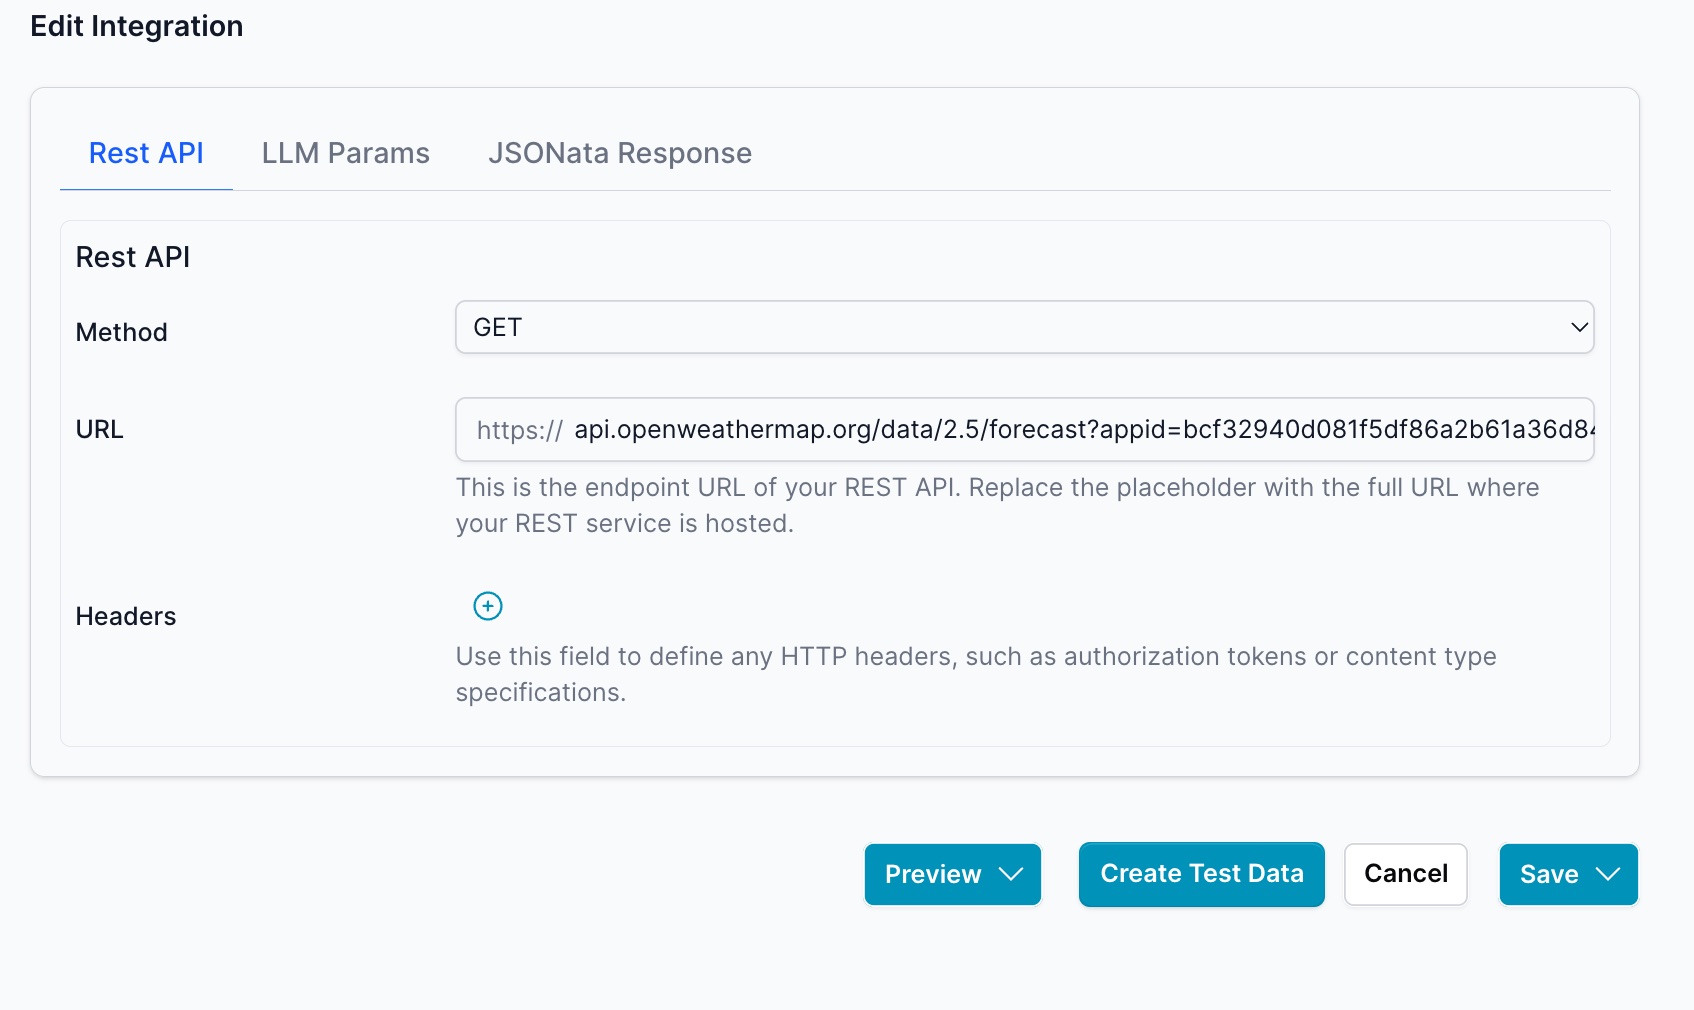
Step 1: Configure the REST API
Set up your REST API endpoint with the appropriate method, URL, and headers.
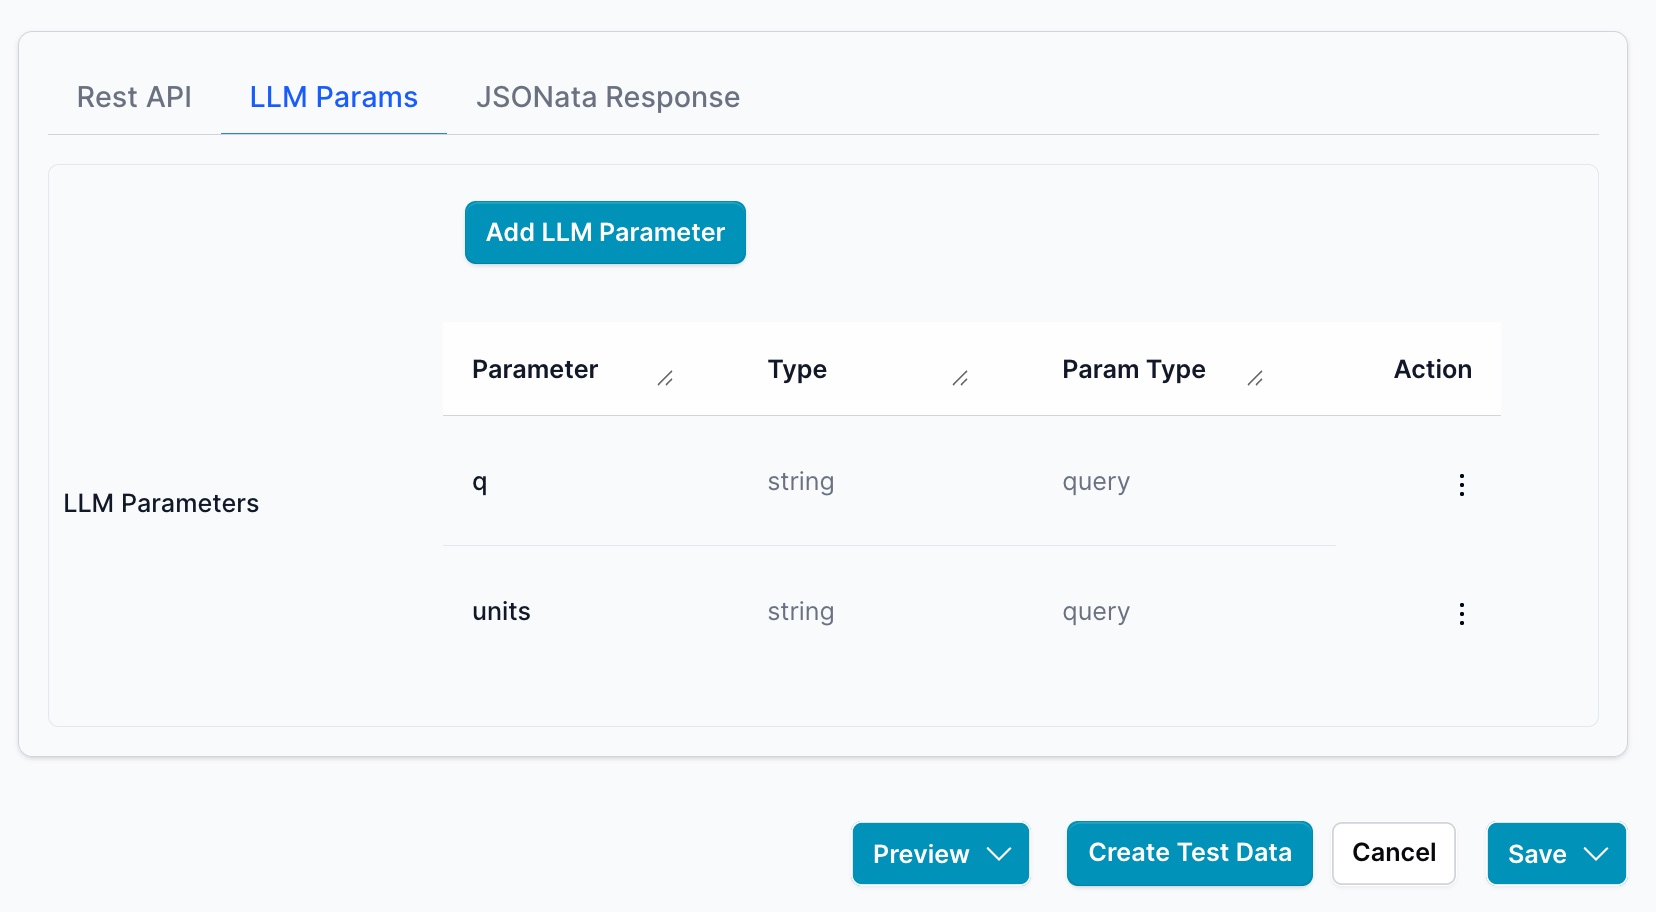
Step 2: Define LLM Parameters
Configure the parameters that the LLM will use when calling this integration. Define parameter names, types (string, number, etc.), and whether they're query or body parameters.
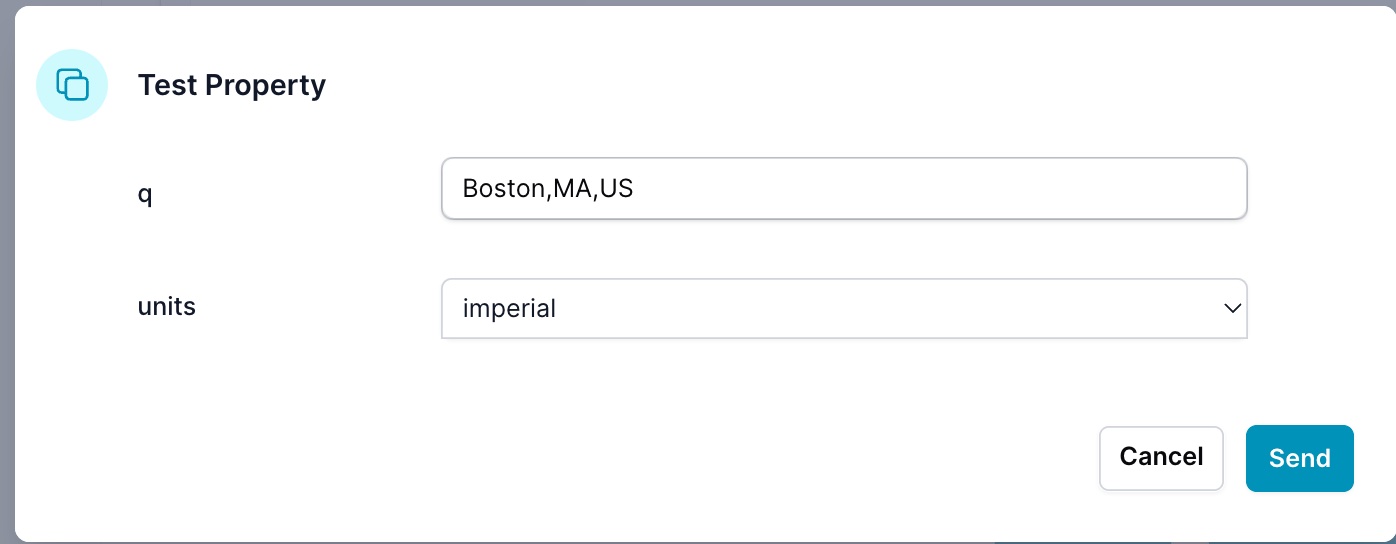
Step 3: Create Test Data
Click the Create Test Data button to generate test values for your parameters. This opens a dialog where you can input sample values.
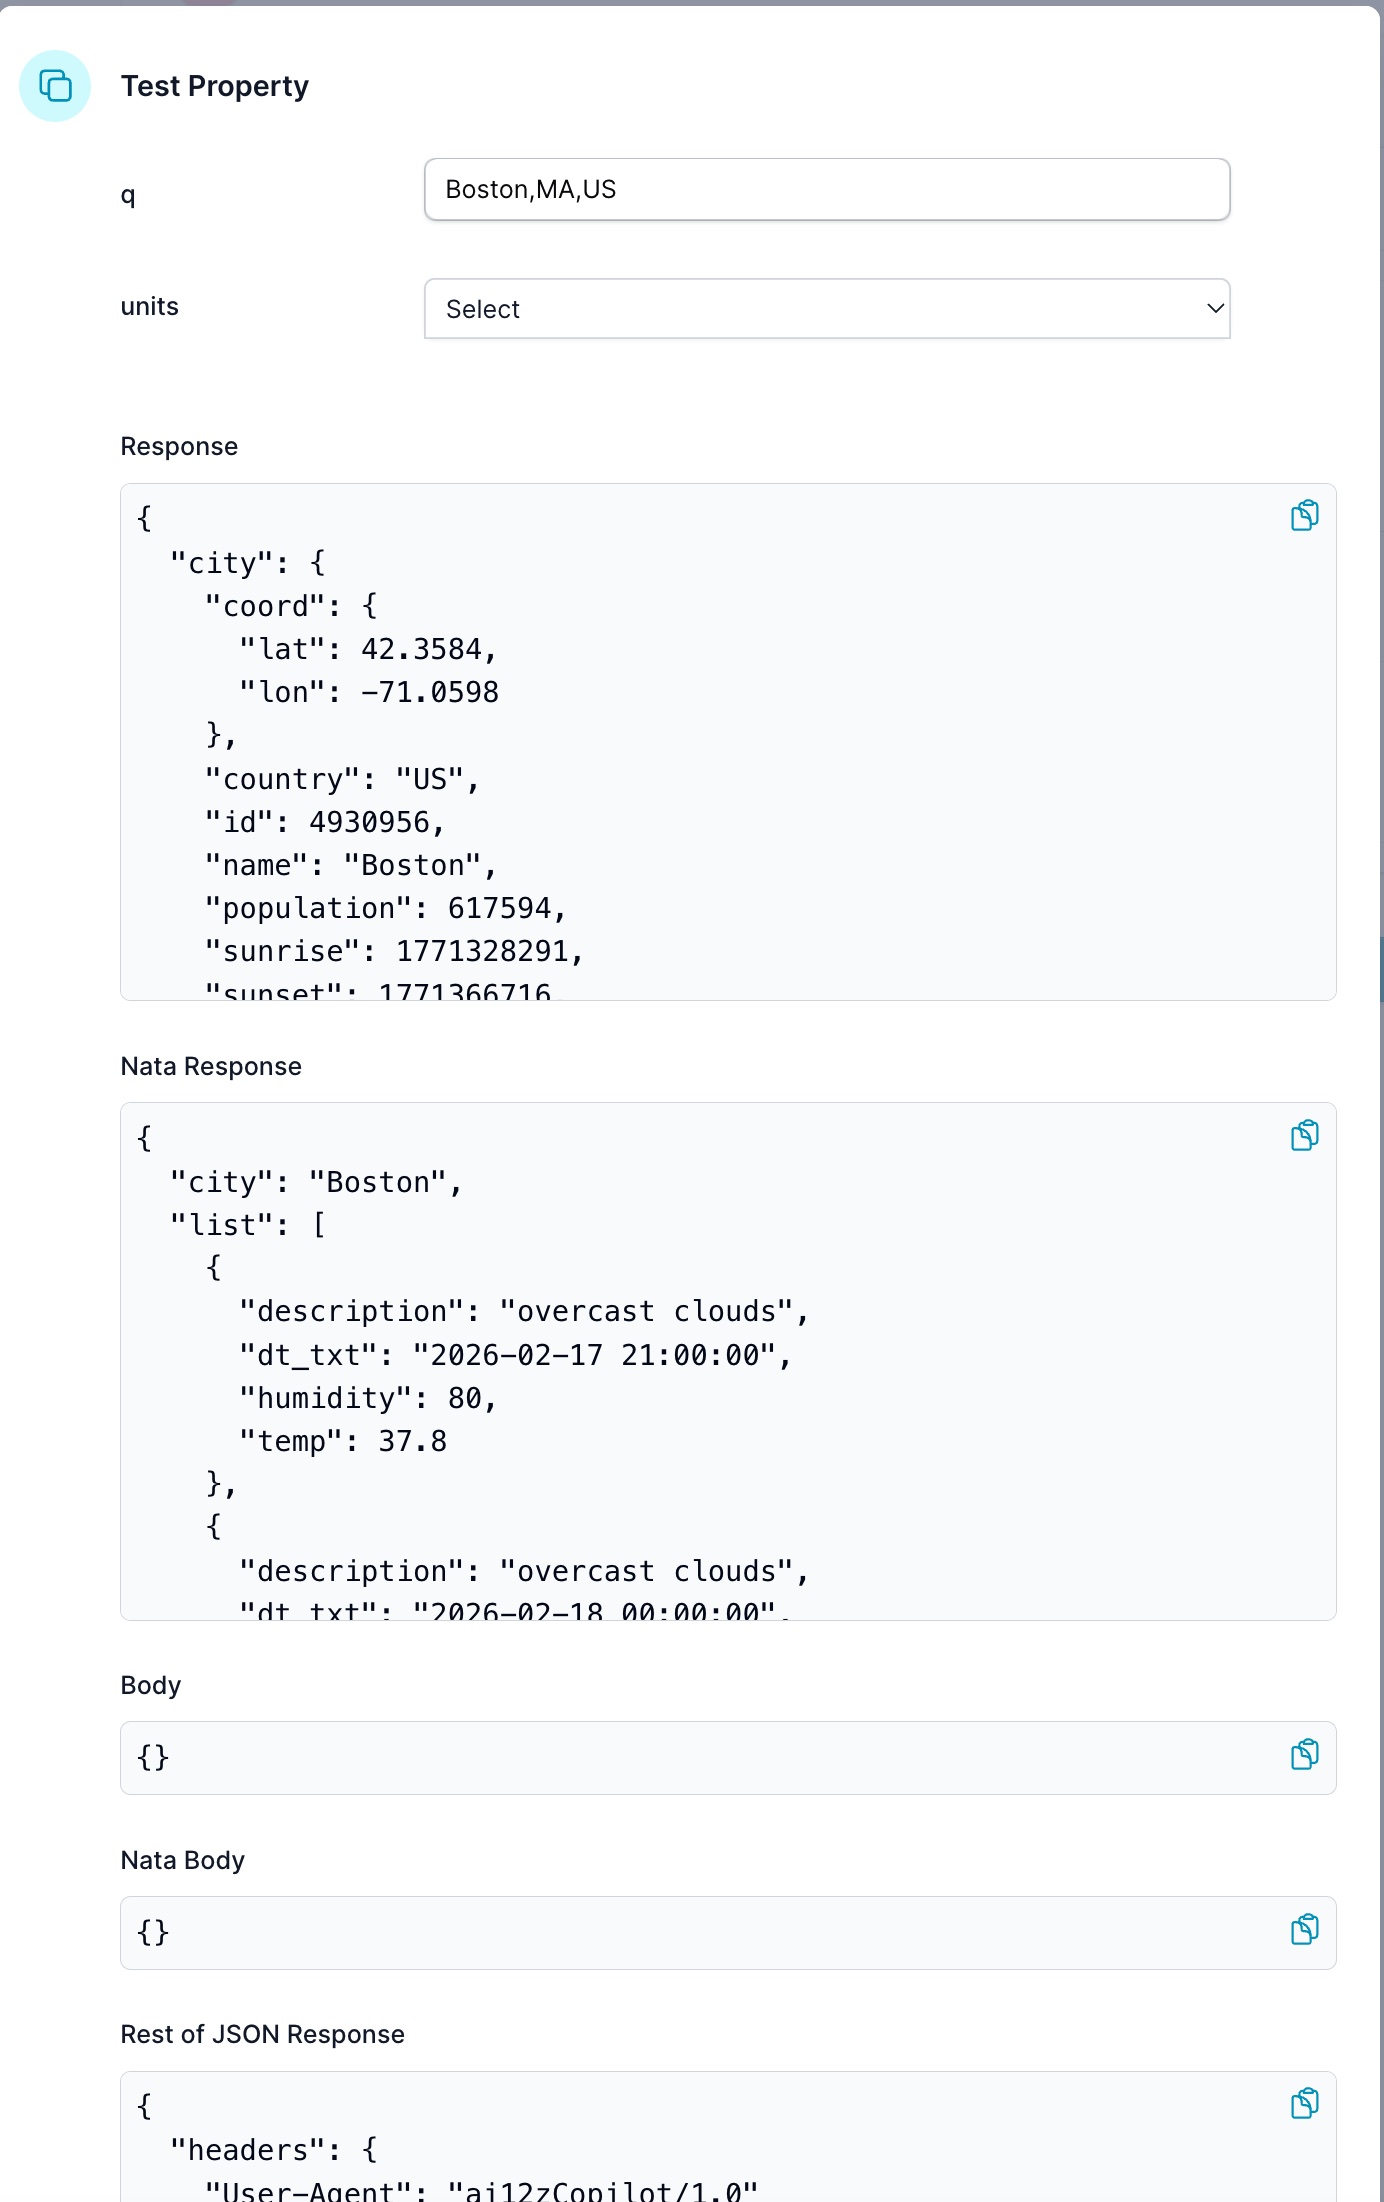
Step 4: View Test Results
Review the API response to verify the integration works as expected. The results show:
- Response: Raw JSON response from the API
- Nata Response: Transformed response after JSONata processing
- Body: Request body sent to the API
- Rest of JSON Response: Additional response metadata (headers, status, etc.)
Note: Test data is stored in the backend database for reuse in other features like carousels or JSONata transformations.
Step 5: Create JSONata Transformation (Optional)
Use AI-assisted coding to create a JSONata transformation that reshapes the API response into the format your application needs.
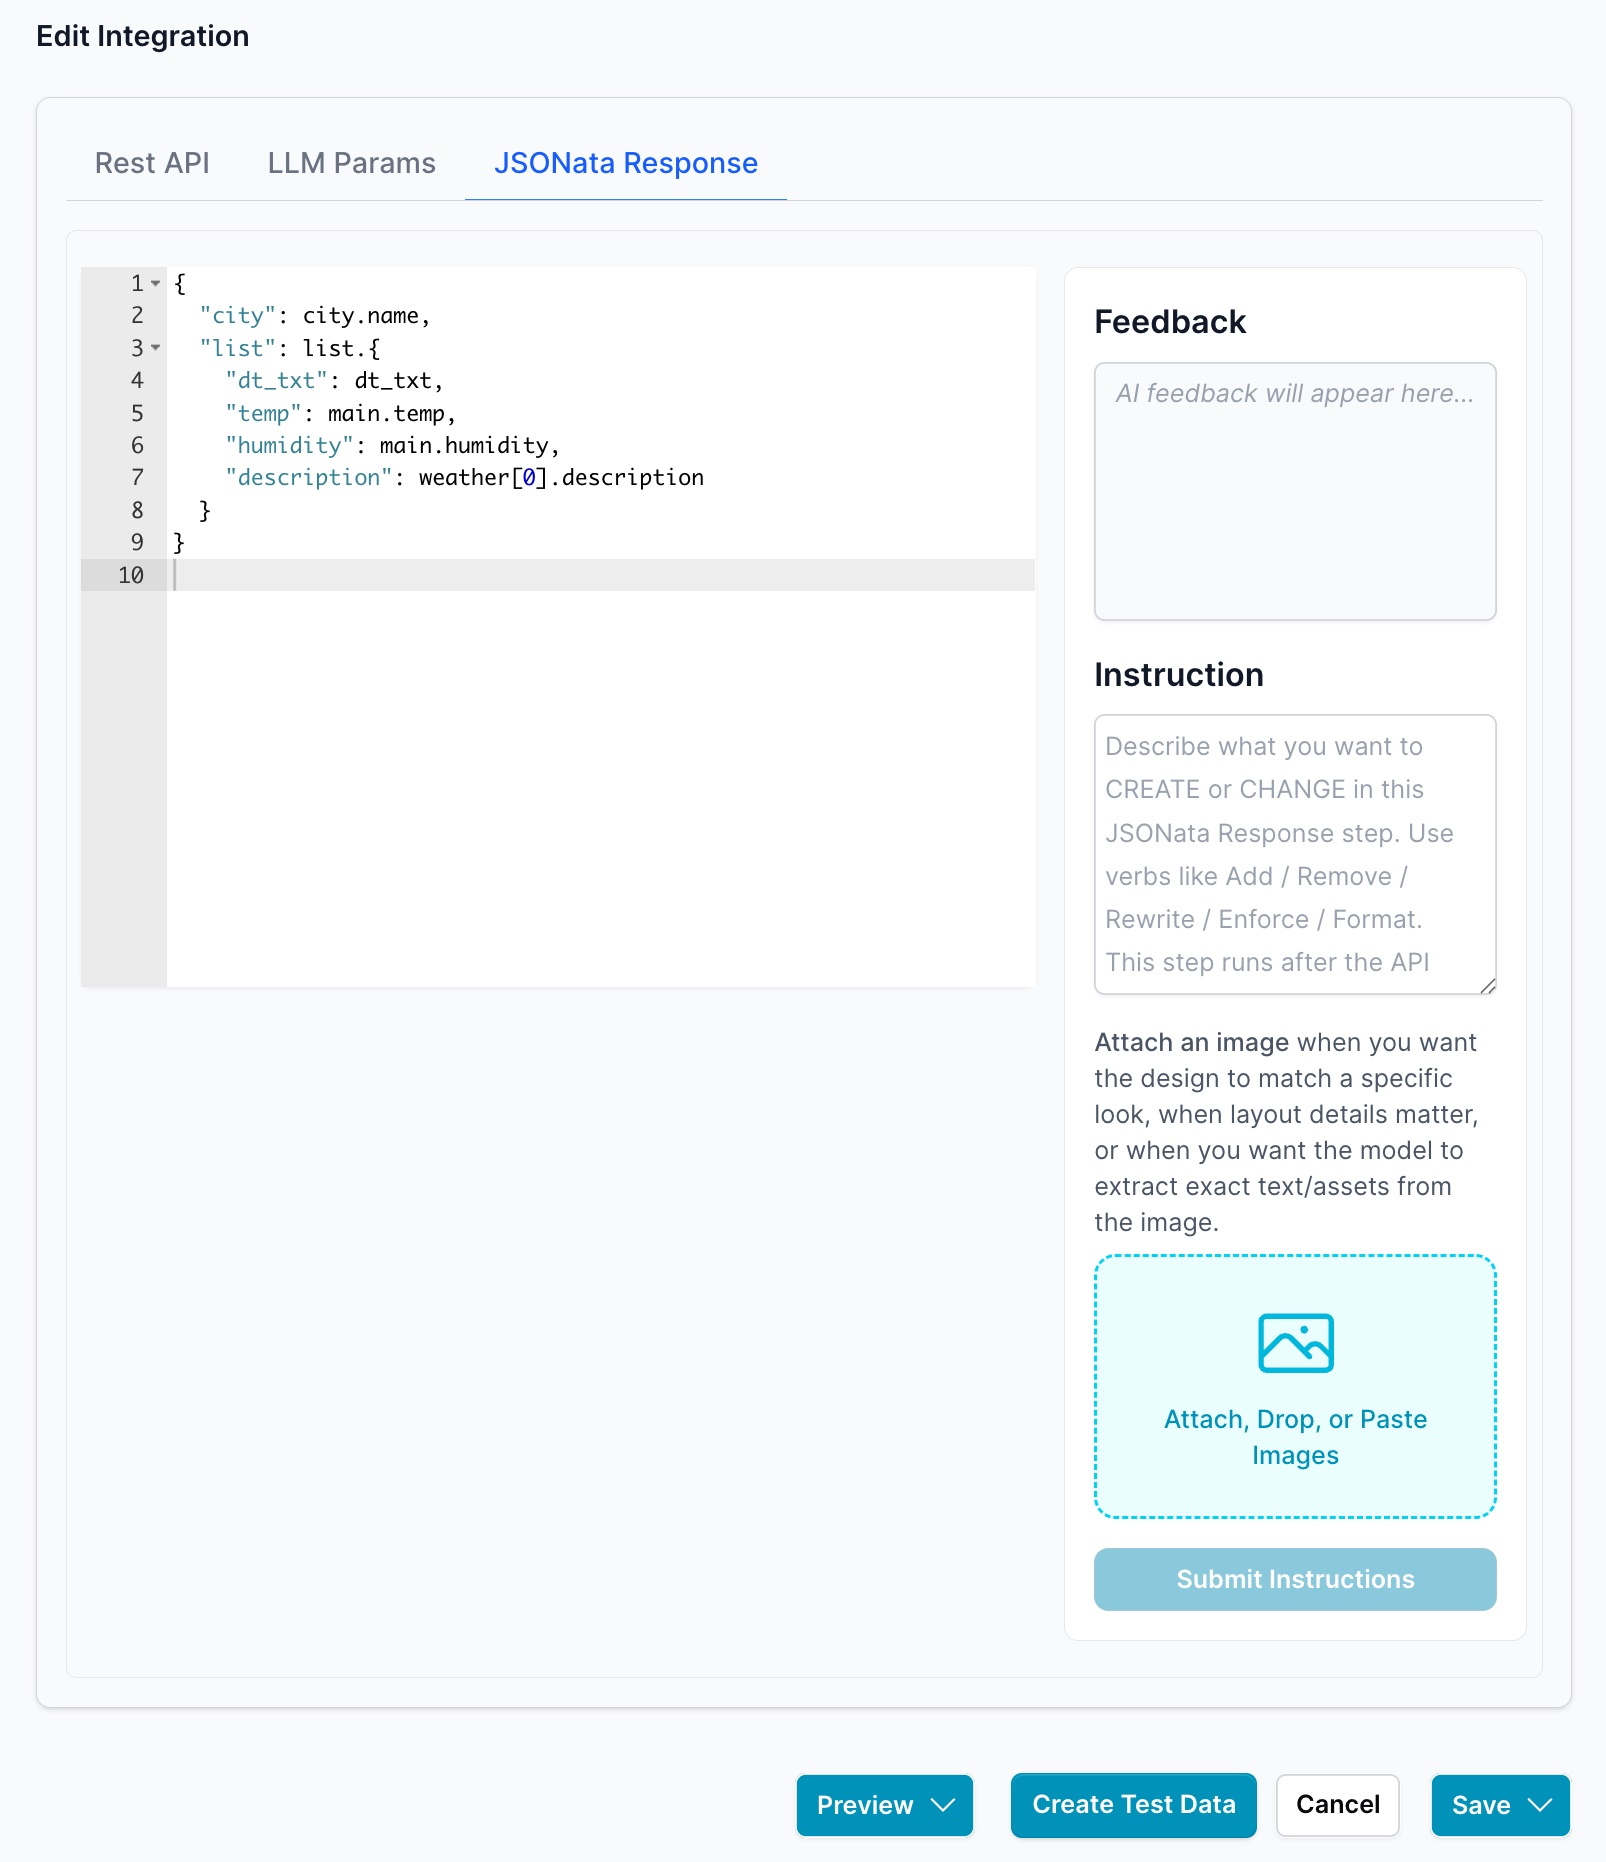
Important: After creating or modifying a JSONata transformation, repeat steps 3 and 4 to update the test data in the database. This ensures that features like carousel generation have access to the latest transformed data structure when using AI-assisted coding to build handlebars templates, scripts, and styles.
Best Practices
- Test with realistic data that matches your production use case
- Verify all parameter types and values before saving
- Update test data after modifying JSONata transformations
- Check both the raw response and transformed data
- Ensure error cases are handled appropriately