Content Ingestion
Overview
The Documents section serves as the central hub for all content that your AI Agent uses to answer user queries. Content from CMS connectors can also be viewed here. By uploading and managing comprehensive documentation here, you equip your Agent to deliver accurate, relevant, and helpful responses to customers, prospects, and employees.
How Content Ingestion Works
When you add content, the ingestion process automatically:
- Extracts images and generates detailed descriptions for use by Image AI.
- Splits documents into chunks for vectorization—creating embeddings, text, and metadata (including associated images).
- Enhances understanding for web content with JSON-LD structured data, when present.
It also captures per-page context (title, URL, language, and page metadata) so Answer AI can cite accurate sources and Image AI can match images found on the same pages your answer came from.
Connect your CMS directly for automated, ongoing sync of your site’s content. Enable CMS connectors in organization settings, then select the connector in your Agent configuration.
Ways to Add Content
Adding Files
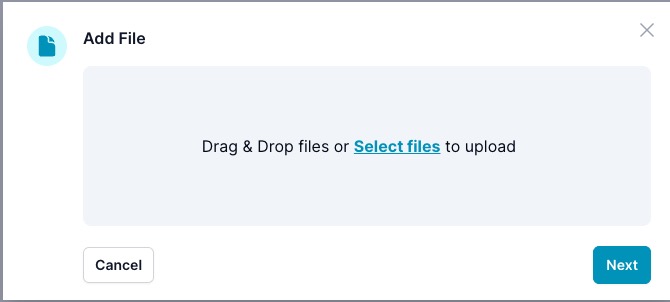
- Click
Add a new fileto upload documents (e.g., product guides, PDFs, sales decks). - Supported file types include:
.pdf,.docx,.pptx,.xlsx,.csv,.txt,.json,.markdown,.md, and more.
Adding URLs
- Use
Add URLto ingest specific web pages or resources (including YouTube videos and public documents). - Paste the URL and the content will be fetched and added to your knowledge base.
Adding Entire Websites
- Select
Add Websiteto crawl and ingest a complete site—ideal for corporate sites, knowledge bases, and large catalogs. - The system will automatically discover and pull in all linked, relevant pages.
During website ingestion, ai12z detects page languages and stores a per-language breakdown. You can view this distribution later on the Settings tab for the document.
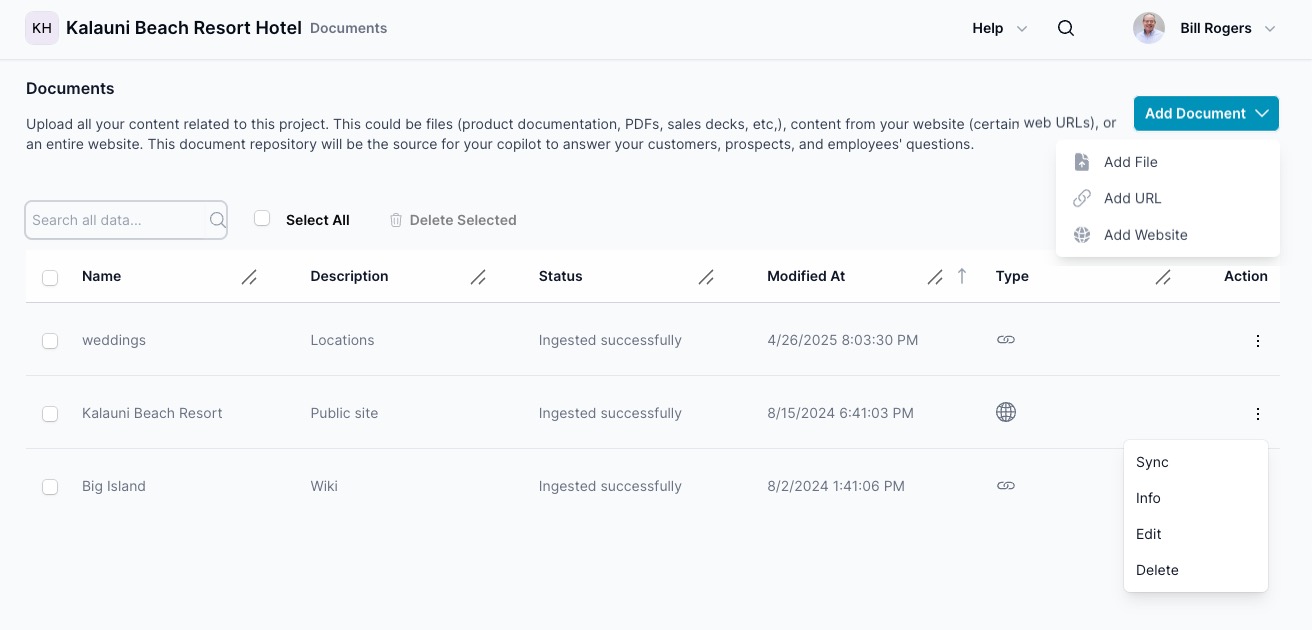
Adding and Managing Documents
- In the Documents section, click
Add Documentand choose whether to add a file, URL, or website. - Each uploaded document appears in the list with its name, description, and last modified date.
- Use the search box to quickly filter documents by title, URL, or content preview.
- Use the Action menu (three dots) for each document to:
- Info: See document details (type, size, upload date, etc.).
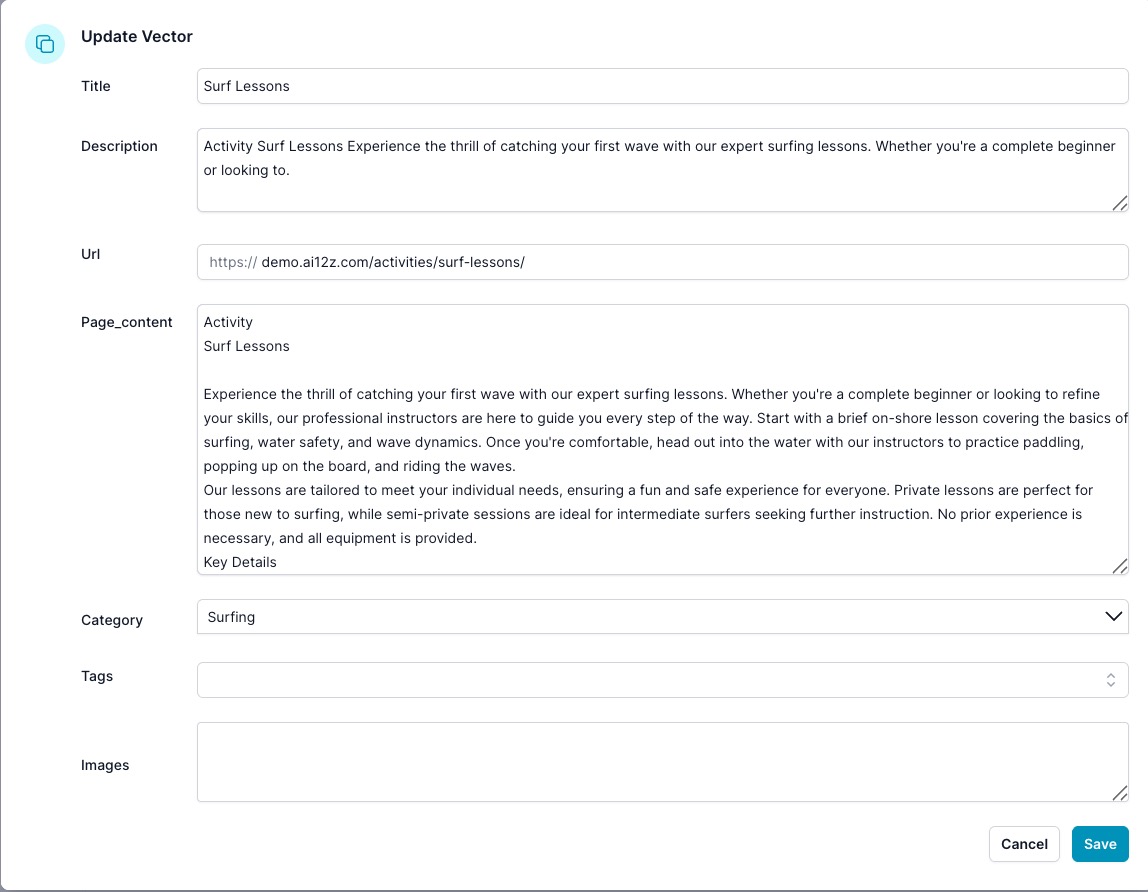
- Edit: Update the title and description
- Continue Ingest: Complete ingestion steps if you enabled features like histogram analysis.
- Sync: Check for changes and update ingested websites automatically.
- Delete: Remove obsolete or irrelevant content.
Processing Multi‑Step Ingestions (Show Histogram enabled)
If you enable Show Histogram, website ingestion runs in stages:
- ai12z generates a site map and prepares page statistics.
- You can adjust
IncludePattern/ExcludePatternfilters and languages. - Click
Continue Ingestto proceed with splitting and vectorization. - Email notifications let you know when the next step is ready and when the ingestion fully completes.
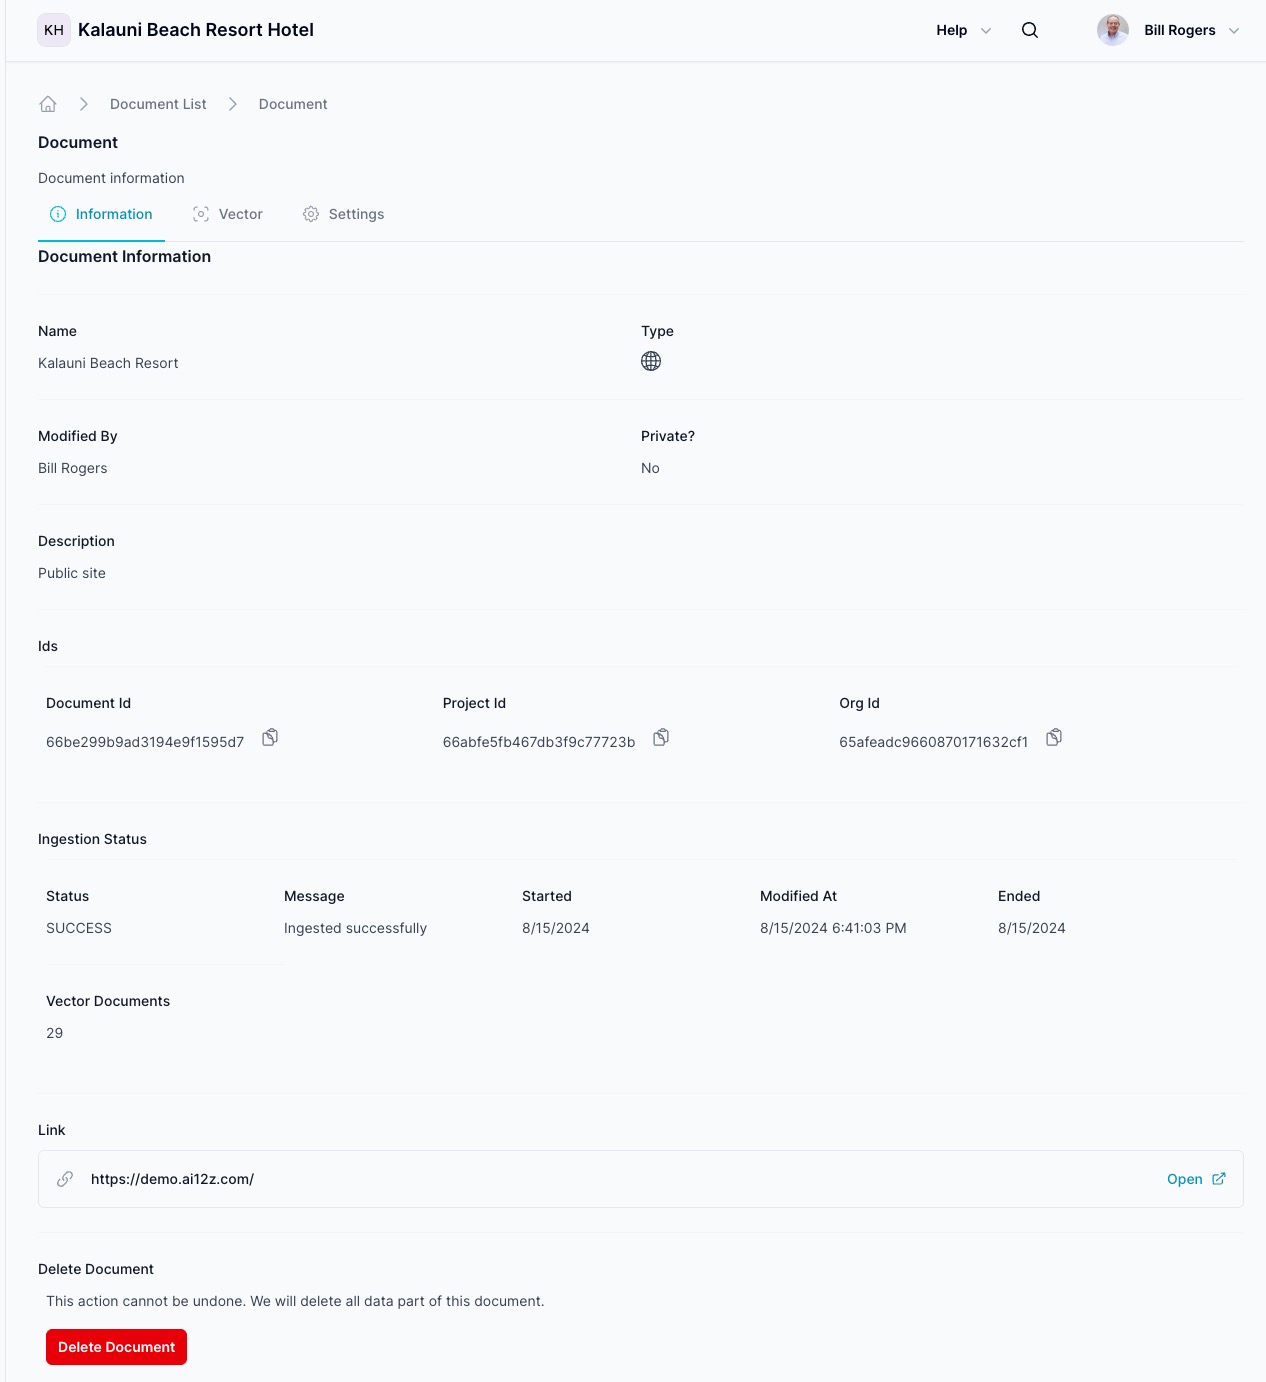
Document Status & Insights
Every document or asset has a Document Information panel with:
- Basic details (IDs, upload status, last sync).
- Tabs for Vector Documents (all processed chunks stored in the vector DB) and Settings (ingestion rules, language filters, etc.).
- A source Link back to the original URL (for websites) and a Delete Document action.
Information tab
Vector tab
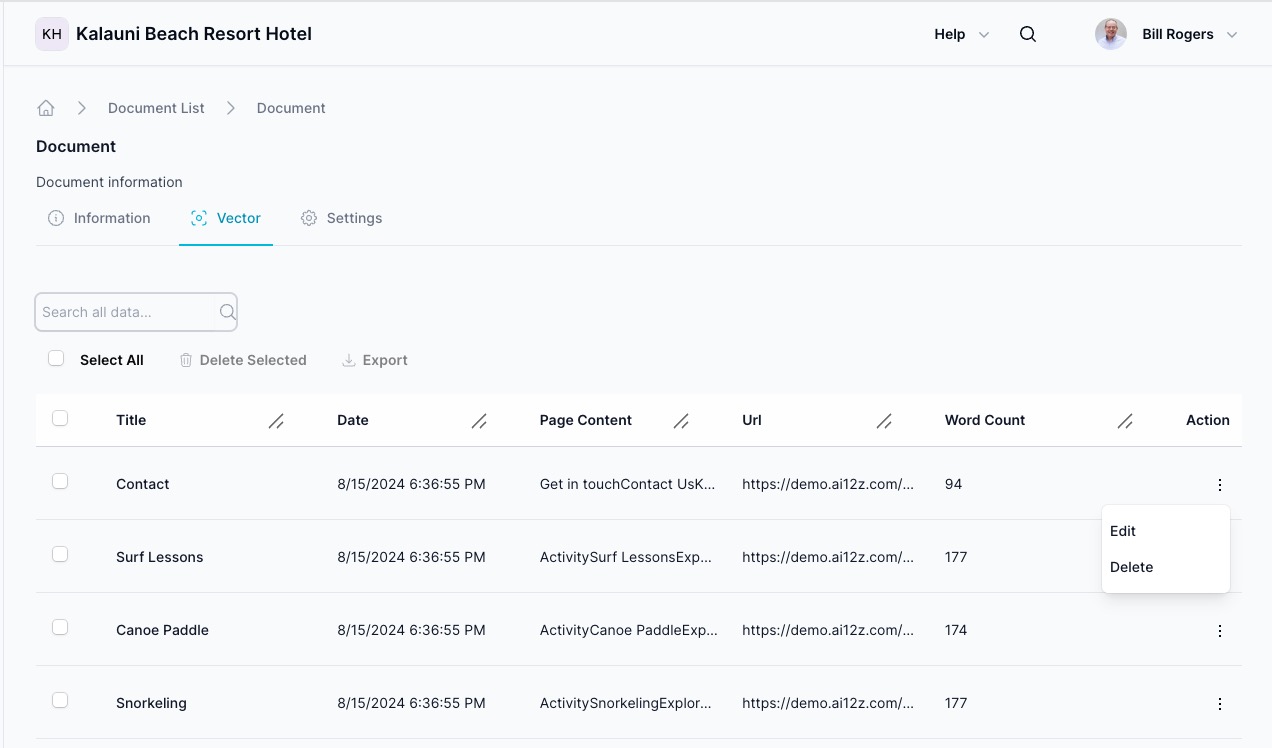
Vector Actions
- Use the search input to find vector chunks by title, URL, or text.
- Select rows to perform bulk actions like Delete Selected or Export.
- Per row actions: Edit and Delete.
Settings tab
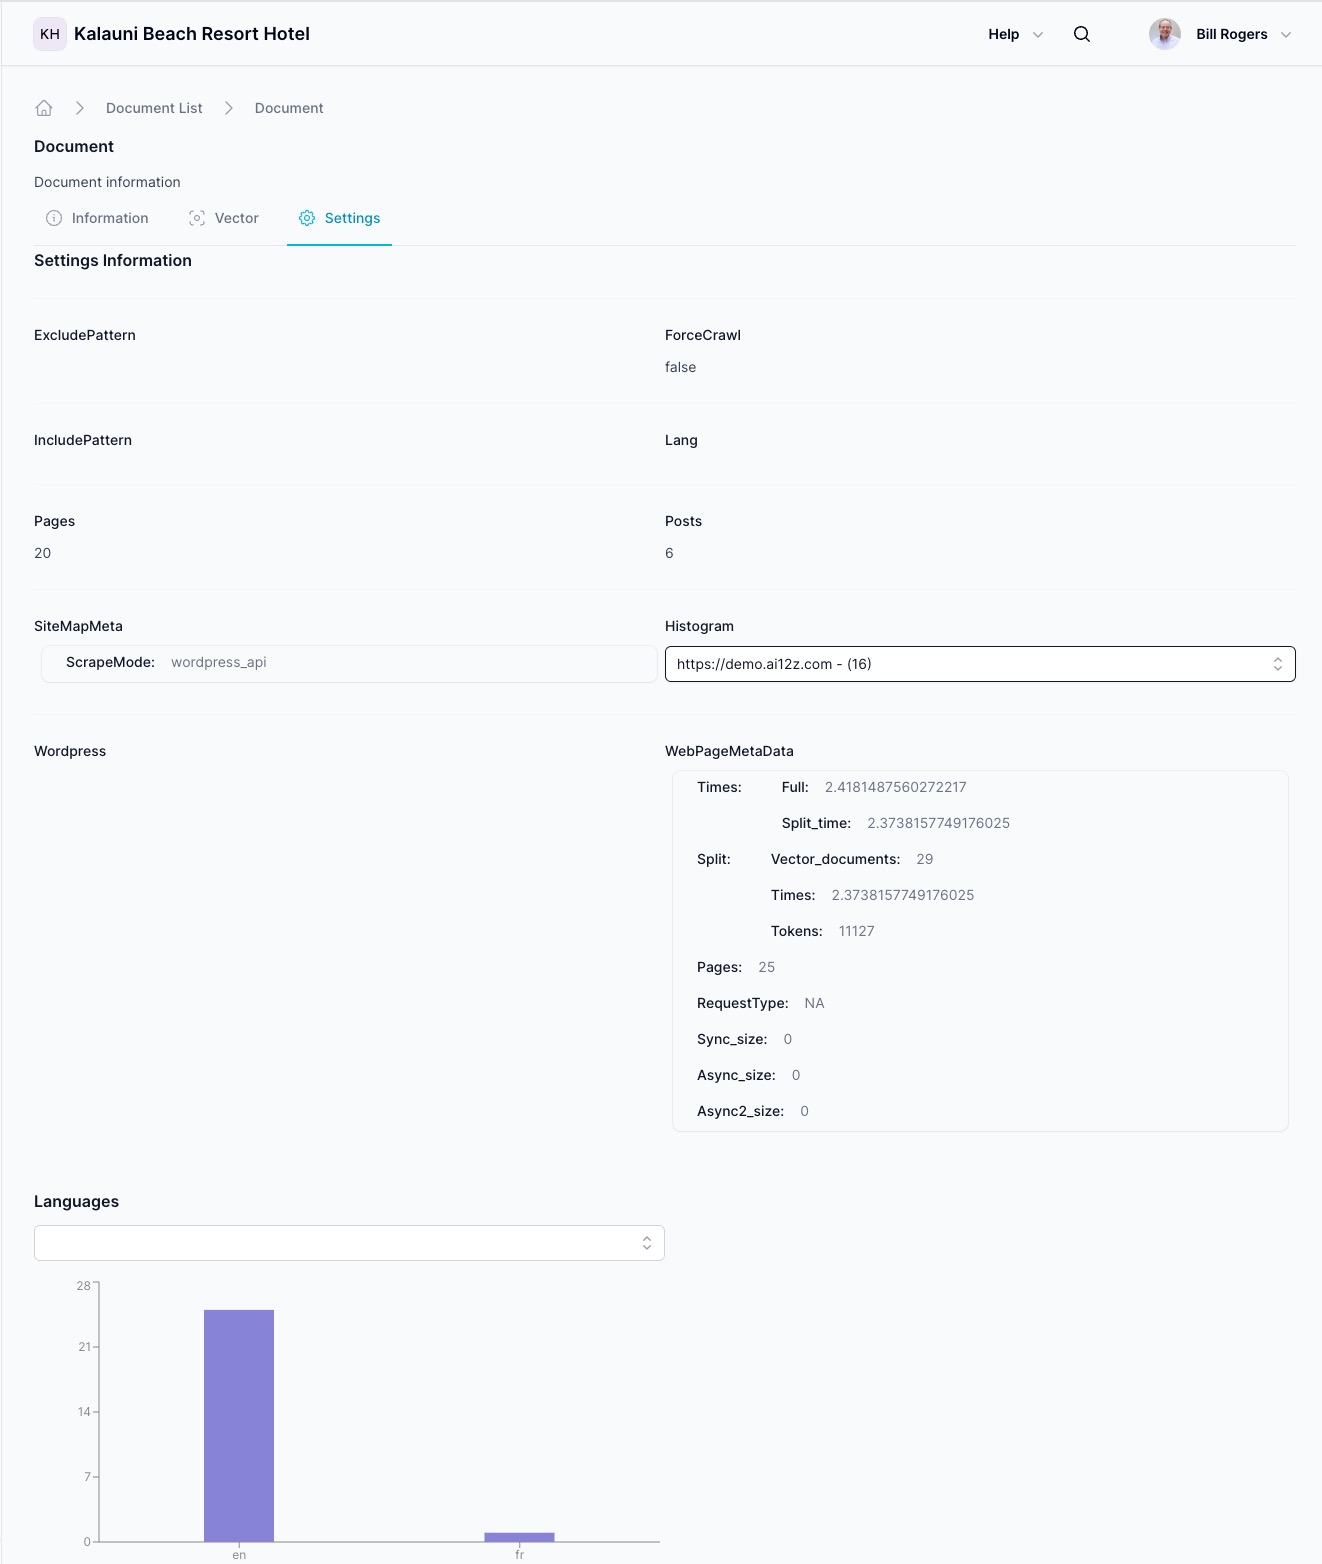
The Settings tab summarizes ingestion controls and telemetry, including:
ExcludePattern/IncludePatternForceCrawland crawl statistics (Pages,Posts)SiteMapMeta(e.g., scrape mode used such aswordpress_api)Histogramselector (if enabled)WebPageMetaDatawith times, token counts, pages processed, and request typeLanguageschart showing detected language distribution across pages
Best Practices for Document Management
- Relevance: Only upload content that aligns with the questions your Agent will receive.
- Organization: Tag and categorize documents for easier management and retrieval.
- Keep Updated: Regularly sync and update content to ensure users always receive the latest information.
- Review Frequently: Use the Info action to verify content types and details; remove outdated or duplicate files.
A well-maintained Documents section ensures your AI Agent can always access up-to-date, high-quality information—improving accuracy and user satisfaction.