Overview
The Email Sending Integration lets your agent send emails to one or many recipients with minimal setup. It works with the built‑in ai12z provider or any SMTP service (e.g., Gmail, Outlook). You can use it two ways: (1) have the LLM supply a complete HTML body, or (2) use an HTML template for consistent styling while the LLM sends only the context variables the template renders (mustache‑style).
Quick start
- Enable Send Email and open settings, test, or templates

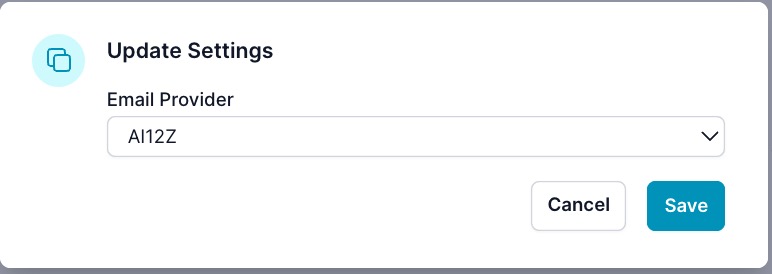
- Choose your provider
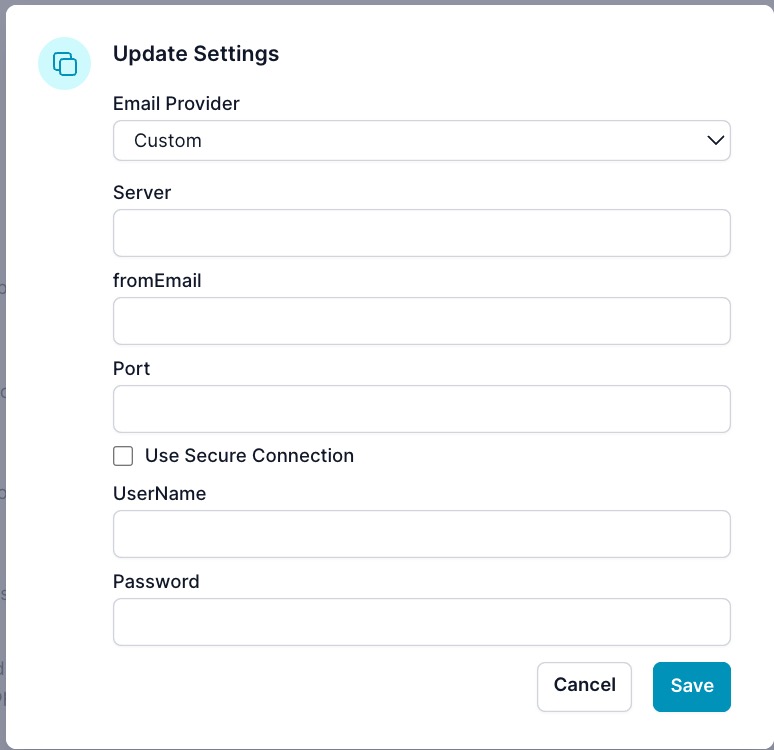
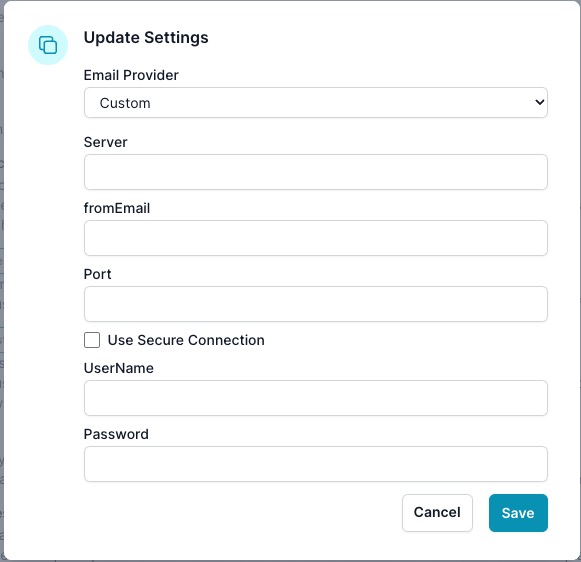
- If Custom, enter SMTP settings and Save
- Send a quick test
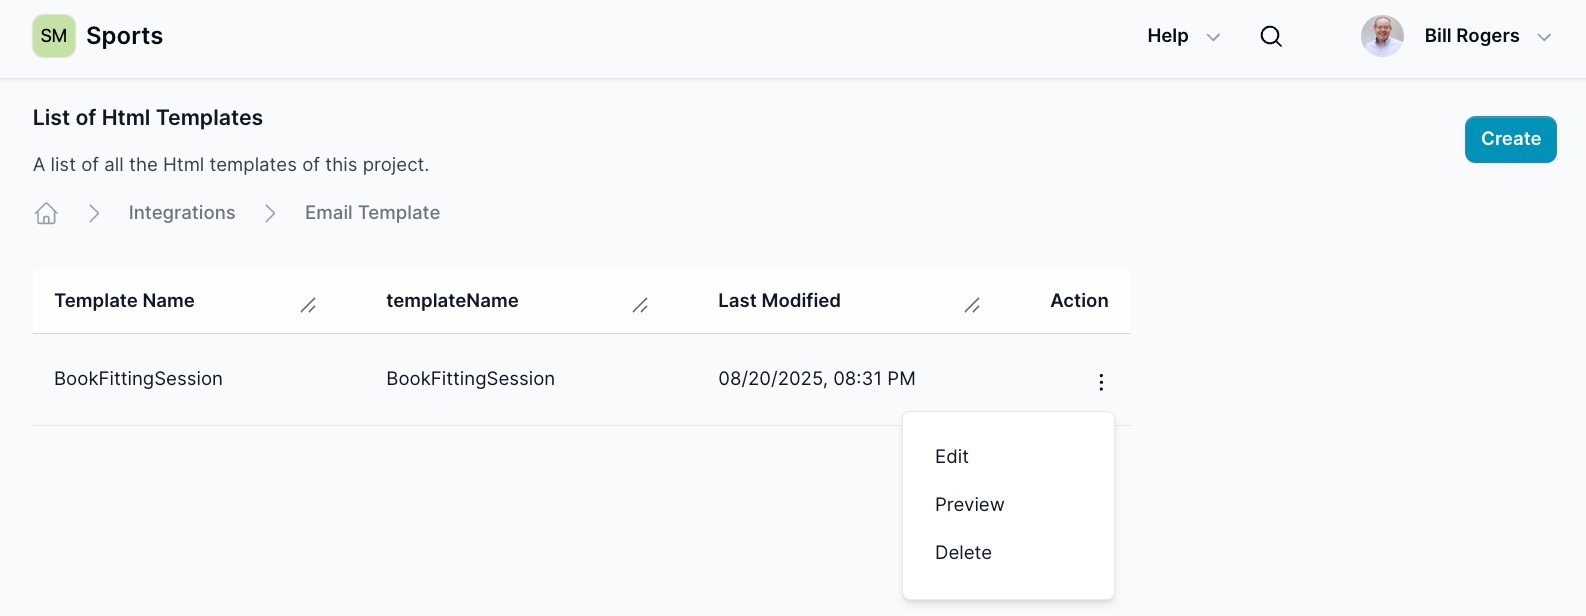
Use the link icon next to Send Email to manage templates.
Key Features
- Multiple Recipients: Send emails to one or more recipients in a single operation.
- HTML Email Support: Compose rich emails using HTML for better formatting and presentation.
- Template-Based Emails: Use pre-configured HTML templates with dynamic content rendering.
- Barcode & QR Code Generation: Automatically generate barcodes and QR codes within email templates.
- Flexible Variable Naming: Support for both clean variable names and form fields with spaces.
- Custom Email Providers: Configure and use your own email providers, including popular services like Gmail and Outlook.
- Easy Integration: As an out-of-the-box Integration, it requires no customization except connecting to your email service
Purpose
The Integration is designed to:
- Enhance Communication: Enable your Agent to send notifications, alerts, newsletters, or any email communication to users.
- Simplify Integration: Eliminate the need for complex SMTP configurations and email handling code.
- Save Time: Automate the process of sending emails, allowing you to focus on your Agent features.
How it works
- The agent calls the integration with recipients, subject, and either direct HTML or a template name plus context.
- The integration renders variables (and barcode/QR if provided) and sends using the configured provider.
Email Provider Configuration
Using ai12z as Email Provider
By default, the Integration uses the ai12z email provider, which requires minimal setup. For production, configure your own provider to ensure deliverability and compliance.
Configuring a Custom Email Provider
You should use your own email provider, (e.g., Gmail, Outlook, or a custom SMTP server), as the ai12z is used for prototyping your application. Follow these steps:
-
Access Email Settings:
- Navigate to your ai12z Copilot portal.
- Go to Agent Settings.
- Select the Email tab to configure your email provider.
-
Fields to Configure:
- Email Provider: Choose
Customor select a pre-configured provider if available. - Server: Enter your SMTP server address.
- Gmail:
smtp.gmail.com - Outlook:
smtp.office365.com - Custom Server: Your SMTP server domain (e.g.,
smtp.yourdomain.com)
- Gmail:
- fromEmail: Specify the email address you want to send emails from.
- Port: Enter the SMTP port number.
- Common ports:
587for TLS465for SSL25for non-encrypted connections
- Common ports:
- Use Secure Connection: Check this box if your provider requires a secure connection (TLS/SSL).
- UserName: Your email account username (typically your email address).
- Password: The password for your email account.
-
Save your settings
- Click Save to apply your settings.
- Ensure your credentials and server details are correct to enable successful email sending.
-
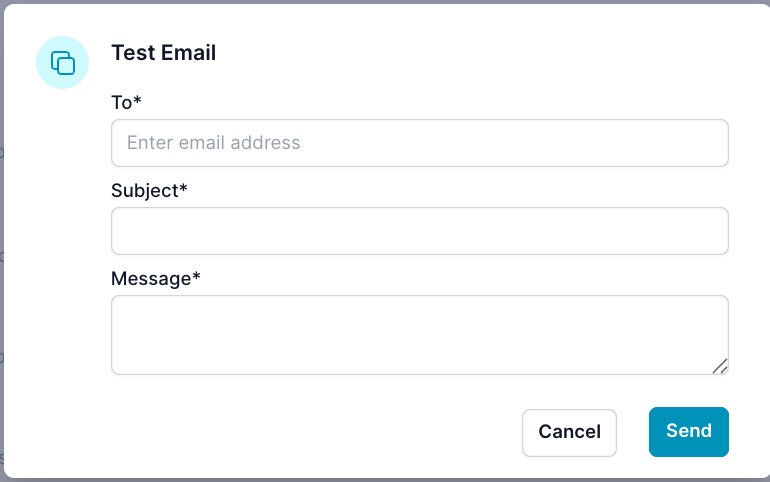
Send a test email
- Send a test email to verify that the settings work correctly.
- Navigate to the test email section under the email settings or trigger an action that sends an email.
Example Configurations
Gmail Setup:
- Server:
smtp.gmail.com - Port:
587 - Use Secure Connection: Checked (TLS)
- UserName: Your Gmail email address (e.g.,
youremail@gmail.com) - Password: Your Gmail password (consider using an app-specific password if 2-step verification is enabled)
Outlook Setup:
- Server:
smtp.office365.com - Port:
587 - Use Secure Connection: Checked (TLS)
- UserName: Your Outlook email address (e.g.,
youremail@outlook.com) - Password: Your Outlook password
Custom Server Setup:
- Server: Your custom SMTP server (e.g.,
smtp.yourdomain.com) - Port: Based on your server settings (usually
587or465) - Use Secure Connection: Depends on your server configuration
- UserName: Your email address or username
- Password: Your email account password
Parameters
When the LLM invoking the Email Sending Integration, it can specify the following parameters:
-
recipients (array of strings, required): A list of email addresses to send the email to. For example:
["user1@example.com", "user2@example.com"]. -
subject (string, required): The subject line of the email.
-
body_html (string, optional): The HTML content of the email body when sending direct HTML. Allows for rich text formatting and inclusion of images, links, and other HTML elements.
-
templateName (string, optional): The name of the HTML template to use for rendering the email. Use this when using templates stored in your ai12z configuration.
-
context (object, optional): A dictionary of data to fill into the template when using templateName. Contains variables like firstName, lastName, phone, etc. Special variables for barcode/QR generation:
barcode_number: Will automatically generate a barcode image accessible as{{ barcode_img }}qrcode_text: Will automatically generate a QR code image accessible as{{ qrcode_img }}
Important: Use EITHER body_html (for direct HTML content) OR templateName with context (for template-based emails). If no templateName or context is available in the system, you MUST use body_html with direct HTML content.
Email Templates
Templates allow you to create reusable email designs where the LLM only needs to provide variable values, not generate the entire email content. This approach is more efficient, consistent, and professional.
Managing Templates
Manage templates from the link icon next to Send Email in the integrations interface.
The ai12z Email Integration supports flexible template rendering that adapts to different variable naming conventions (snake_case or names with spaces).
Creating Templates with AI Assistance
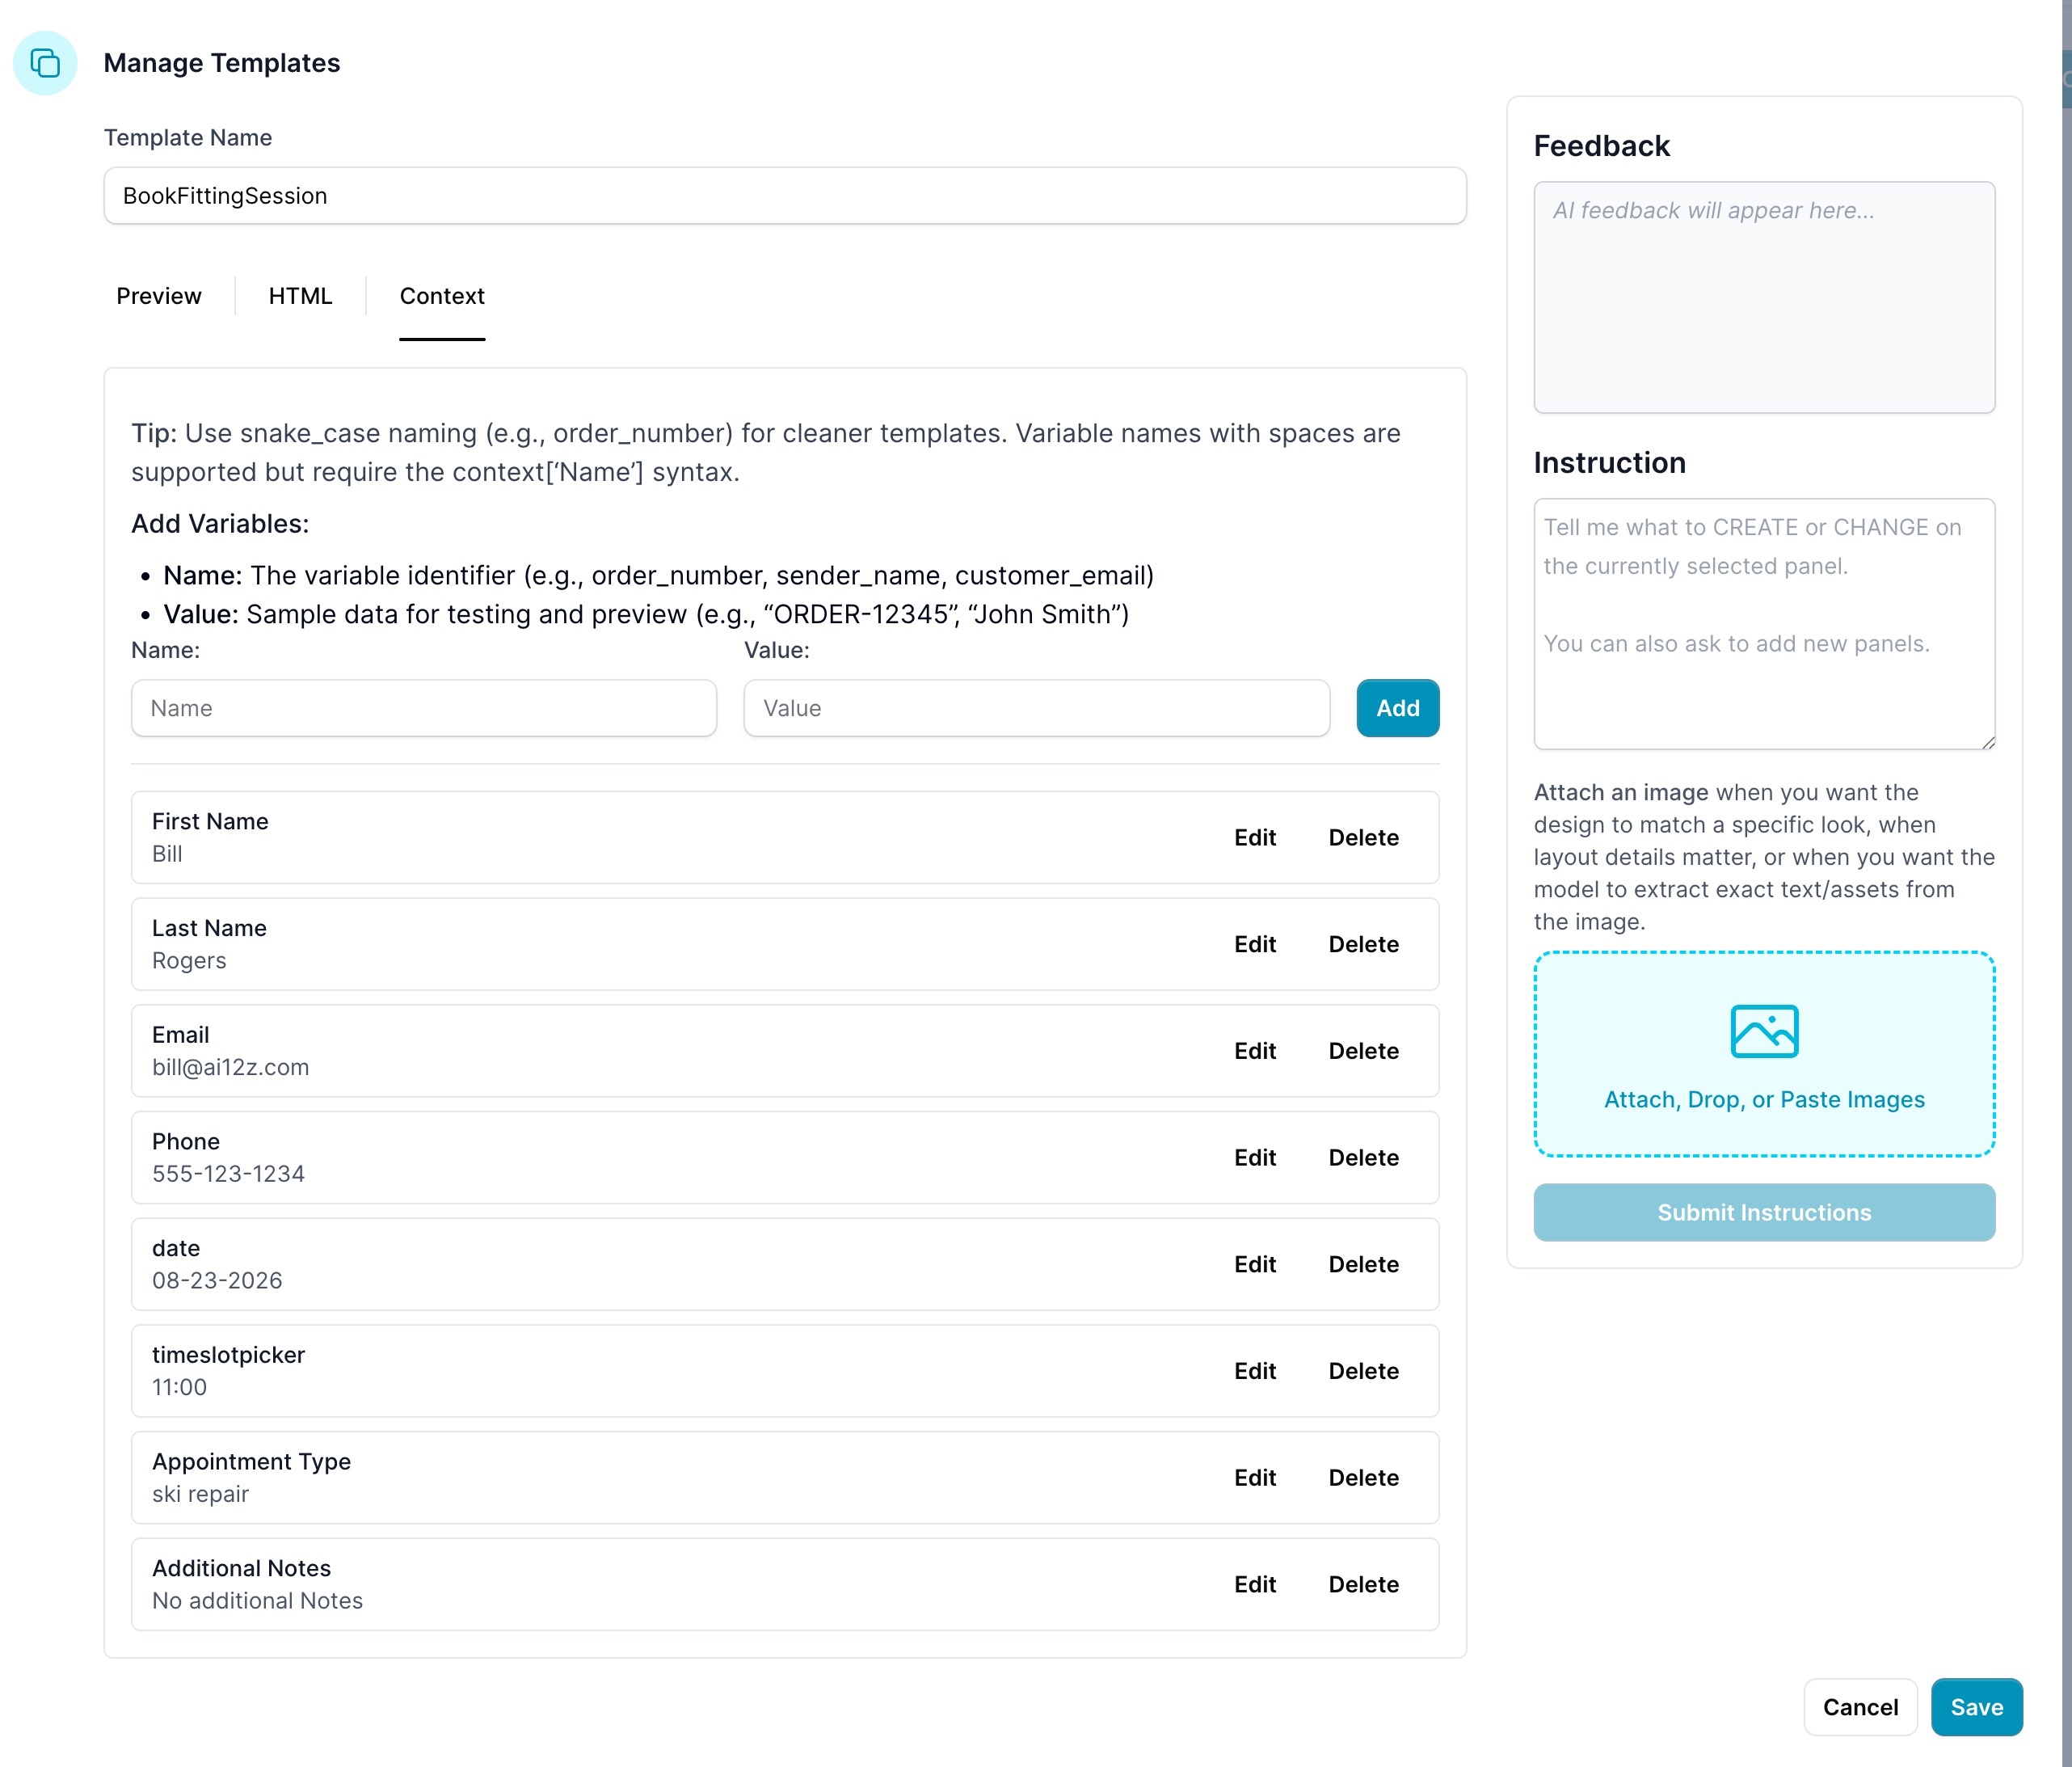
Step 1: Define Template Context
First, create the context variables that the LLM will populate:
Step 2: Provide AI Instructions
Describe your template requirements using clear action verbs like Add, Remove, Rewrite, Match, Format, and Enforce.
Example Instructions:
- "Create a return confirmation email for
productReturn" - "Match our brand tone: friendly, concise, professional"
- "Add sections: Greeting, Summary, Return Steps, Order Details, Support/Contact"
- "Enforce: only show optional fields (tracking_number, exchange_product_for, size/color) when present"
- "Format: subject line + preheader + body; include a clear CTA button (e.g., 'Download Label' or 'Track Return')"
- "Rewrite: shorten to under 150 words and keep bullets scannable"
- "Review this email for clarity, tone, and missing variables—no code changes" (feedback only)
Variable Naming Best Practices
✅ Recommended: snake_case
first_name, last_name, email_address, phone_number
order_id, shipping_address, billing_info, customer_notes
product_sku, order_date, appointment_time
❌ Avoid: Spaces, Hyphens, Special Characters
"First Name", "last-name", "emailAddress", "Phone#"
"Customer's Notes", "product/sku", "order.date"
Template Syntax Examples
Direct Access (snake_case variables)
<!doctype html>
<html>
  <body>
    <h1>Hello {{ first_name }} {{ last_name }}!</h1>
    <p>Your order {{ order_number }} is confirmed.</p>
    <p>Email: {{ email_address }}</p>
    <p>Phone: {{ phone_number or 'Not provided' }}</p>

    {% if shipping_address %}
    <p>Shipping to: {{ shipping_address }}</p>
    {% endif %}
  </body>
</html>
Context Access (for variables with spaces)
When integrating with forms that have field names with spaces, use context-based access:
<!doctype html>
<html>
  <body>
    <h1>Hello {{ context['First Name'] }} {{ context['Last Name'] }}!</h1>
    <p>Your order {{ context.get('Order Number', 'N/A') }} is confirmed.</p>
    <p>Email: {{ context['Email Address'] }}</p>
    <p>Phone: {{ context.get('Phone Number', 'Not provided') }}</p>

    {% if context.get('Shipping Address') %}
    <p>Shipping to: {{ context['Shipping Address'] }}</p>
    {% endif %}
  </body>
</html>
Template Rendering Process
The system uses intelligent rendering that automatically selects the best approach:
try:
    # Try direct variable access first (faster, cleaner)
    rendered_html = Template(html_template).render(**context)
except TypeError:
    # Fall back to context-based access (handles spaces in variable names)
    rendered_html = Template(html_template).render(context=context)
When to Use Each Approach
Direct Access ({{ variable_name }}):
- Creating new templates with clean variable names
- You control the variable naming convention
- Variable names follow snake_case convention
Context Access ({{ context['Variable Name'] }}):
- Integrating with external forms or systems
- Variable names contain spaces or special characters
- Need graceful handling of missing variables with
.get()
Barcode and QR Code Generation
The email system automatically generates barcode and QR code images when specific context variables are provided:
Barcode Generation
Add barcode_number to your context to automatically generate a Code128 barcode:
"context": {
  "barcode_number": "203865",
  "order_number": "ORD-12345"
}
The system will automatically create a barcode_img variable containing a base64-encoded PNG image:
<!-- In your email template -->
{% if barcode_img %}
<div class="barcode-section">
  <img
    src="{{ barcode_img }}"
    alt="Barcode"
    style="width: 200px; height: 50px;"
  />
  <div class="barcode-number">{{ barcode_number }}</div>
</div>
{% endif %}
QR Code Generation
Add qrcode_text to your context to automatically generate a QR code:
"context": {
  "qrcode_text": "https://tracking.example.com/?id=203865",
  "tracking_url": "https://tracking.example.com/?id=203865"
}
The system will automatically create a qrcode_img variable:
<!-- In your email template -->
{% if qrcode_img %}
<div class="qr-section">
  <p>Scan to track your order:</p>
  <img
    src="{{ qrcode_img }}"
    alt="QR Code"
    style="width: 100px; height: 100px;"
  />
</div>
{% endif %}
Combined Example
"context": {
  "order_number": "ORD-12345",
  "barcode_number": "203865",
  "qrcode_text": "https://tracking.example.com/?id=203865",
  "customer_name": "John Doe"
}
<div class="tracking-section">
  <h2>Order {{ order_number }} for {{ customer_name }}</h2>

  {% if barcode_img %}
  <div class="barcode">
    <img src="{{ barcode_img }}" alt="Barcode" />
    <p>Barcode: {{ barcode_number }}</p>
  </div>
  {% endif %} {% if qrcode_img %}
  <div class="qr-code">
    <p>Quick tracking:</p>
    <img src="{{ qrcode_img }}" alt="QR Code" />
  </div>
  {% endif %}
</div>
Usage Examples
Example 1: Direct HTML Email
{
  "function": "send_users_email",
  "parameters": {
    "recipients": ["user1@example.com", "user2@example.com"],
    "subject": "Welcome to Our Service",
    "body_html": "<h1>Welcome!</h1><p>Thank you for joining our service.</p>"
  }
}
This example:
- Sends an email with the subject "Welcome to Our Service" to two recipients
- Uses the provided HTML content as the email body
- Returns a success message upon completion
Example 2: Template-Based Email with Form Integration
When receiving a "Book_a_Fitting_Session" form submission:
{
  "function": "send_users_email",
  "parameters": {
    "recipients": ["bill@ai12z.com"],
    "subject": "Your Fitting Appointment is Confirmed",
    "templateName": "BookFittingSession",
    "body_html": null,
    "context": {
      "First Name": "Bill",
      "Last Name": "Rogers",
      "Email": "bill@ai12z.com",
      "Phone": "555-123-1234",
      "date": "08-23-2025",
      "timeslotpicker": "11:00",
      "Appointment Type": "ski repair",
      "Additional Notes": "Please bring your skis 30 minutes early",
      "barcode_number": "APT20250823",
      "qrcode_text": "https://appointments.example.com/check-in?id=APT20250823"
    }
  }
}
Key Points:
templateNamemust exactly match the configured template name- Set
body_htmltonullwhen using templates contextcontains form data with exact field names- This template uses context-based access due to spaces in field names
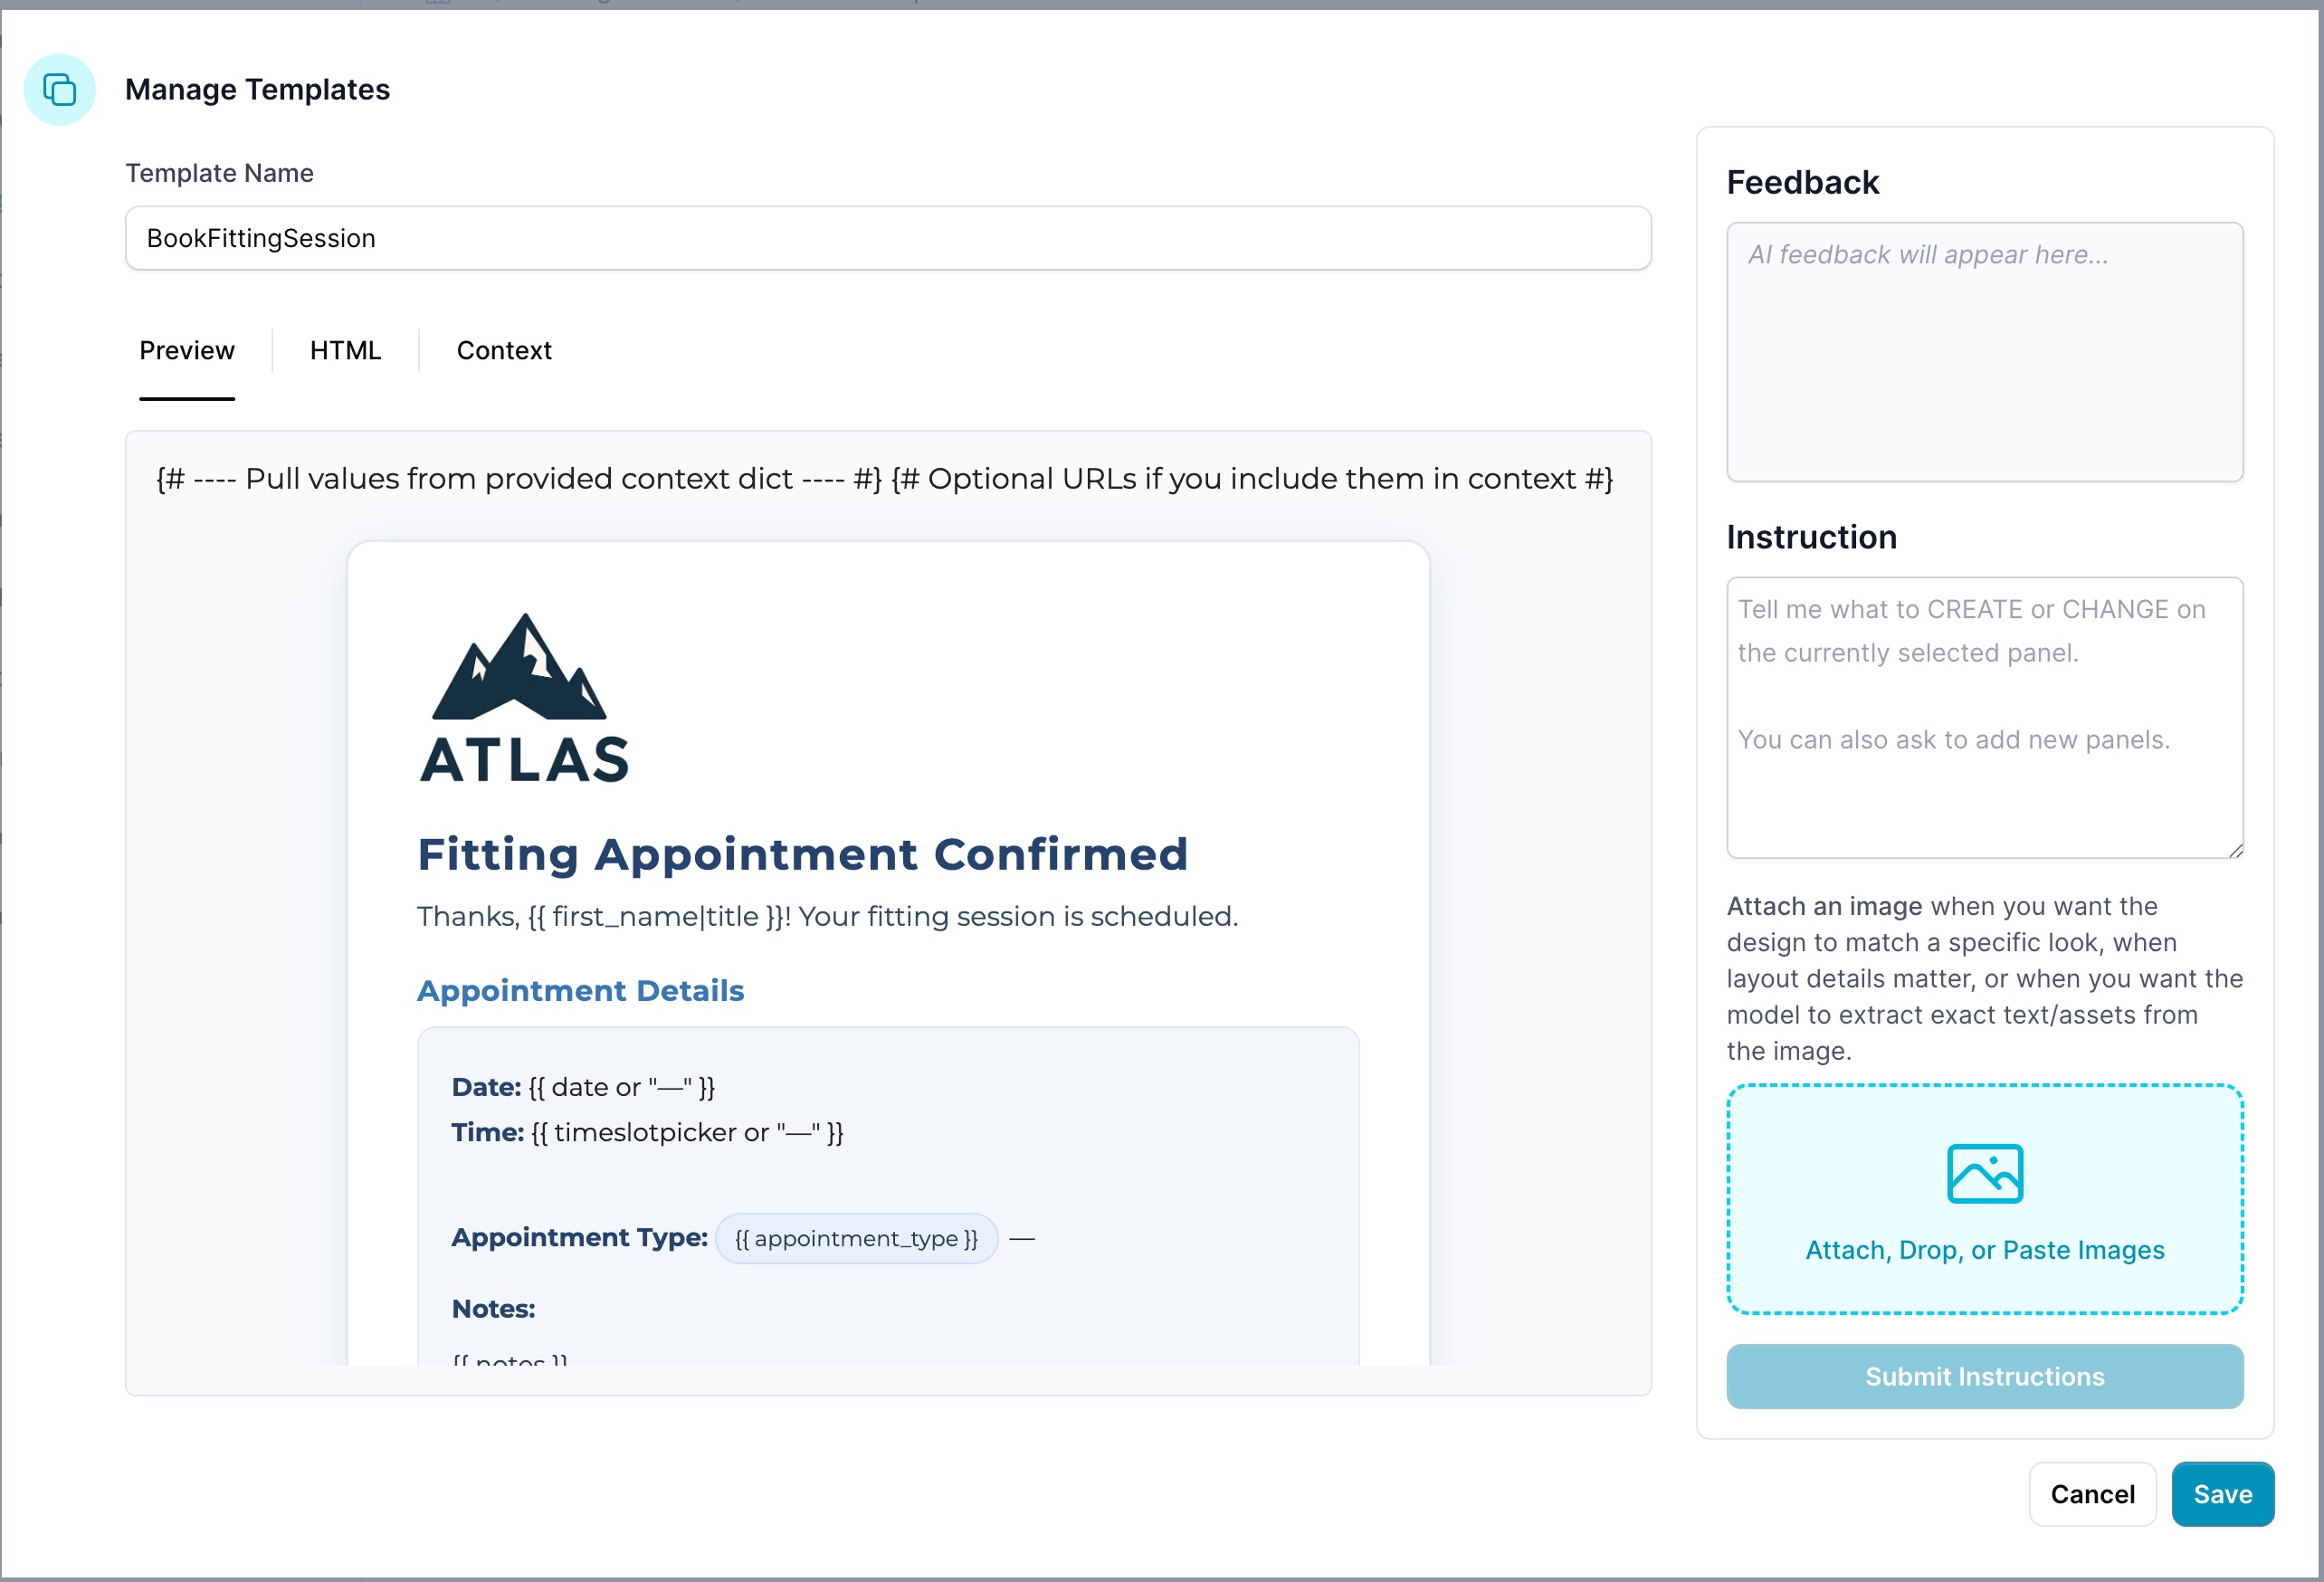
BookFittingSession Template Structure
The BookFittingSession.html template uses context-based variable access because the form fields contain spaces:
{# Template variables with context-based access #} {% set first_name =
context.get('First Name') %} {% set last_name = context.get('Last Name') %} {%
set email = context.get('Email') %} {% set phone = context.get('Phone') %} {%
set date = context.get('date') %} {% set timeslotpicker =
context.get('timeslotpicker') %} {% set appointment_type=
context.get('Appointment Type') %} {% set notes = context.get('Additional
Notes') %}

<!-- Email content uses the extracted variables -->
<h1>Fitting Appointment Confirmed</h1>
<p>
  Thanks{% if first_name %}, {{ first_name|title }}{% endif %}! Your fitting
  session is scheduled.
</p>

<div class="appointment-details">
  <div><strong>Date:</strong> {{ date or "—" }}</div>
  <div><strong>Time:</strong> {{ timeslotpicker or "—" }}</div>
  <div><strong>Type:</strong> {{ appointment_type or "—" }}</div>
  {% if notes %}
  <div><strong>Notes:</strong> {{ notes }}</div>
  {% endif %}
</div>

<!-- Barcode and QR Code section -->
{% if context.get('barcode_img') or context.get('qrcode_img') %}
<div
  class="check-in-section"
  style="margin-top: 20px; padding: 15px; background: #f8f9fa; border-radius: 8px;"
>
  <h3>Easy Check-In</h3>

  {% if context.get('barcode_img') %}
  <div class="barcode" style="margin: 10px 0;">
    <p><strong>Appointment Barcode:</strong></p>
    <img
      src="{{ context['barcode_img'] }}"
      alt="Appointment Barcode"
      style="max-width: 200px; height: auto;"
    />
    <p style="font-family: monospace; font-size: 12px;">
      {{ context.get('barcode_number', '') }}
    </p>
  </div>
  {% endif %} {% if context.get('qrcode_img') %}
  <div class="qr-code" style="margin: 10px 0;">
    <p><strong>Quick Check-In:</strong></p>
    <img
      src="{{ context['qrcode_img'] }}"
      alt="Check-in QR Code"
      style="width: 80px; height: 80px;"
    />
    <p style="font-size: 12px;">Scan to check in when you arrive</p>
  </div>
  {% endif %}
</div>
{% endif %}
Agent Configuration Example
Include these instructions in your agent's system prompt:
When a user submits a "Book_a_Fitting_Session" form:

1. Extract all form data exactly as submitted (preserve field names with spaces)
2. Call send_users_email with:
   - recipients: [user's email from form]
   - subject: "Your Fitting Appointment is Confirmed"
   - templateName: "BookFittingSession"
   - body_html: null
   - context: All form fields exactly as received
3. Do not modify field names or values
4. The template handles formatting and display
5. Confirm to the user that their appointment email has been sent
Example 3: Choosing Between Template and Direct HTML
Use template when available:
{
  "templateName": "BookFittingSession",
  "context": {
    /* form data */
  },
  "body_html": null
}
Use direct HTML when no template exists:
{
  "templateName": null,
  "context": null,
  "body_html": "<h1>Appointment Confirmed</h1><p>Your fitting session is scheduled...</p>"
}
Benefits
- Enhanced Communication: Streamline user communication directly from your application
- Time Savings: Reduce development time with a ready-made email solution
- Template System: Create consistent, professional emails with reusable templates
- Flexible Variables: Support for both snake_case and space-separated variable names
- Rich Features: Built-in barcode and QR code generation
Limitations
- Email Provider Restrictions: Providers may have sending limits or require additional authentication (e.g., app-specific passwords for Gmail)
- Spam Compliance: Ensure compliance with anti-spam laws and regulations (e.g., CAN-SPAM Act)
- Configuration Required: SMTP settings must be properly configured for your email provider
Troubleshooting
If emails are not being sent:
- Check Configuration: Verify SMTP server, port, and credentials are correct. Click
Test Emailto verify - Secure Connection: Confirm that TLS/SSL settings match your provider's requirements
- Network Settings: Ensure your network allows SMTP connections to the specified server and port
- Provider Limitations: Check for sending limits or additional authentication requirements
- Template Errors: Verify that variable names in templates match the context data being passed
Support
For assistance or questions:
- Documentation: Refer to the ai12z documentation for detailed information
- Contact: Reach out to our support team at support@ai12z.com
The Email Sending Integration enables seamless email communication in your applications, enhancing user engagement with minimal development effort.