PDF Generator
Overview
Generate downloadable PDFs from customizable HTML templates. Common use cases include shipping labels, invoices, and confirmations. Templates support variables, conditional blocks, and embedded barcodes/QR codes.
Step 1: Enable the PDF Generator
- Go to your project’s Integrations page.
- Under “Out-of-the-Box Integrations,” enable PDF Generator (HTML Template).

- Click the link icon to open the template list.
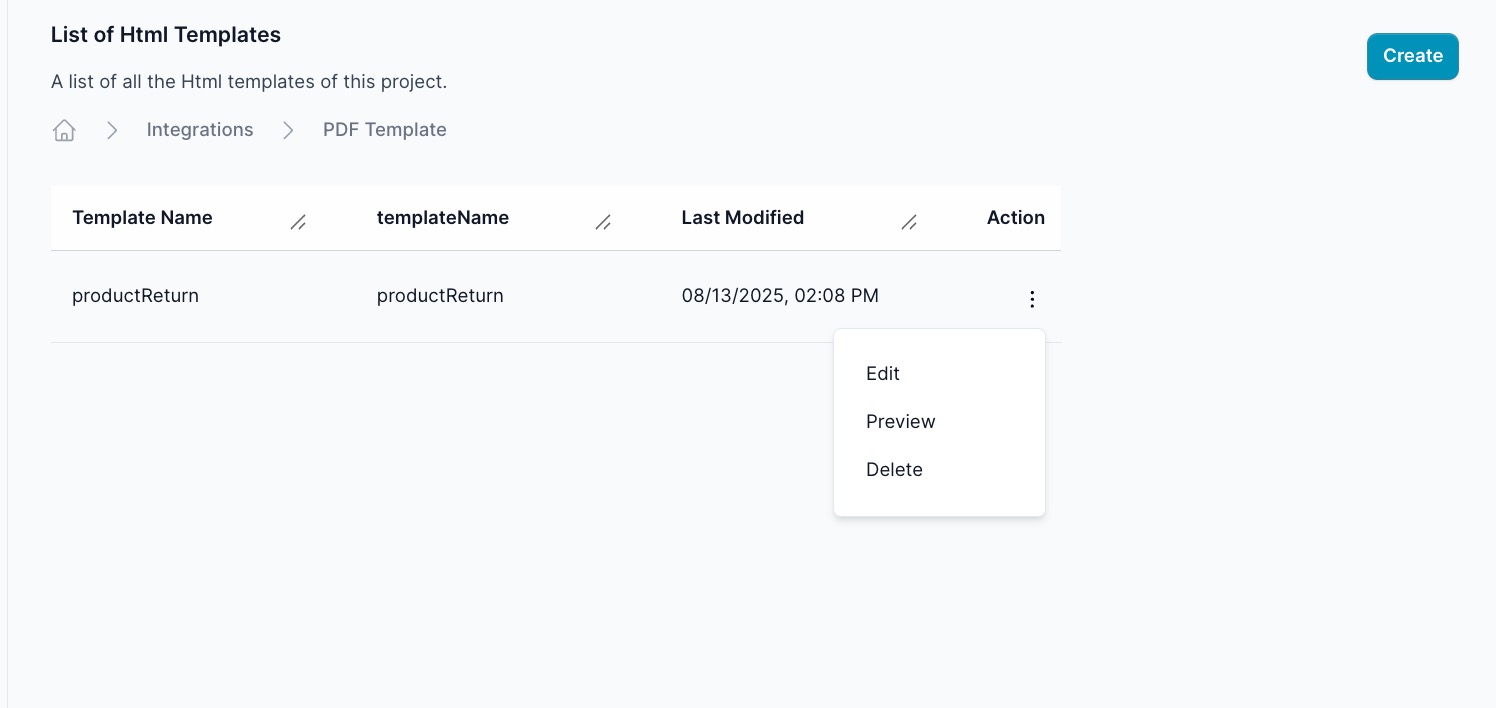
Step 2: Create a template
- Click Create.
- Enter a Template Name (for example,
productReturn). - Add context
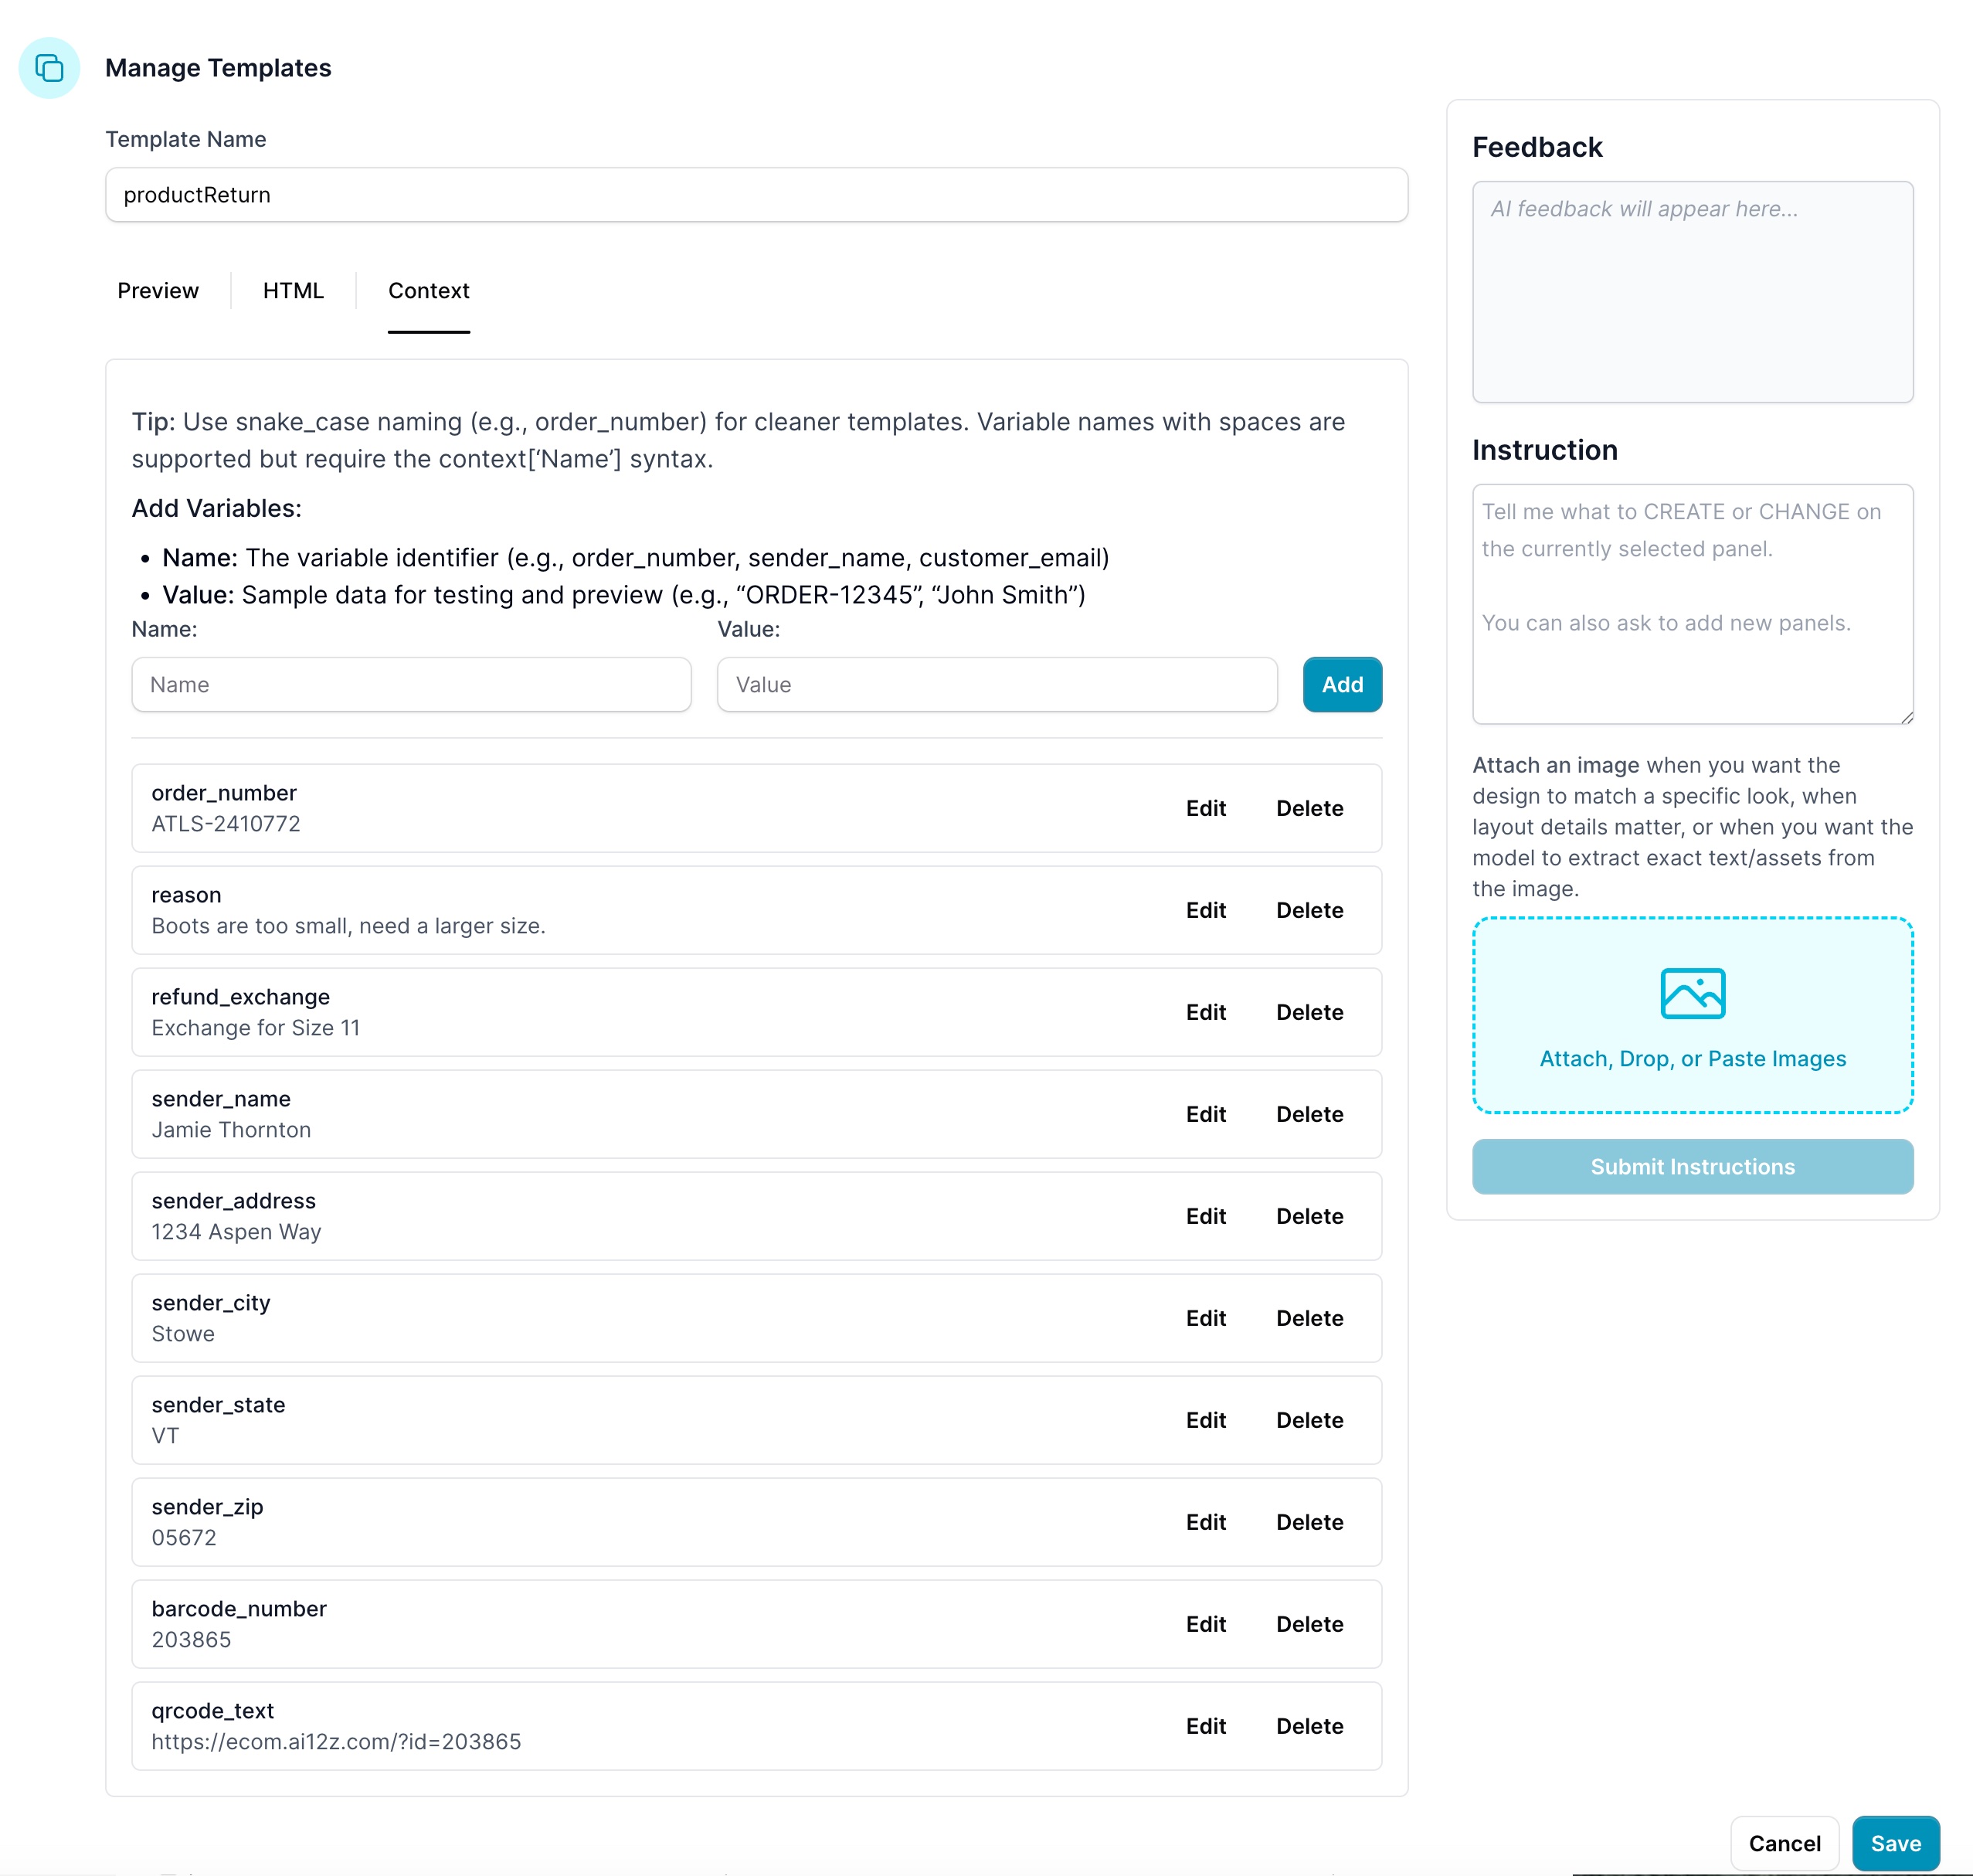
- Vibe code In the instructions describe the purpose of the template to be include logos, address, other context.
Describe what this PDF template is for and what you want changed. Use verbs like Add / Remove / Rewrite / Match / Format / Enforce.
Examples:
- “Create a return shipping label for template
productReturn.” - “Match the attached screenshot: logo + title, From/To columns, tracking, barcode + QR.”
- “Add an Order Details section: order_number, reason, refund_exchange (show optional fields only if present).”
- “Enforce: hide barcode/QR blocks unless barcode_img/qrcode_img exists.”
- “Rewrite styling to be clean/modern ‘Atlas’ and print-friendly.”
Feedback only: “Review this template for layout, missing variables, and PDF best practices—no code changes.”
Tip: Prefer snake_case variables (sender_name). If fields include spaces, use context['Field Name'].
- Click Save.
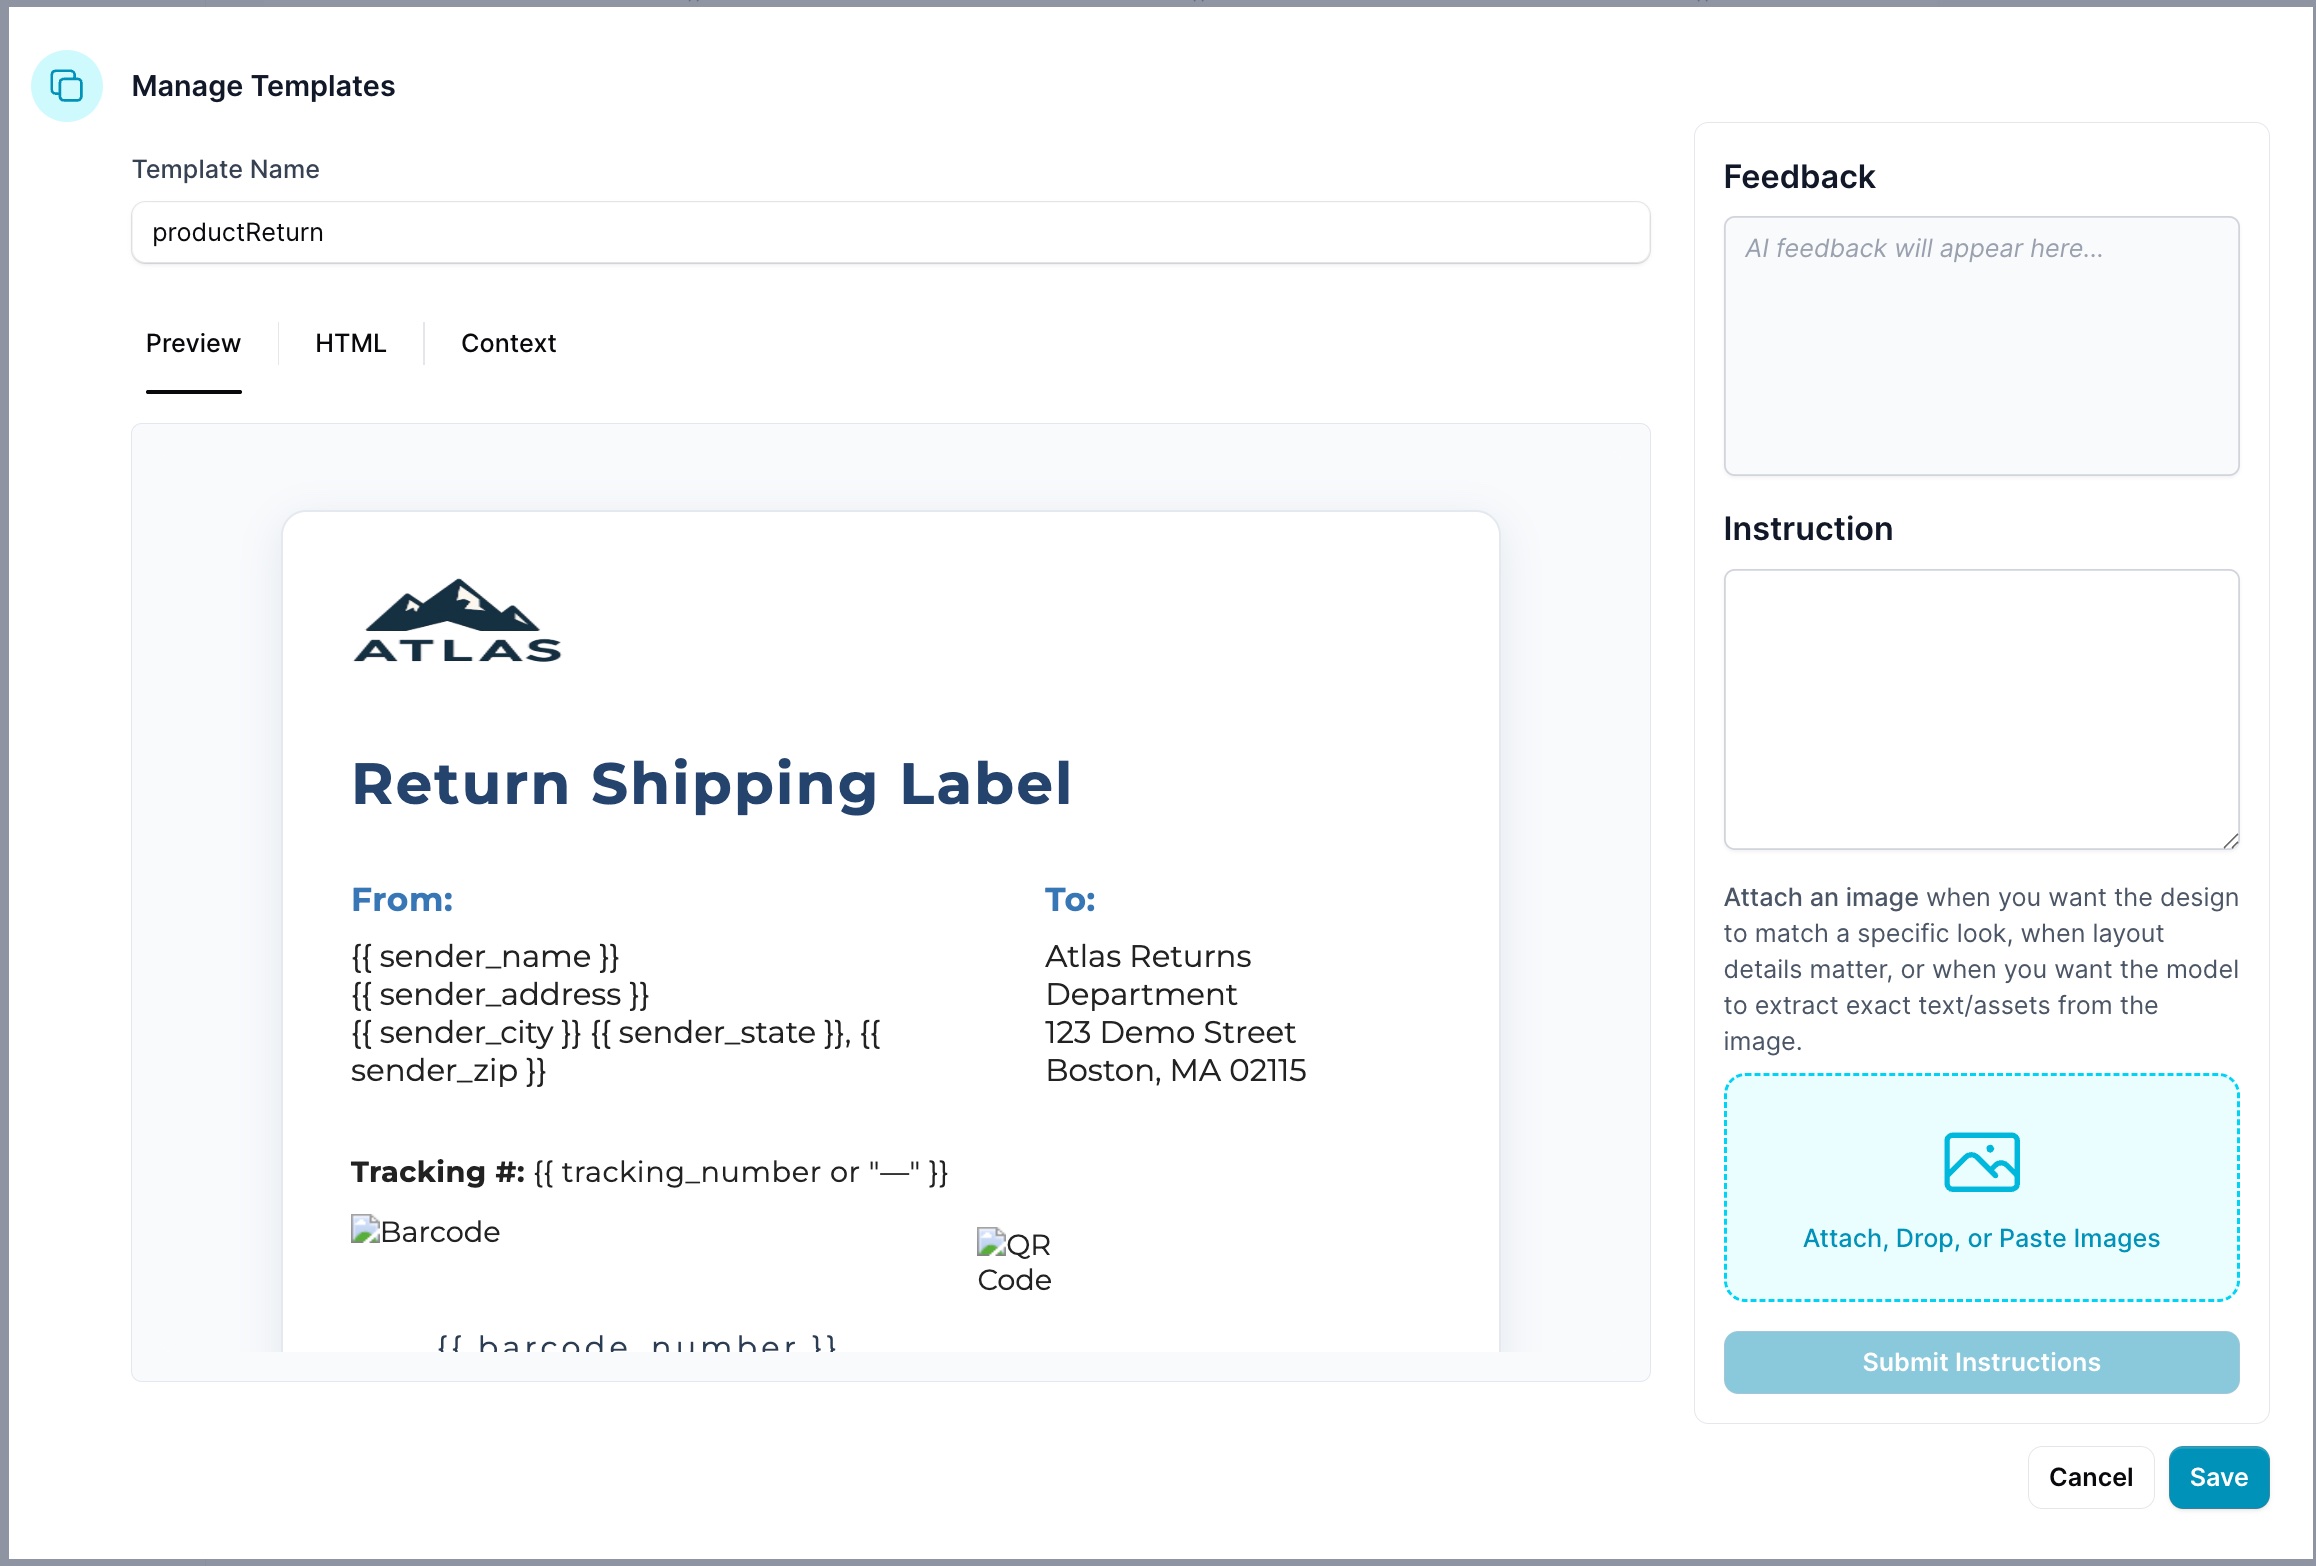
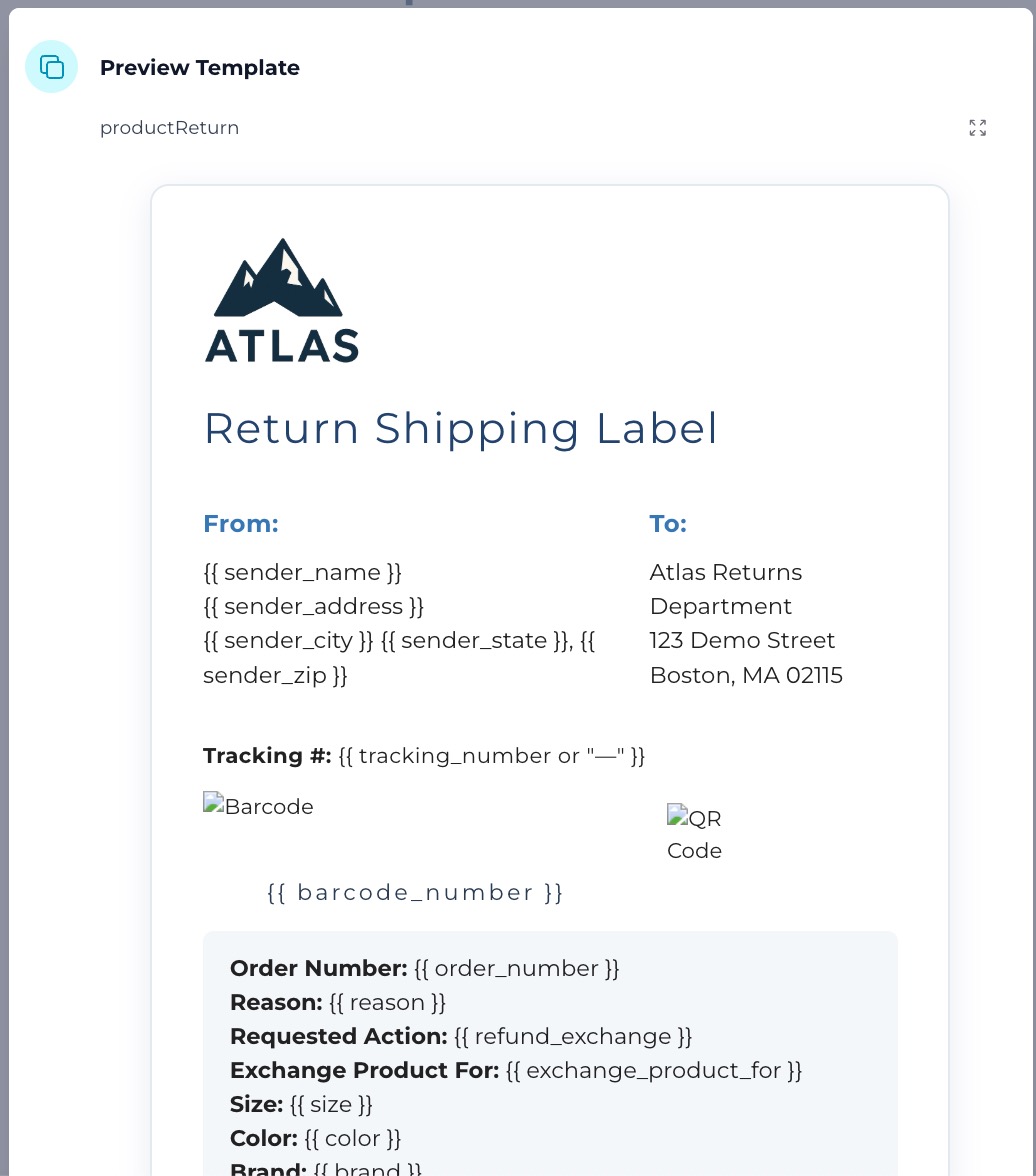
Preview your template to verify layout and variables resolve.
Tip: You can use the sample HTML template below as a starting point.
Step 3: ReAct system Prompt
Add information below to the ReAct system prompt:
Returning Products
When Make_a_Return_of_a_product submits data, call the template_to_pdf function The form will give you a little extra data that needs to combined when sending the context data The template_to_pdf expects a context that you will create from the form data, for now hard code the "barcode_number" to "203865". "qrcode_text" hard code to "https://ecom.ai12z.com/?id=203865"
template_to_pdf
Use the templateName it is required: "templateName" : "productReturn" hard code to use this value.
context is a required parameter for template_to_pdf function. The values are just an example do not use these values, use what comes from the form
"context": {
 "order_number": "ATLS-2410772",
 "reason": "Boots are too small, need a larger size.",
 "refund_exchange": "Exchange for Size 11",
 "sender_name": "Jamie Thornton",
 "sender_address": "1234 Aspen Way",
 "sender_city": "Stowe",
 "sender_state": "VT",
 "sender_zip": "05672",
 "barcode_number": "203865",
            "qrcode_text": "https://ecom.ai12z.com/?id=203865"
}
Step 4: Return the PDF Link
After generating the PDF, your system should return the download link to the user in the bot/chat interface.
Do not include any extra thank you or confirmation messages with the link—only the link itself should be sent, or the user will not see the download option.
Sample HTML Template
Here’s a ready-to-use HTML template. You can customize the logo, colors, and company information as needed:
<!doctype html>
<html>
<head>
<meta charset="UTF-8" />
<title>Return Shipping Label</title>
<style>
@import url("https://fonts.googleapis.com/css?family=Montserrat:700,400&display=swap");
body {
font-family: "Montserrat", Arial, sans-serif;
background: #f9fafc;
color: #222;
margin: 0;
padding: 0;
}
.label-container {
width: 600px;
margin: 32px auto;
background: #fff;
border-radius: 14px;
box-shadow: 0 6px 24px rgba(36, 71, 107, 0.1);
border: 1.5px solid #e3e9ef;
padding: 36px 38px 28px 38px;
}
.logo {
width: 120px;
margin-bottom: 20px;
}
h1 {
font-size: 2rem;
margin-bottom: 10px;
color: #23436d;
letter-spacing: 0.04em;
}
.section-title {
font-size: 1.14rem;
font-weight: bold;
color: #3777b6;
margin: 24px 0 10px 0;
letter-spacing: 0.02em;
}
.address-block {
font-size: 1.07rem;
margin-bottom: 12px;
}
.label-row {
display: flex;
justify-content: space-between;
margin-bottom: 24px;
}
.order-details {
background: #f3f6fb;
border-radius: 8px;
padding: 16px 20px;
margin-top: 16px;
font-size: 1.06rem;
}
.contact-section {
margin-top: 32px;
padding-top: 18px;
border-top: 1.5px solid #e3e9ef;
color: #23436d;
}
.contact-title {
font-weight: bold;
font-size: 1.08rem;
margin-bottom: 7px;
}
.contact-item {
margin: 2px 0 2px 0;
}
.tracking {
font-size: 1rem;
margin-top: 14px;
letter-spacing: 0.02em;
}
.code-row {
display: flex;
gap: 28px;
align-items: center;
justify-content: flex-start;
margin-top: 14px;
margin-bottom: 10px;
}
.code-block {
display: flex;
flex-direction: column;
align-items: center;
}
.barcode {
width: 320px;
height: 60px;
object-fit: contain;
}
.qrcode {
width: 70px;
height: 70px;
object-fit: contain;
}
.code-label {
font-size: 1.05rem;
letter-spacing: 0.14em;
color: #2a3d53;
margin-top: 4px;
text-align: center;
}
</style>
</head>
<body>
<div class="label-container">
<img
class="logo"
width="120"
height="40"
src="https://ai12z.com/wp-content/uploads/2023/12/AI12z_homepage_logo.png"
alt="Atlas Logo"
/>
<h1>Return Shipping Label</h1>
<div class="label-row">
<div>
<div class="section-title">From:</div>
<div class="address-block">
{{ sender_name }}<br />
{{ sender_address }}<br />
{{ sender_city_state_zip }}
</div>
</div>
<div>
<div class="section-title">To:</div>
<div class="address-block">
Atlas Returns Department<br />
123 Demo Street<br />
Boston, MA 02115
</div>
</div>
</div>
<div class="tracking">
<strong>Tracking #:</strong> {{ tracking_number or "—" }}
</div>
{% if barcode_img or qrcode_img %}
<div class="code-row">
{% if barcode_img %}
<div class="code-block">
<img class="barcode" src="{{ barcode_img }}" alt="Barcode" />
<div class="code-label">{{ barcode_number }}</div>
</div>
{% endif %} {% if qrcode_img %}
<div class="code-block">
<img class="qrcode" src="{{ qrcode_img }}" alt="QR Code" />
</div>
{% endif %}
</div>
{% endif %}
<div class="order-details">
<div><strong>Order Number:</strong> {{ order_number }}</div>
<div><strong>Reason:</strong> {{ reason }}</div>
<div><strong>Requested Action:</strong> {{ refund_exchange }}</div>
{% if exchange_product_for %}
<div>
<strong>Exchange Product For:</strong> {{ exchange_product_for }}
</div>
{% endif %} {% if size %}
<div><strong>Size:</strong> {{ size }}</div>
{% endif %} {% if color %}
<div><strong>Color:</strong> {{ color }}</div>
{% endif %} {% if brand %}
<div><strong>Brand:</strong> {{ brand }}</div>
{% endif %}
</div>
<div class="contact-section">
<div class="contact-title">Contact Info</div>
<div class="contact-item">
47 Tremont Street, Suite 300<br />Boston, MA 02108<br />United States
</div>
<div class="contact-item">contact@atlas.com</div>
<div class="contact-item">+1 234 567 890</div>
</div>
</div>
</body>
</html>
Template Rendering and Best Practices
Flexible Template System
The PDF Generator supports flexible template rendering that automatically adapts to different variable naming conventions. The system intelligently handles both clean variable names and field names with spaces or special characters.
Variable Naming Best Practices
✅ Recommended Variable Names (snake_case)
sender_name, sender_address, order_number, barcode_number,
qrcode_text, shipping_address, order_date, product_sku,
customer_notes, exchange_product_for, tracking_number
❌ Avoid These Variable Names
"Sender Name", "order-number", "orderNumber", "Order#",
"Customer's Notes", "product/sku", "order.date"
Template Syntax Examples
Standard Templates (Direct Access)
<div>
  <h1>Return Label for {{ sender_name }}</h1>
  <p>Order: {{ order_number }}</p>
  <p>Reason: {{ reason }}</p>

  {% if tracking_number %}
  <p>Tracking: {{ tracking_number }}</p>
  {% endif %} {% if barcode_img %}
  <img src="{{ barcode_img }}" alt="Barcode" />
  <div>{{ barcode_number }}</div>
  {% endif %}
</div>
Form Integration Templates (Context Access)
When integrating with forms that have field names with spaces, use context-based access:
<div>
  <h1>Return Label for {{ context['Sender Name'] }}</h1>
  <p>Order: {{ context.get('Order Number', 'N/A') }}</p>
  <p>Reason: {{ context['Reason'] }}</p>

  {% if context.get('Tracking Number') %}
  <p>Tracking: {{ context['Tracking Number'] }}</p>
  {% endif %} {% if context.get('barcode_img') %}
  <img src="{{ context['barcode_img'] }}" alt="Barcode" />
  <div>{{ context.get('Barcode Number', '') }}</div>
  {% endif %}
</div>
Template Rendering Process
The system uses intelligent rendering that automatically selects the best approach:
try:
    # Try direct variable access first (faster, cleaner)
    rendered_html = Template(html_template).render(**context)
except TypeError:
    # Fall back to context-based access (handles spaces in variable names)
    rendered_html = Template(html_template).render(context=context)
When to Use Each Approach
Use Direct Access ({{ variable_name }}) when:
- Creating new templates with clean variable names
- You control the variable naming convention
- Variable names follow snake_case convention
Use Context Access ({{ context['Variable Name'] }}) when:
- Integrating with external forms or systems
- Variable names contain spaces or special characters
- Need graceful handling of missing variables with
.get()
FAQ
Q: What variables can I use in the template?
A: Any field you send in the context can be referenced with {{ field_name }} (direct access) or {{ context['Field Name'] }} (context access). Common fields: sender_name, order_number, barcode_number, qrcode_text, and any optional context parameter.
Q: Can I add more templates?
A: Yes, you can add multiple templates and select the one to use by passing its name as the templateName parameter.
Q: What's the difference between {{ variable_name }} and {{ context['Variable Name'] }}?
A: The first approach (direct access) is faster and cleaner but requires variable names without spaces. The second approach (context access) handles any variable name but is slightly slower. The system automatically tries both approaches.
Troubleshooting
- PDF renders without barcode/QR
- Ensure
barcode_numberand/orqrcode_textare present in the context. Use the template fields{{ barcode_img }}and{{ qrcode_img }}.
- Ensure
- Variables render blank
- Check your variable names. Use direct access for snake_case or context access for names with spaces:
{{ context['Order Number'] }}.
- Check your variable names. Use direct access for snake_case or context access for names with spaces:
- Link not shown to user
- Return only the link in the final message (no extra text) so the chat UI exposes the download control.