Test Custom Agent
User Documentation for Testing a Custom Agent
Overview
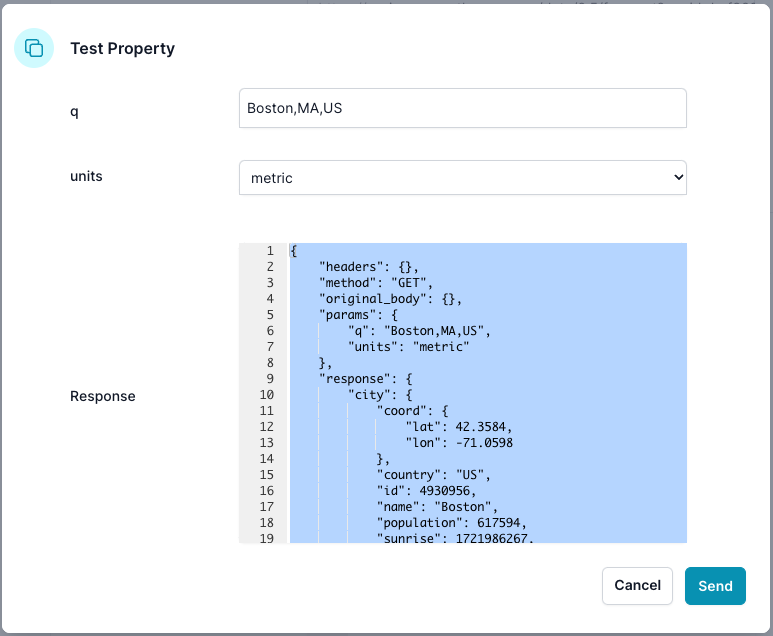
The Test Parameter dialog allows you to test the configuration of your custom agent. This feature is useful for verifying that the agent's parameters, request, and response handling are set up correctly. You can enter test values for the parameters and see the corresponding API response.
Screen Elements
-
Header Section:
- Title: "Test Parameter"
-
Fields:
- Parameters:
- q: An input field to enter the location query (e.g., city name).
- units: A dropdown to select the unit system (e.g., imperial or metric).
- Parameters:
-
Response:
- Description: Displays the JSON response from the API based on the provided parameters.
-
Action Buttons:
- Send:
- Function: Sends the test request with the entered parameters and displays the response.
- Cancel:
- Function: Closes the dialog without sending a request.
- Send:
How to Use
-
Opening the Test Parameter Dialog:
- From the Edit Agent screen, click the "Test" button to open the Test Parameter dialog.
-
Entering Parameters:
- In the q field, enter the location you want to query (e.g., "Boston,MA,US").
- In the units dropdown, select the desired unit system (e.g., "imperial").
-
Sending the Test Request:
- Click the "Send" button to send the test request to the API with the entered parameters.
- The Response section will display the JSON response from the API. This response includes details such as headers, method, parameters, and the response body.
-
Reviewing the Response:
- Inspect the JSON response to verify that the API call is working as expected.
- Check the response data to ensure it aligns with the configuration of your custom agent.
-
Closing the Dialog:
- If you need to make further changes based on the test results, click "Cancel" to close the dialog and return to the Edit Agent screen.
Notes
- Ensure that you enter valid test values for the parameters to get an accurate response.
- Use the JSON response to debug and fine-tune your custom agent configuration if necessary.
- The Response section provides a detailed view of the API call, including headers, method, parameters, and the full response body.