Salesforce Agent Availability Flow
Overview
The Check Agent Availability for Routing flow determines whether a live agent is available before routing an incoming chat session. If an agent is available, the conversation is routed to the chat queue. If no agent is available, the flow records the reason and ends gracefully without routing.
Flow Structure
The flow consists of the following elements:
Start
  └── agentAvailability (Action: Check Availability for Routing)
        └── agent_Availability (Decision)
              ├── [check agent availability] → route to chat queue (Route Work) → End
              └── [Default Outcome] → Reason for Not Routing Assignment (Assignment) → End
Flow Elements
1. agentAvailability — Action
| Property | Value |
|---|---|
| Type | Action |
| Label | agentAvailability |
| Description | Check Availability for Routing |
Calls the Salesforce built-in action to check whether any agents are currently available in the configured queue or skill set.
2. agent_Availability — Decision
| Property | Value |
|---|---|
| Type | Decision |
| Label | agent_Availability |
Evaluates the result from the availability check and branches accordingly.
| Outcome | Condition | Next Step |
|---|---|---|
| check agent availability | Agent is available | route to chat queue |
| Default Outcome | No agent available | Reason for Not Routing Assignment |
3. route to chat queue — Route Work
| Property | Value |
|---|---|
| Type | Route Work |
| Label | route to chat queue |
Routes the incoming chat session to the appropriate chat queue when an agent is available. After routing, the flow ends.
4. Reason for Not Routing Assignment — Assignment
| Property | Value |
|---|---|
| Type | Assignment |
| Label | Reason for Not Routing Assignment |
Sets a variable to capture the reason why the session was not routed (e.g., no agents available). This value can be used downstream for reporting, logging, or displaying a fallback message to the user. After the assignment, the flow ends.
How to Create This Flow in Salesforce
Prerequisites
- Salesforce org with Omni-Channel and Messaging (or Chat) enabled
- An existing chat queue configured in Omni-Channel setup
- Appropriate permissions to create and activate flows
Step 1: Open Flow Builder
- In Salesforce, go to Setup → search for Flows → click New Flow.
- Select Omni-Channel Flow as the flow type.
- Click Create.
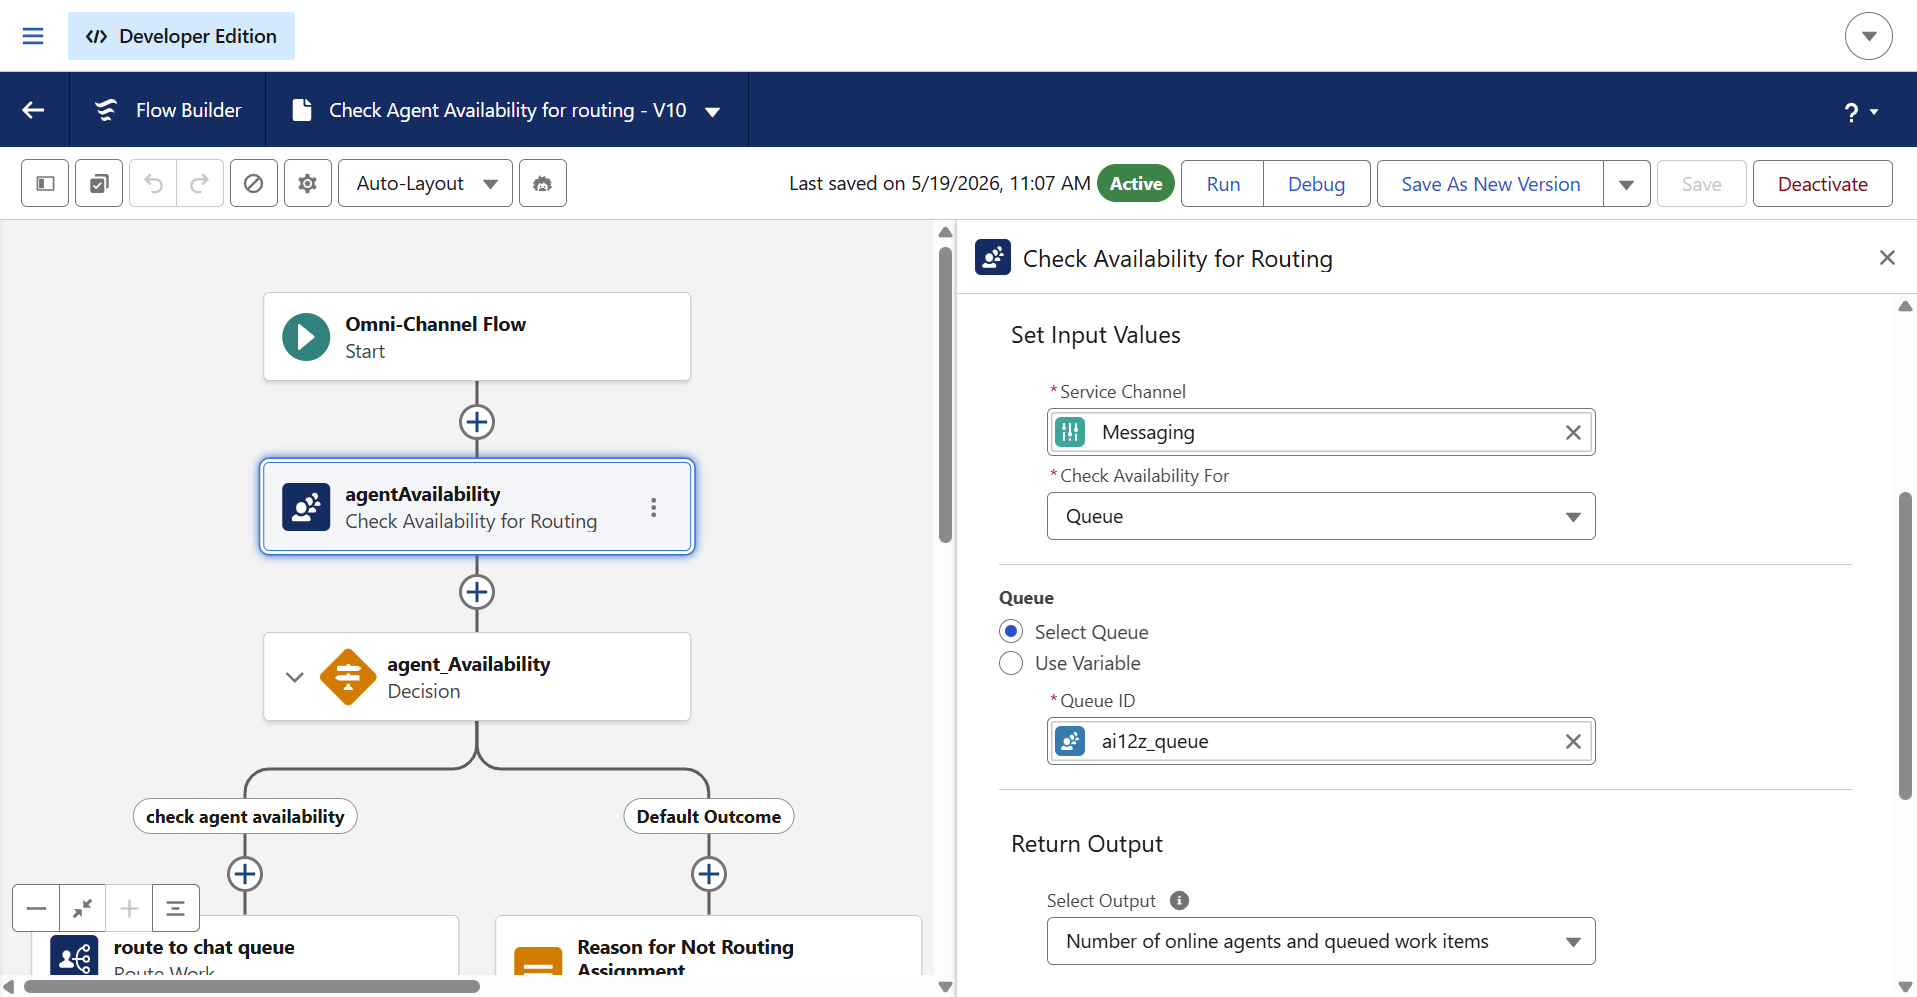
Step 2: Add the Agent Availability Action
- Click the + icon on the canvas to add the first element.
- Select Action.
- Search for and select Check Agent Availability for Routing.
- Set the Label to
agentAvailability. - Configure the input parameters (queue, skill, or channel) as required by your org setup.
- Click Done.
Step 3: Add the Decision Element
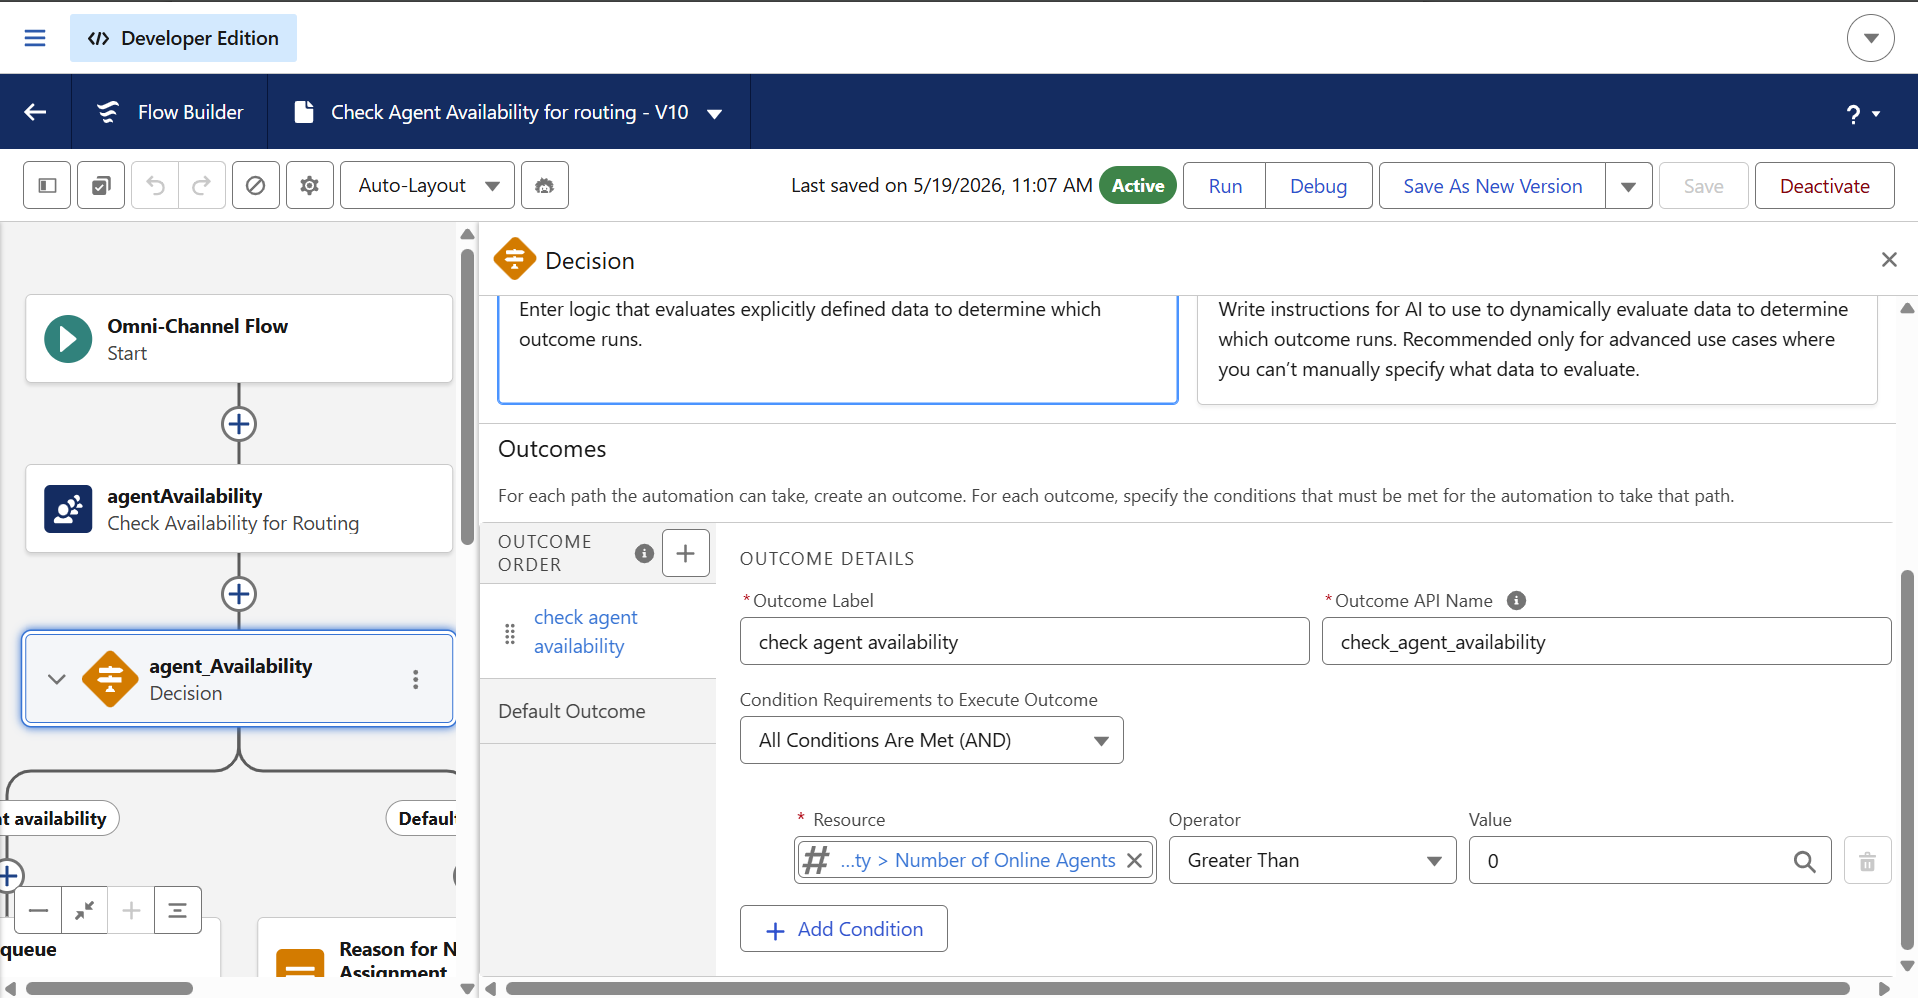
- Click + below the action to add the next element.
- Select Decision.
- Set the Label to
agent_Availability. - Add an outcome:
- Label:
check agent availability - Condition: Set the condition to evaluate whether the availability result from the previous action is
true(agent available).
- Label:
- Leave the Default Outcome label as-is or rename it descriptively.
- Click Done.
Step 4: Add Route Work (Agent Available Path)
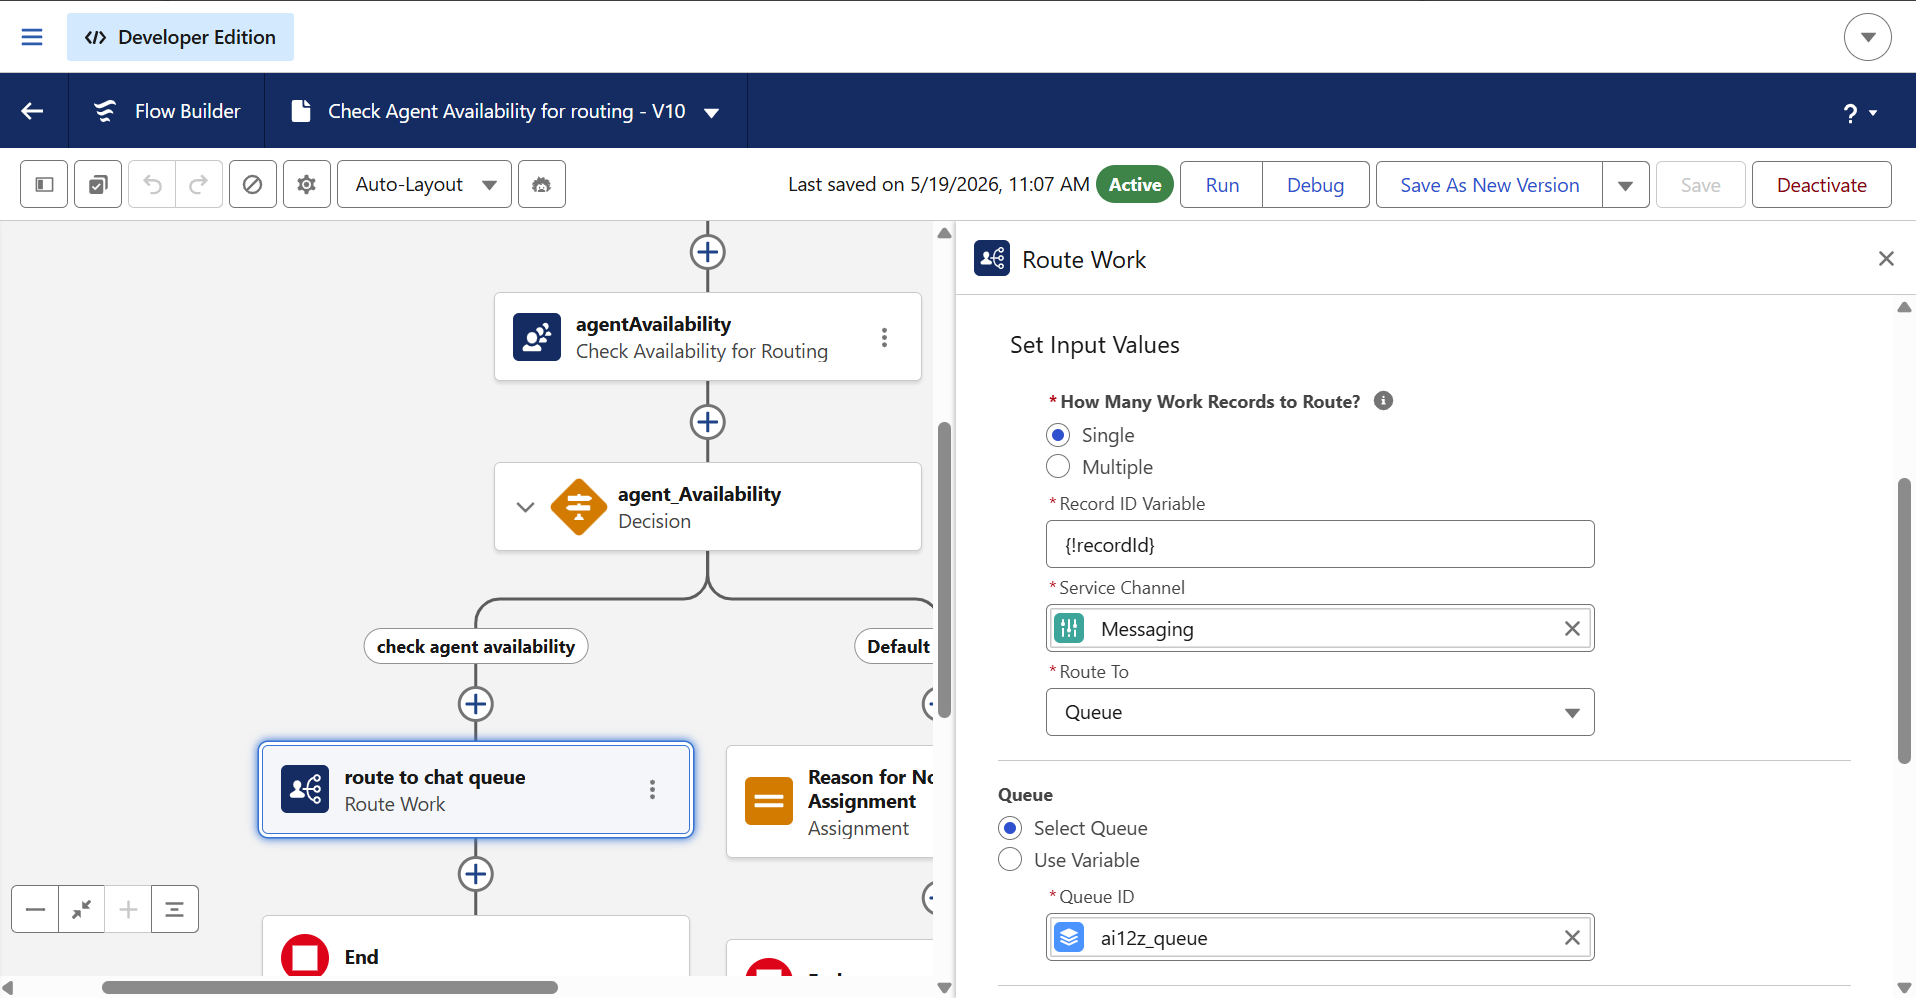
- Click + on the check agent availability branch.
- Select Route Work.
- Set the Label to
route to chat queue. - Configure the routing destination to your target chat queue.
- Click Done.
Step 5: Add Assignment (No Agent Path)
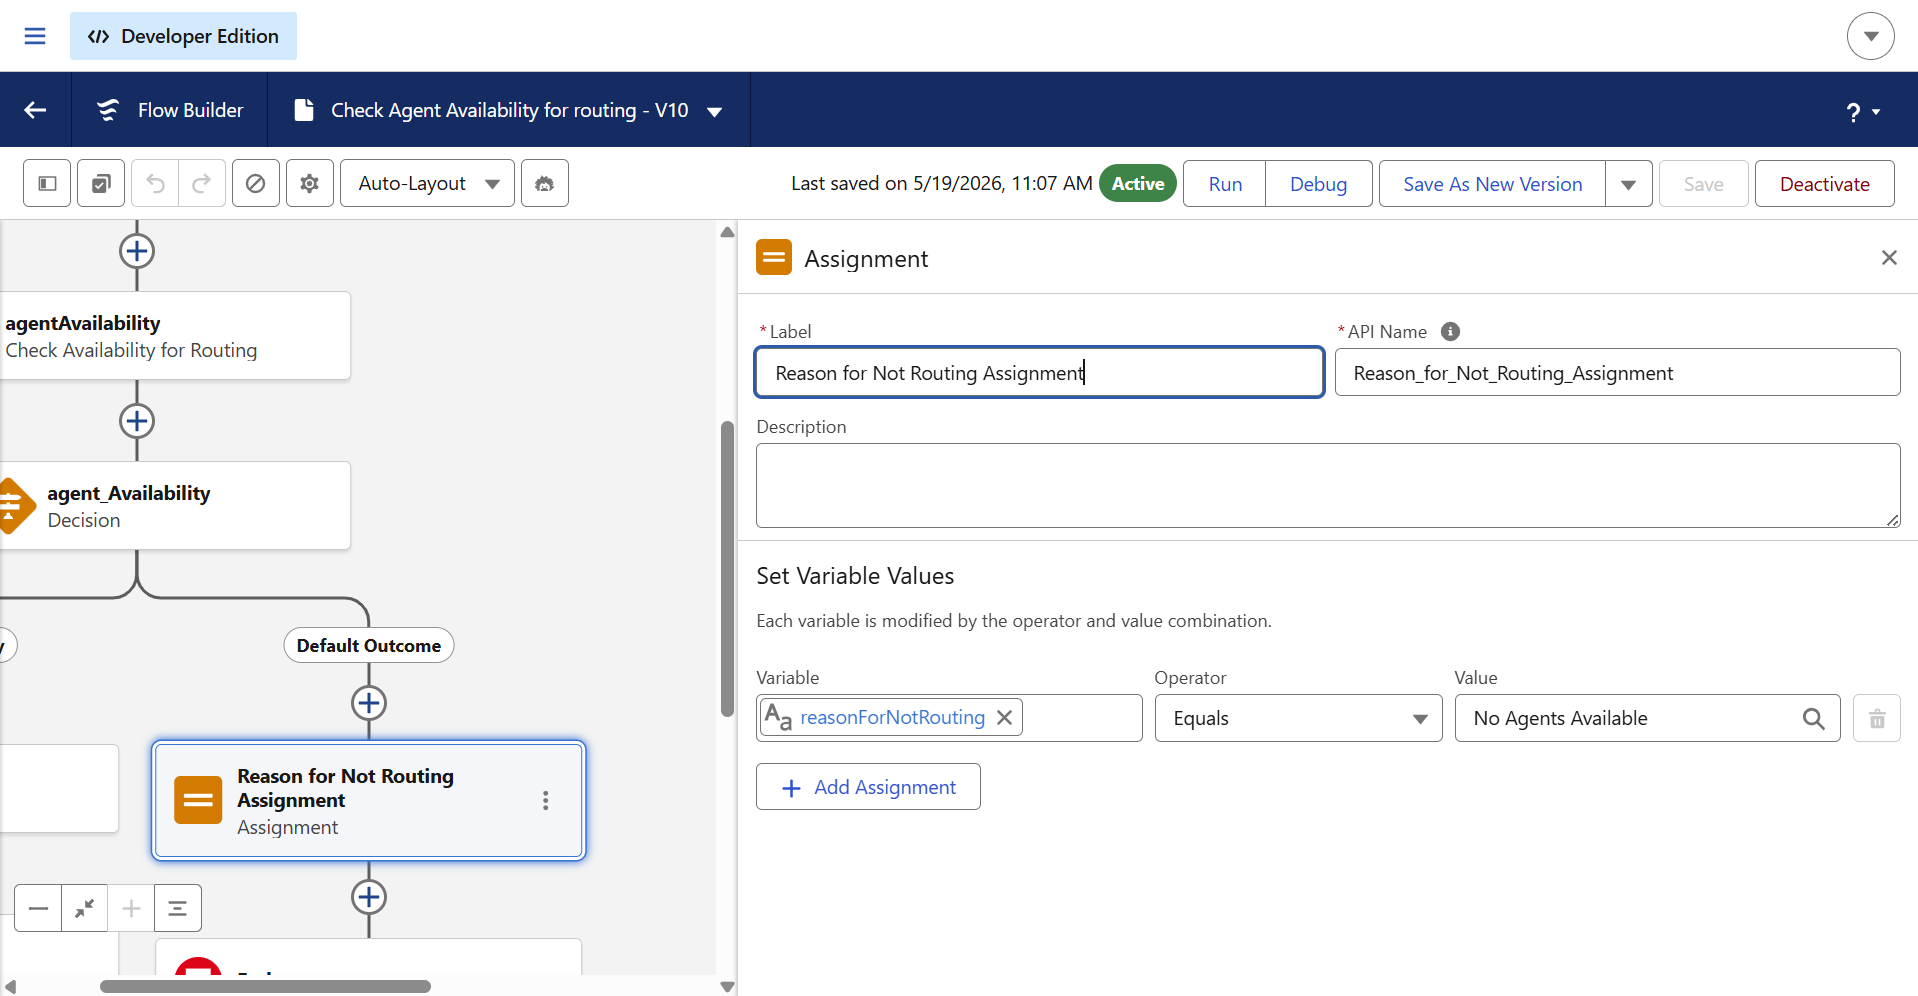
- Click + on the Default Outcome branch.
- Select Assignment.
- Set the Label to
Reason for Not Routing Assignment. - Add a variable assignment to store the no-agent reason, for example:
- Variable:
{!reasonNotRouted} - Value:
No agents available
- Variable:
- Click Done.
Step 6: Save and Activate
- Click Save and give the flow a name, e.g.,
Check Agent Availability for Routing. - Click Save As New Version if updating an existing flow.
- Click Activate to make the flow live.
Test the flow using the Debug button before activating to verify both branches behave as expected.