Project Settings
Overview
The project settings screen allow the project admin to change the properties of the project.
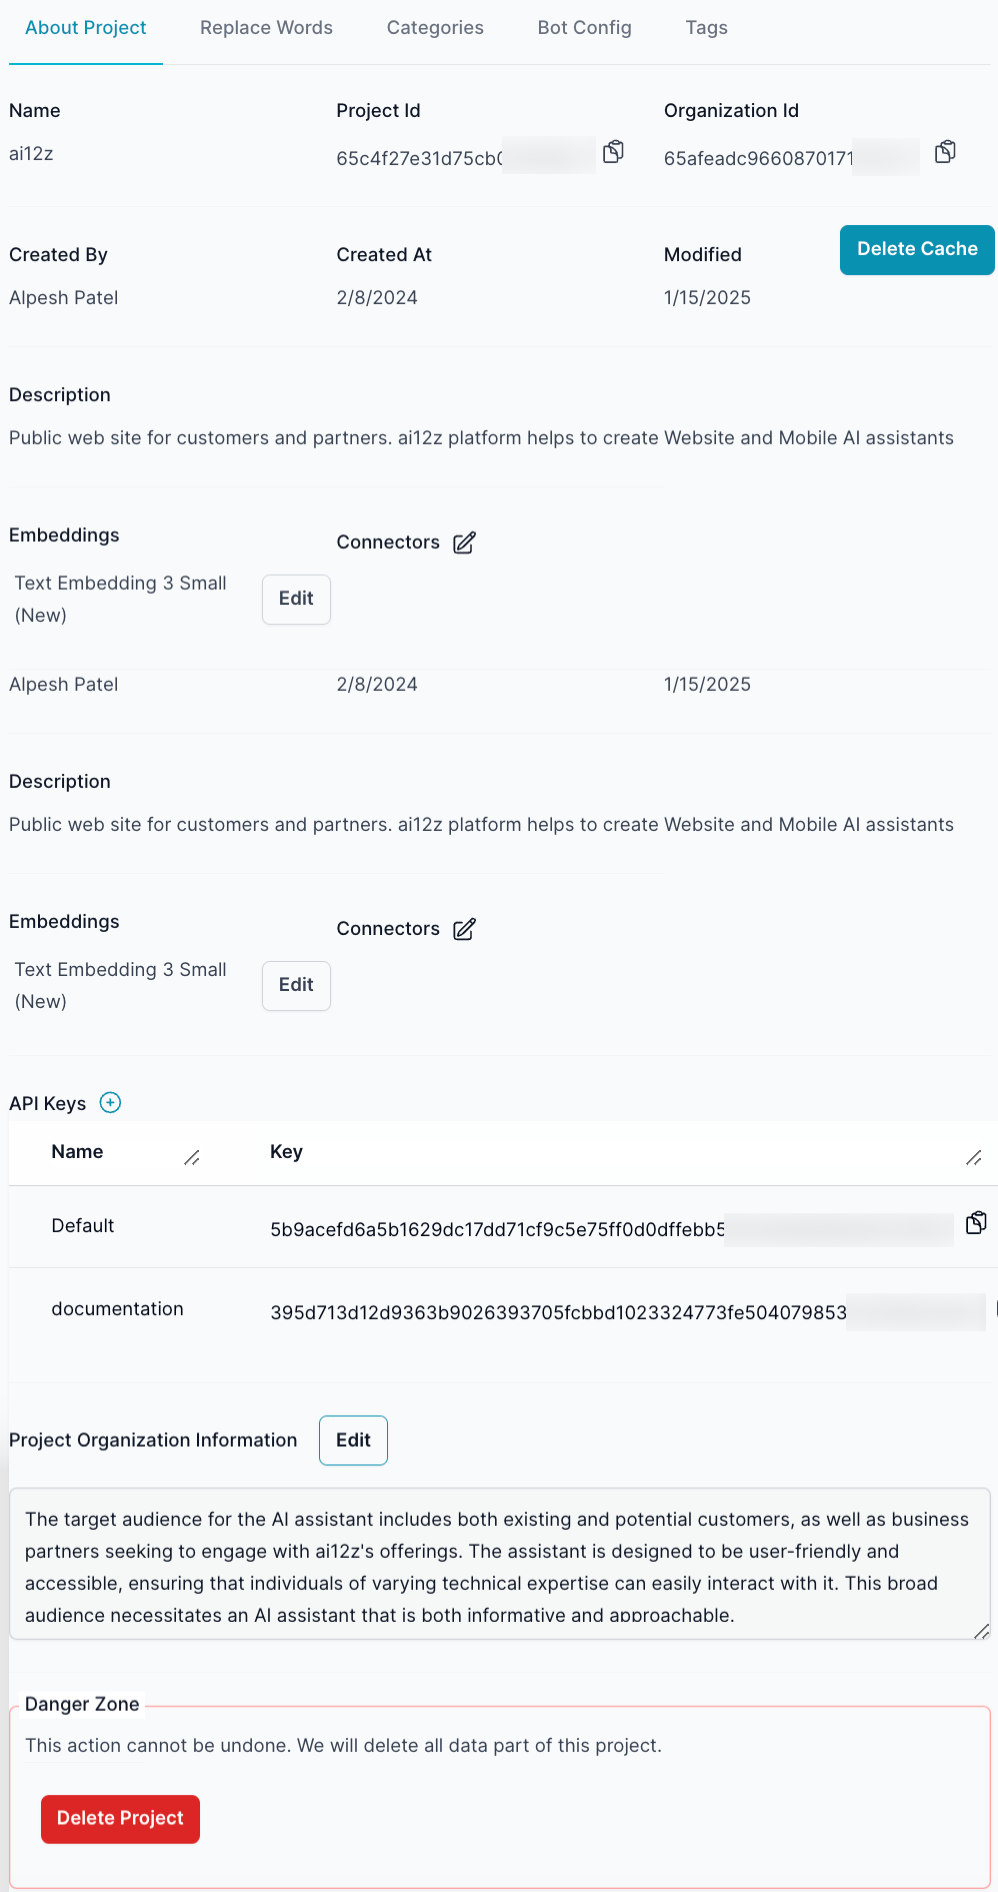
Embeddings
-
ADA V2 (text-embedding-ada-002) is the original embedding model. For projects using this model, we recommend upgrading
-
Text Embedding Small (text-embedding-3-small). This model has enhanced performance over ADA V2 and costs less. Recommended for English projects.
-
Text Embedding large (text-embedding-3-large) is recommended for projects involving non-English content, as it offers enhanced performance capabilities better suited for diverse linguistic datasets. However, please be aware that this comes at a higher cost.

CMS Connectors
CMS connectors need to be enabled in the Organization settings. Then Enable in the project.
API Keys for the web components, or API for Rest API, or WebSocket API to Ask AI questions
This is the API key that enables the web controls like the search control or the bot control. Or if a developer is building their own Bot or Seacrh control and they are using either the WebSocket or Rest API to call on the copilot to ask a question.
Creating an API Key
To create an API key:
-
Navigate to the "API Keys" section in your account settings.
-
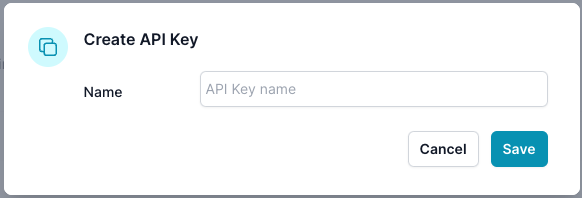
Click on the "Create API Key" button. A dialog box will appear, prompting you to name your API key.
-
Enter a meaningful name for your API key. The name should reflect the source or the intended use of the API key to help you organize and identify the key later. For instance, if you're creating a key for your web application, you might name it "Web" or something more specific to the service it will access.
-
Click "Save" to generate the API key. Your new key will now appear in the list of API keys with its name, creation date, and status indicated.

-
Once the key is created, it's active and ready to use. The key will be a unique alphanumeric string that you should keep confidential.
Deleting an API Key
To delete an API key:
-
In the "API Keys" section, locate the key you wish to delete.
-
Click on the action button (three dots) on the right side of the key's entry.

-
Choose "Archive" to deactivate the API key. Confirm the action if prompted.
-
Once archived, the API key is no longer active and cannot be used to access the API.
Note on API Key Usage
The name you assign to your API key serves as an identifier for filtering data and understanding the source of the API traffic. By using descriptive names tied to their use cases—such as "Mobile" for mobile apps or "Analytics" for data analysis—you can easily keep track of the different ways your API keys are used and monitor their activity. Always keep your API keys secure to prevent unauthorized use.
Project Organization Information
This information is created by AI, when creating the project. You can edit this information if more relevant information is available. This information is used to provide context when creating knowledge base articles or categories.
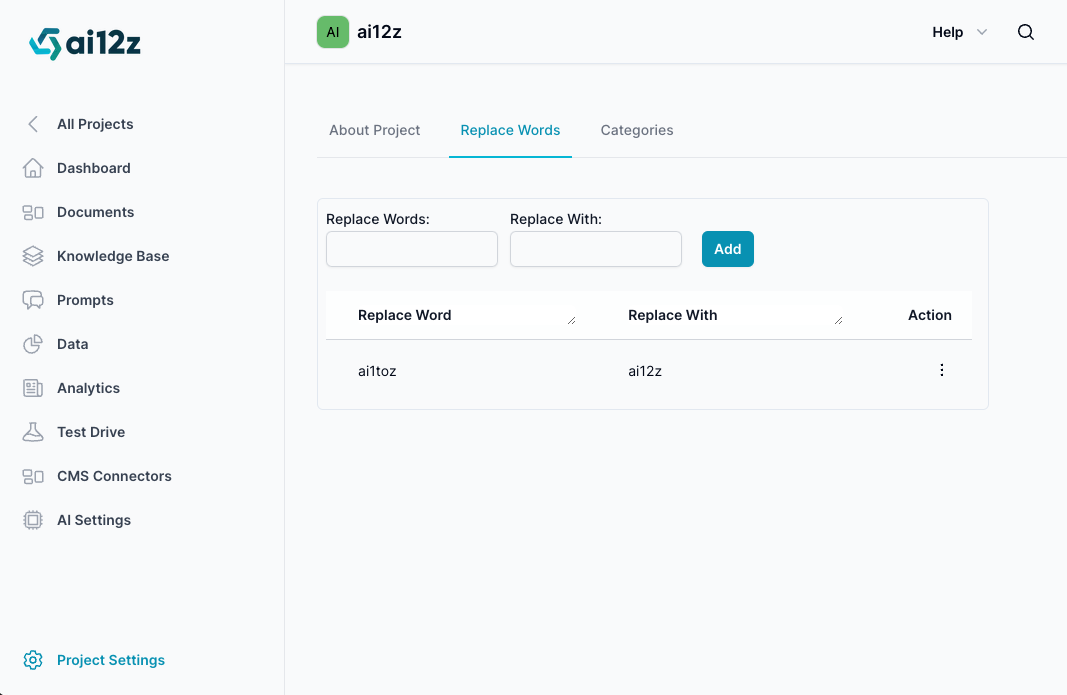
Replace Words
Replace words used to change a string of words with another string. Replace words is not case sensitive. Example use, if you are dealing with a drug, you might change the word drug with the real drug name.
Categories
Bot Config
Tags
Tags are used to filter data either exclude or include, eCommerce is an example use case