Optimizely
AI12Z Optimizely Module Installation and Setup Guide
Step 1: Add Connector
- Log in to the AI12Z portal.
- Open Connectors from the left navigation and click Add Connectors.
- Select Optimizely and submit.
Step 2: Configure Connector
- Open Connectors and click the row action on Optimizely to edit.
- In the Connector Configuration screen, fill out the following fields:
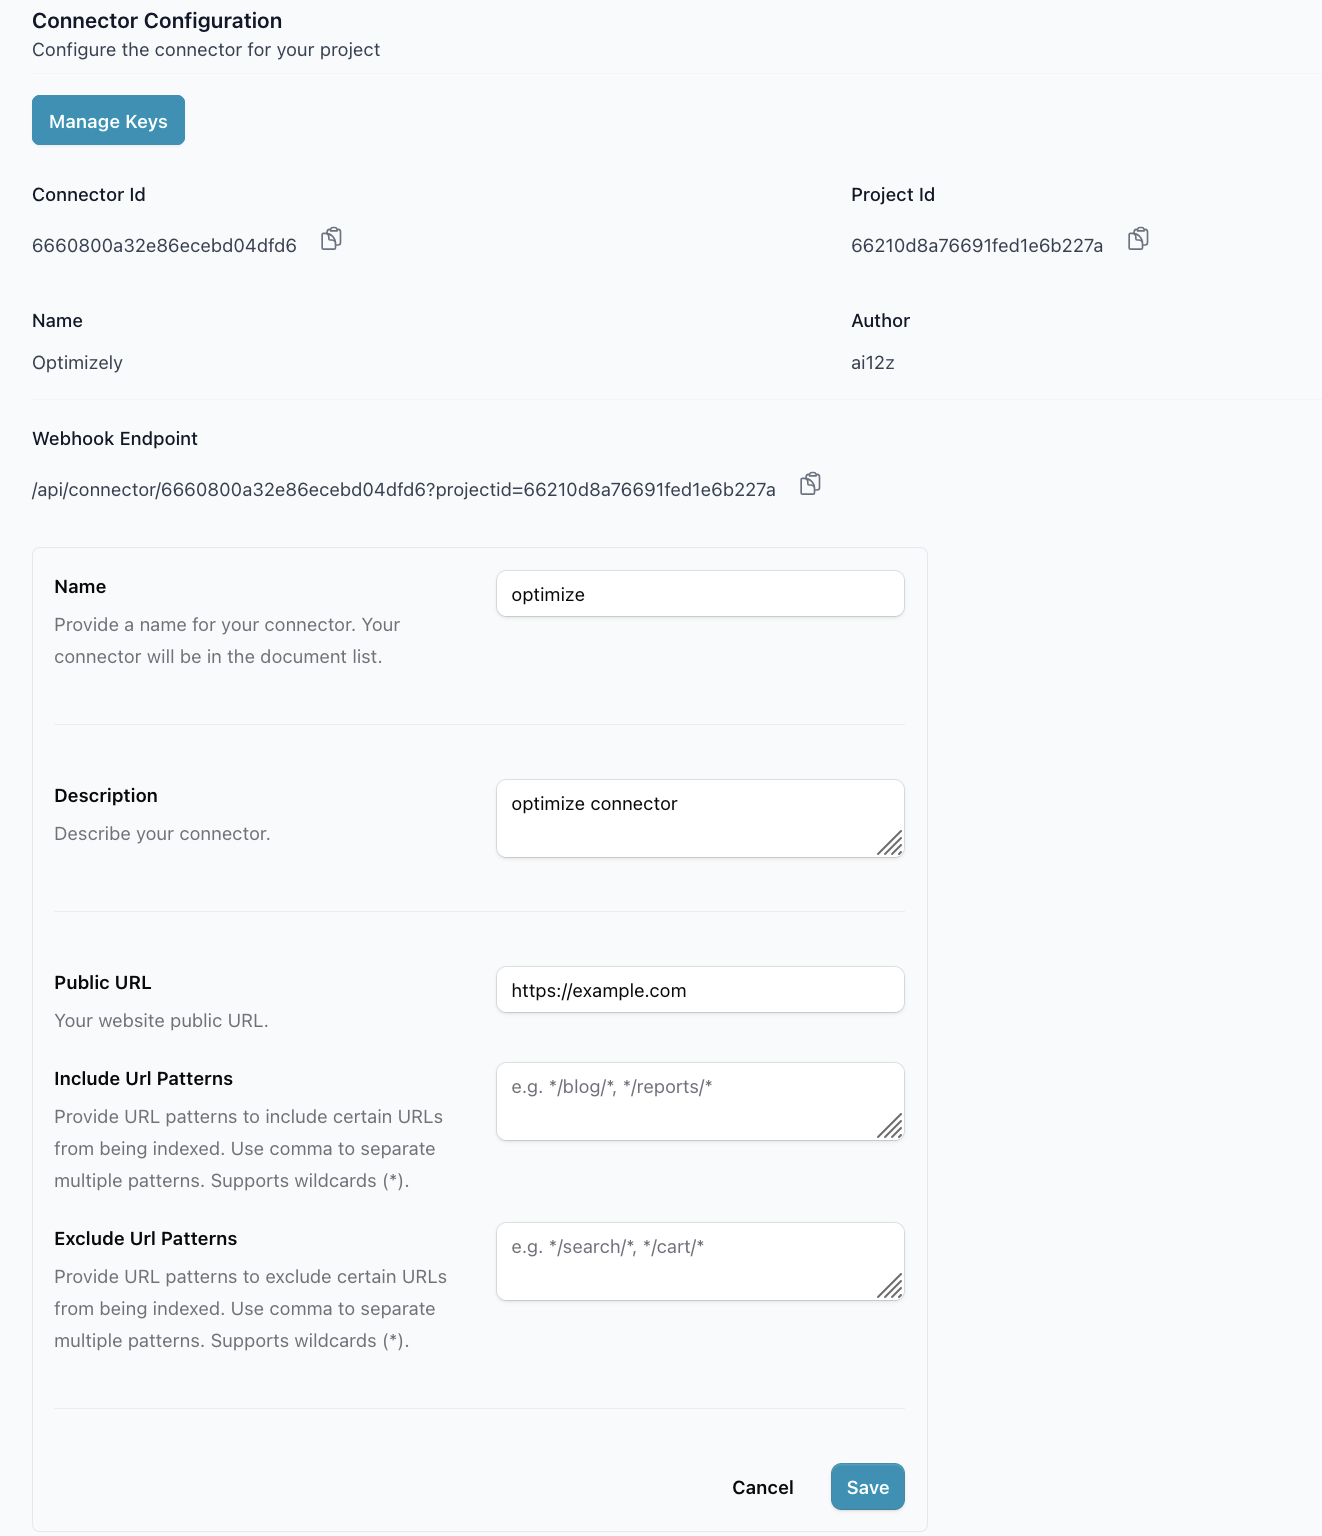
- Name: Provide a name for your connector. This will appear in your document list. (e.g., "My Optimizely Site")
- Description: Describe your connector. (e.g., "My Optimizely Site")
- Public Instance URL: Enter the public Optimizely site URL (e.g.,
example.com/optimizelyPublic). - URL Filtering (Optional):
- Include URL Patterns: Provide patterns to include URLs for indexing (e.g.,
*/travel/*). Use commas to separate multiple patterns. Supports wildcards (*). - Exclude URL Patterns: Provide patterns to exclude URLs from indexing (e.g.,
*/about/company). Use commas to separate multiple patterns. Supports wildcards (*).
- Include URL Patterns: Provide patterns to include URLs for indexing (e.g.,
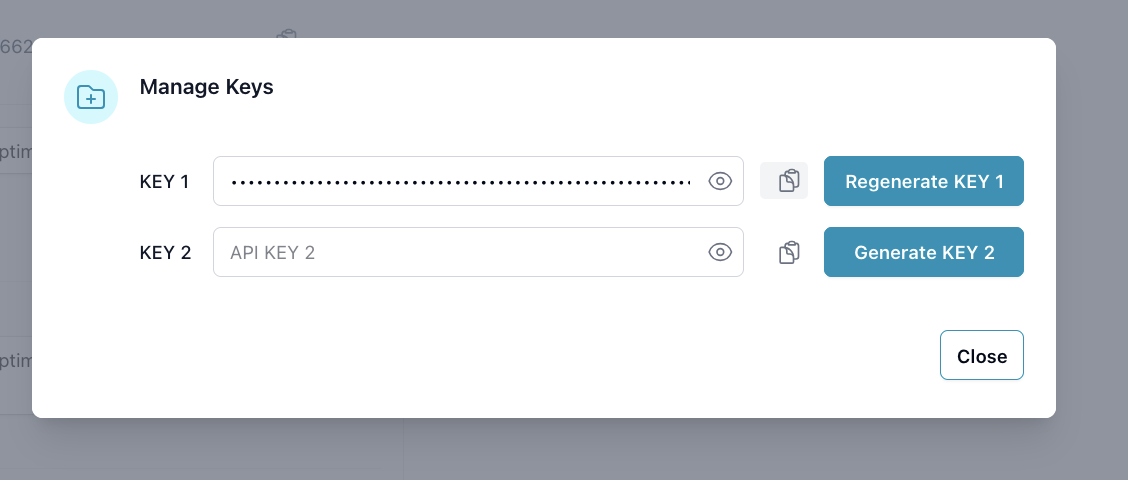
- Navigate to Manage Keys and generate an API key. Save this key securely — you will need it when configuring the AI12Z package on your website.
Step 3: Optimizely Module Setup
Install the AI12Z NuGet Package
In your Optimizely project, install the AI12Z connector package via the NuGet Package Manager or the .NET CLI:
dotnet add package Ai12z.Optimizely.Cms
Then register the connector in your Startup.cs:
public void ConfigureServices(IServiceCollection services)
{
    // ... your existing services
    services.AddAi12zOptimizely();
}

public void Configure(IApplicationBuilder app, IWebHostEnvironment env)
{
    // ... your existing middleware
    app.UseEndpoints(endpoints =>
    {
        endpoints.MapContent();
        endpoints.MapControllers(); // required for AI12Z endpoints
    });
}
Configure the AI12Z Connector
Once the package is installed and the application is running, navigate to the AI12Z settings page inside the Optimizely CMS admin panel: (Settings → AI12Z Sync)
Note: This page is only accessible to users with the CmsAdmins role.
Fill in the following fields:
| Field | Description |
|---|---|
| Webhook URL | The AI12Z endpoint that receives content events. Copy this from the AI12Z Connector Configuration screen under Endpoint URL. It follows the format: https://your-service.com/api/connector/{id}?projectid={value} |
| Site Base URL | The public URL of your Optimizely website. Example: https://your-site.com |
| X-API-Key | The API key you generated and saved in Step 2.3 from the AI12Z Connector Configuration screen. Paste it here. |
| Delay Between Calls (ms) | Pause between webhook calls during a full sync. Default: 100ms. |
Click Save Settings once all fields are filled in.
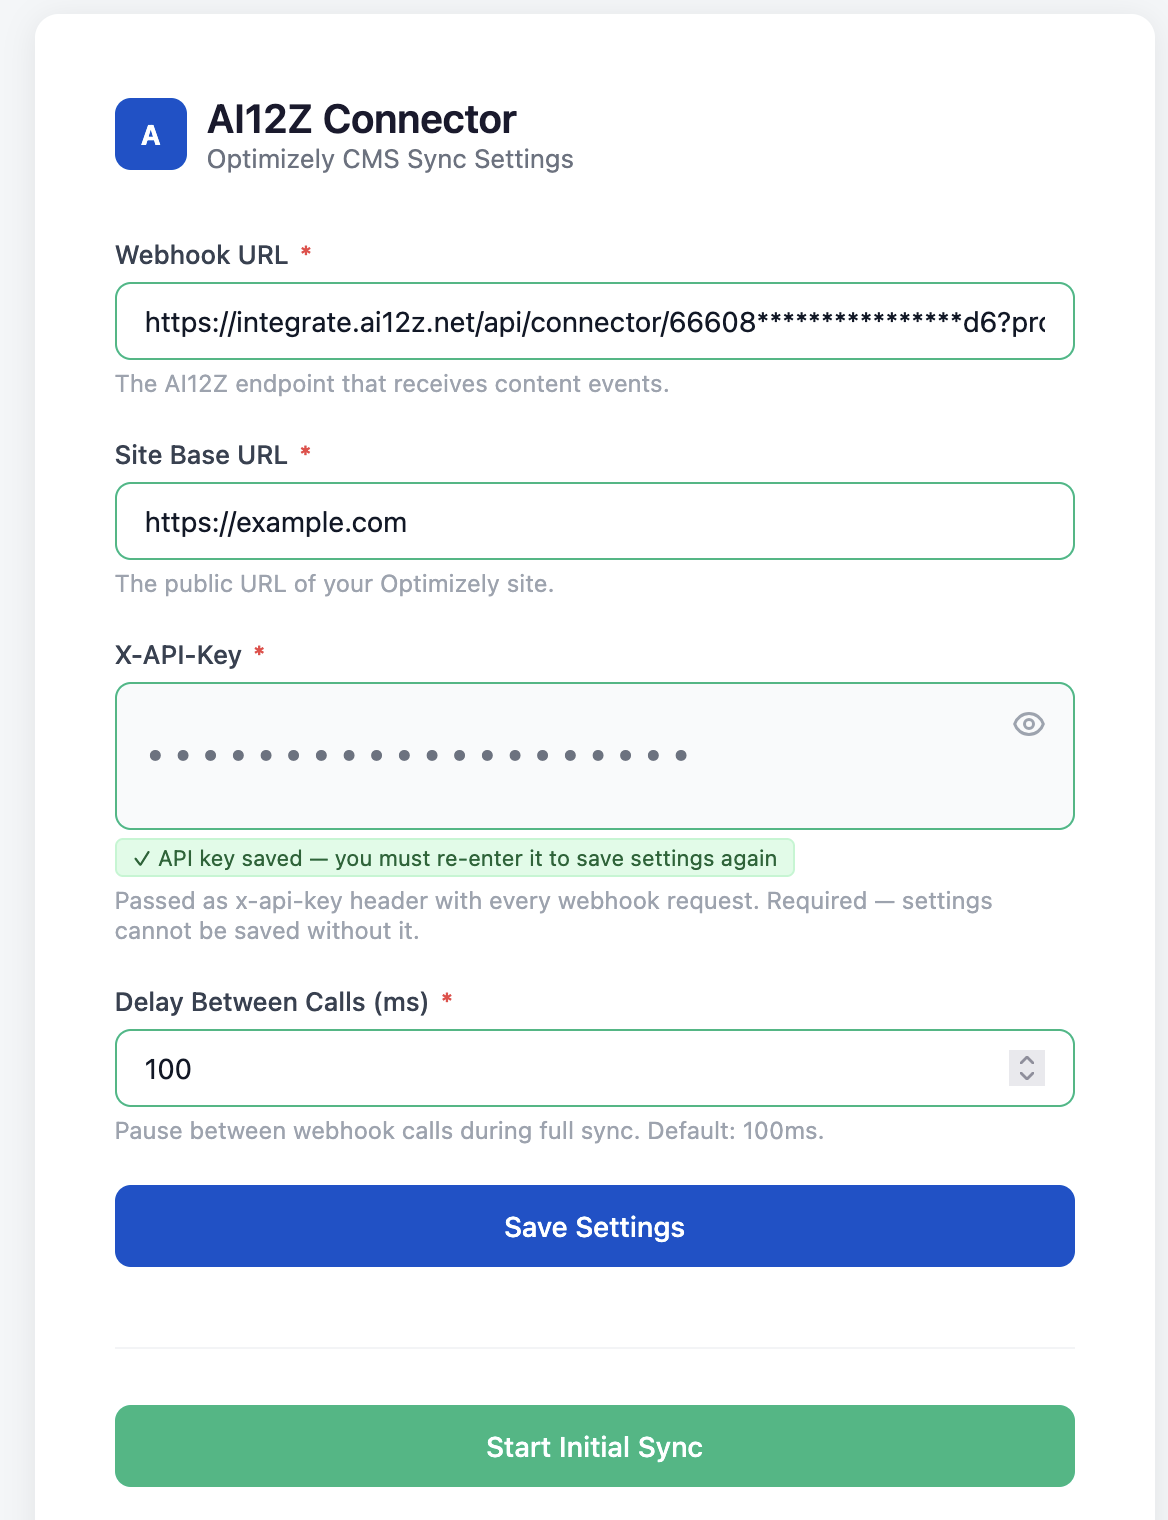
Trigger the Initial Sync
After saving your settings, click Start Initial Sync to ingest all currently published pages and media into AI12Z.
Note: The initial sync may take several minutes depending on the size of your site. Do not close the page while the sync is in progress. You will see a live progress indicator and a confirmation message once the sync is complete.
What Happens After Setup
Once configured, the connector automatically:
- Sends content to AI12Z whenever a page or PDF is published
- Notifies AI12Z when content is unpublished, moved to trash, or deleted
- No further manual intervention is required for day-to-day content updates
What the Code Does (Summary)
- Listens for page or media publish events.
- Extracts metadata such as:
- Page name, ID, parent ID, content type
- URLs, publish timestamps, author info
- All page properties (including nested content references and content areas)
- Sends a JSON payload to your configured AI12Z webhook URL.
- Includes error handling and fallbacks for complex property types to avoid serialization issues.