Sitecore
Sitecore Connector Setup Guide
The connector enables Ai12z to securely access and ingest content directly from your Sitecore instance. Once connected, Ai12z can automatically read, process, and integrate files or content that are added or published in Sitecore. This facilitates seamless content synchronization and real-time updates between your Sitecore environment and the Ai12z platform.
Enable Connector
- Log in to the Ai12z portal using admin credentials.
- Select or create an agent.
- From left nav select conectors.
- Click on Add Connectors button from the connector store configuration screen.
- Select the Sitecore connector from the list.
Step 1: Set up GraphQL IDE
Enable the GraphQL IDE
- To use the GraphQL IDE (Playground), ensure the following prerequisites and steps are met:
Prerequisites
- You must be a member of the sitecore\Sitecore Client Users role to access the GraphQL IDE.
- Enable GraphQL Playground
- In XM Cloud Deploy, navigate to your project’s environment settings.
- Create a new environment variable named Sitecore_GraphQL_ExposePlayground and set its value to true.
- If the variable already exists, update its value to true.
- Redeploy your environment to apply the new environment variable settings.
- Save Authoring and Experience Edge URLs do above steps if this not available by default
- Make a note of both the Authoring URL and Experience Edge URL — you’ll need these during connector setup.
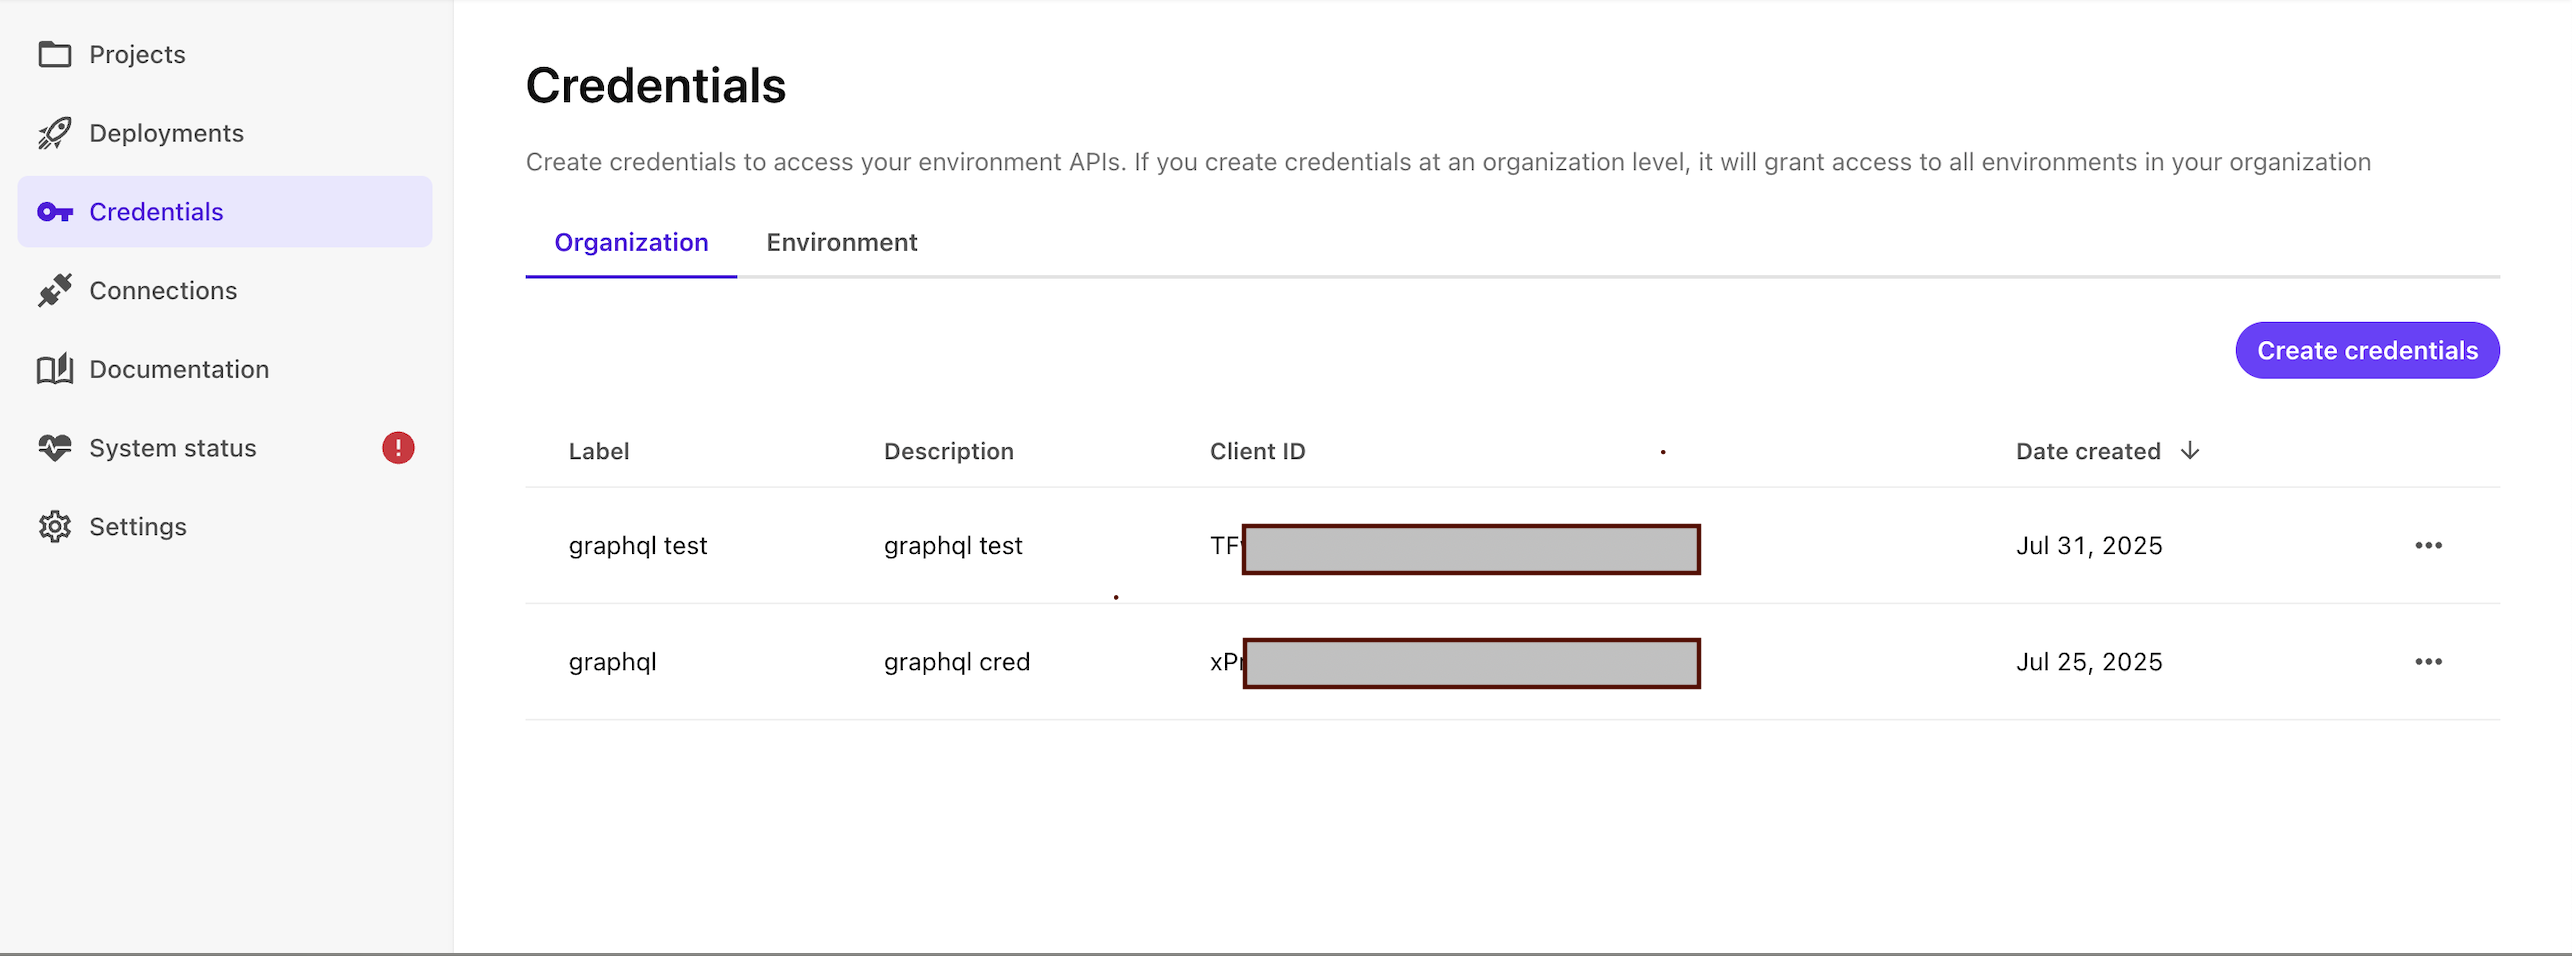
- Create credentials
- Go to deploy.sitecorecloud.io
- Navigate to the Credentials section.
- Click Create Credentials.
- After creation, securely save the Client ID and Secret Key.(These will be required during the Sitecore connector setup.)
-
Step 2: Set Up Your Sitecore Webhook
To integrate your Sitecore environment with Ai12z, configure a webhook that triggers on specific content events.
- Select an envirnment from XM Cloud Switchbar
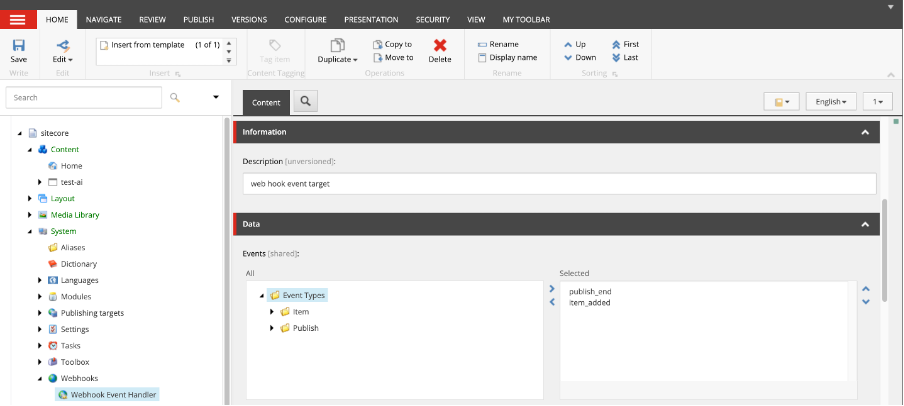
- Select Content Editor from the list
- Expand System > Webhooks
- Click on the "Webhook Event Handler" to create and configure the webhook
- Fill in the required fields as described below.
- Under Events, select only the following:
- item:added
- event:published
- Finish the webhook configuration as follows:
- Name: Enter a name for your webhook (e.g., Ai12z Sitecore Webhook).
- Description: Provide a short description (e.g., Triggers content sync with Ai12z on item add and publish).
- Enabled: Ensure this is checked to activate the webhook.
- Events:
Select only the following events:
- item:added
- event:published
- Url: Enter the secure HTTPS endpoint to receive webhook events.
Step 3: Fill Out the sitecore Connector Form in Ai12z Portal
-
Select Connectors from the Agent left navigation.
-
From the connector list, click on sitecore.
-
Finish the connector configuration as follows:
-
Name:
Enter a name for your connector (e.g., Sitecore Integration). This will appear in your document list. -
Description:
Provide a brief description of your connector (e.g., Connector for ingesting content from Sitecore CMS). -
Public URL:
Enter the public URL of your website (e.g., https://www.example.com). -
Audience:
Specify the intended audience value used for authentication. -
Authoring URL:
Provide the URL for your Sitecore authoring environment. -
Client ID:
Enter the Client ID generated in your Sitecore configuration for API access. -
Client Secret:
Enter the Client Secret associated with your Sitecore Client ID. -
Sitecore Database:
Sitecore Database -
Tenant ID:
Enter the Tenant ID associated with your Sitecore Identity Provider or environment. -

-
-
Click Save to complete the connector setup.